Add References and Set a License - C# .NET Framework
This tutorial shows how to use the LEADTOOLS SDK in a C# .NET Framework application and create a project, add references, and set the license.
| Overview | |
|---|---|
| Summary | This tutorial covers how to set a license in a C# .NET Framework application. |
| Completion Time | 30 minutes |
| Visual Studio Project | Download tutorial project (3 KB) |
| Platform | Windows C# Console Application |
| IDE | Visual Studio 2017, 2019 |
| Runtime License | Download LEADTOOLS |
| Try it in another language |
|
Required Knowledge
Before any functionality from the SDK can be leveraged, a valid runtime license will have to be set.
For instructions on how to obtain a runtime license refer to Obtaining a License.
Create the Project
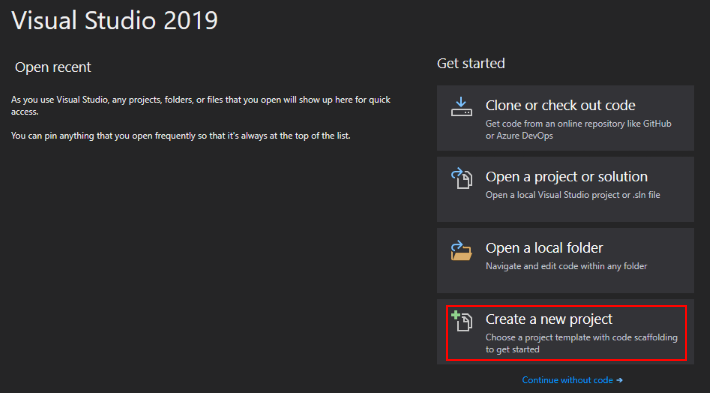
Launch Visual Studio and select Create a new project.
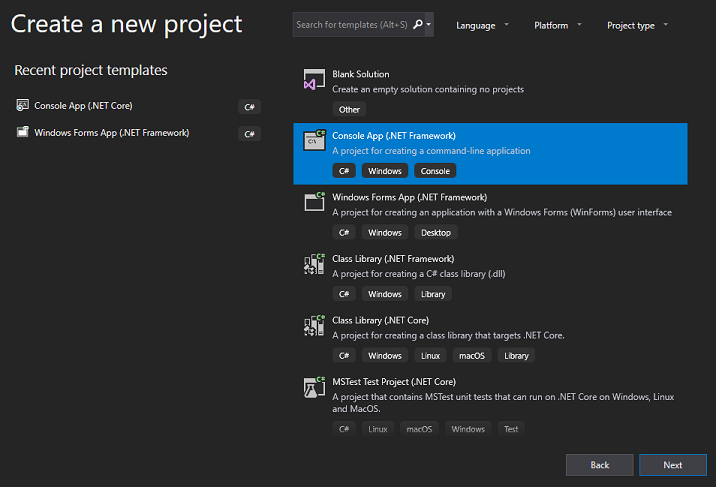
Select Console App (.NET Framework) and click Next.
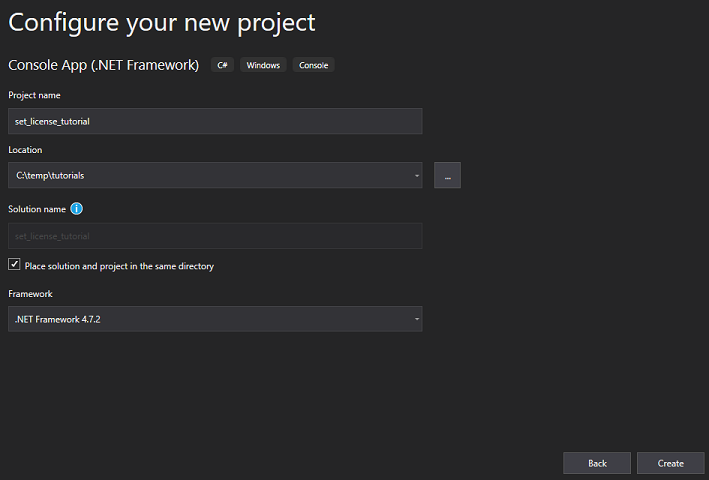
Add the project name, specify the location where the project to be saved to and the other project details, then click Create.
Add LEADTOOLS References
Add the necessary LEADTOOLS references. The references needed depend upon the purpose of the project. References can be added by one or the other of the following two methods (but not both).
- NuGet Reference - Add LEADTOOLS References via NuGet
- Local Reference - Add LEADTOOLS References Locally
NuGet Reference - Add LEADTOOLS References via NuGet
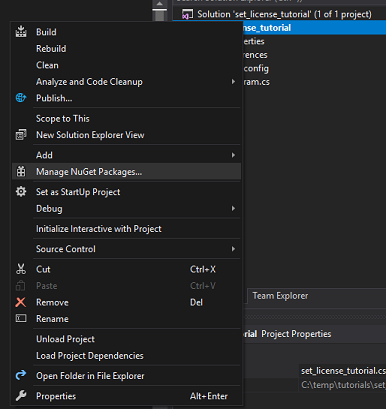
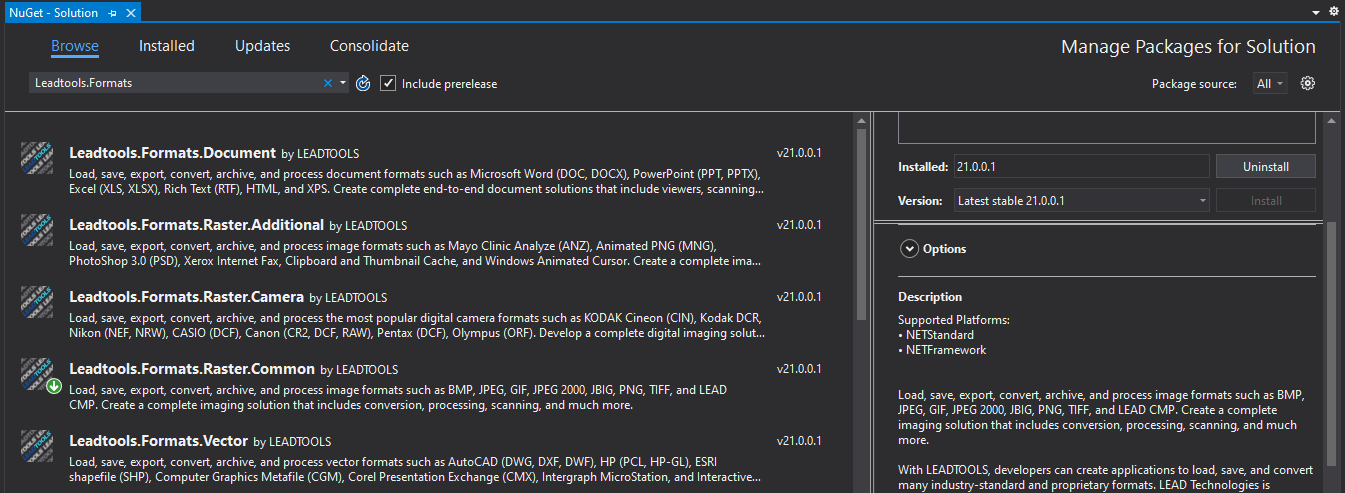
Right-click the C# project in the Solution Explorer and select Manage NuGet Packages...
Browse for LEADTOOLS, then select one of the LEADTOOLS NuGet packages (any one will do) and install it. Accept LEAD's End User License Agreement.
Local Reference - Add LEADTOOLS References Locally
To add the LEADTOOLS references locally, perform the following steps:
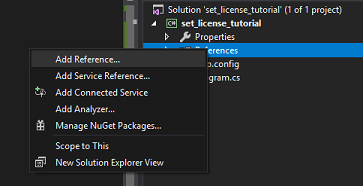
In the Solution Explorer, right-click References, and select Add Reference.
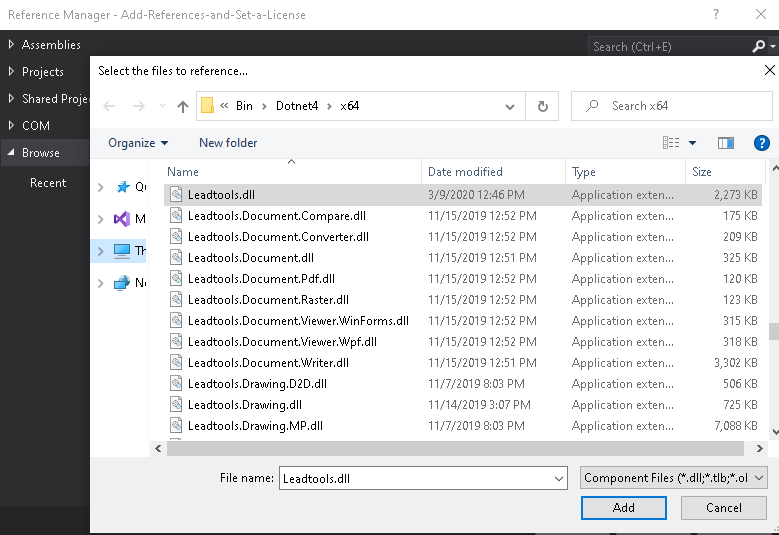
In the Reference Manager, select Browse and then navigate to the directory where the LEADTOOLS Assemblies are located: <INSTALL_DIR>\LEADTOOLS22\Bin\Dotnet4\x64
Select and add Leadtools.dll, then click OK.
Add the Set License Code
Now that the LEADTOOLS references have been added to the project, code can be added to set the runtime license. The License unlocks the features needed for the project. It must be set before any toolkit function is called. The exact function called depends on the platform used. For details (including tutorials for different platforms), refer to Setting a Runtime License.
There are two types of runtime licenses:
- Evaluation license, obtained at the time the evaluation toolkit is downloaded. It allows the toolkit to be evaluated.
- Deployment license. If a Deployment license file and developer key are required, refer to Obtaining a License
Perform the following steps to add the SetLicense() code:
In the Solution Explorer, open Program.cs and add a using Leadtools; to the using block at the top.
In the Program class add a new method called SetLicense() and call it in the Main method.
using System;using System.IO;using Leadtools;namespace set_license_tutorial{class Program{static void Main(string[] args){SetLicense();}static void SetLicense(){string license = @"C:\LEADTOOLS22\Support\Common\License\LEADTOOLS.LIC";string key = File.ReadAllText(@"C:\LEADTOOLS22\Support\Common\License\LEADTOOLS.LIC.key");RasterSupport.SetLicense(license, key);if (RasterSupport.KernelExpired)Console.WriteLine("License file invalid or expired.");elseConsole.WriteLine("License file set successfully");}}}
Run the Project
Run the project by pressing F5, or by selecting Debug -> Start Debugging.
If the steps were followed correctly, a message in the console displays License file set successfully.

Wrap-up
This tutorial showed how to create a new C# .NET Framework Project, add references via NuGet or via local LEADTOOLS DLLs, and set the license.
This is the basis for all C# .NET Framework applications using the LEADTOOLS SDK. All functionality in the SDK is unlocked via setting a license. SetLicense must be called before calling any other LEADTOOLS SDK methods.
After the SDK is purchased, the evaluation license can be replaced with a valid runtime license to disable the Nag Message.
