Detect and Extract MRTD - Java
This tutorial shows how to create a Java application that will utilize MRTD extraction and processing using the LEADTOOLS SDK.
| Overview | |
|---|---|
| Summary | This tutorial covers how to use LEADTOOLS MRTD SDK technology in a Java application. |
| Completion Time | 30 minutes |
| Eclipse Project | Download tutorial project (1 KB) |
| Platform | Java Application |
| IDE | Eclipse |
| Development License | Download LEADTOOLS |
| Try it in another language |
|
Required Knowledge
Get familiar with the basic steps of creating a project by reviewing the Add References and Set a License tutorial and Load and Save Images tutorial, before working on the Detect and Extract MRTD - Java tutorial.
Create the Project and Add the LEADTOOLS References
Start with a copy of the project created in the Load and Save Images tutorial. If that project is unavailable, follow the steps in that tutorial to create it.
The references needed depend upon the purpose of the project. References can be added by local .jar files located at <INSTALL_DIR>\LEADTOOLS22\Bin\Java.
For this project, the following references are needed:
leadtools.jarleadtools.codecs.jarleadtools.document.writer.jarleadtools.forms.commands.jarleadtools.imageprocessing.core.jarleadtools.ocr.jar
This tutorial uses LEADTOOLS Codecs library support. For a complete list of which JAR files are required for your application, refer to Files to be Included with your Java Application
Set the License File
The License unlocks the features needed for the project. It must be set before any toolkit function is called. For details, including tutorials for different platforms, refer to Setting a Runtime License.
There are two types of runtime licenses:
- Evaluation license, obtained at the time the evaluation toolkit is downloaded. It allows the toolkit to be evaluated.
- Deployment license. If a Deployment license file and developer key are needed, refer to Obtaining a License.
Note
Adding LEADTOOLS references and setting a license are covered in more detail in the Add References and Set a License tutorial.
Add the MRTD Reader and Processing Code
With the project created, the references added, the license set, and the load image code added, coding can begin. The code pertaining to saving the image is not necessary for this tutorial and can be commented out.
Open the _Main.java class in the Project Explorer. Add the following statements to the import block at the top.
// Using import at the topimport java.io.IOException;import java.nio.file.*;import leadtools.*;import leadtools.codecs.*;import leadtools.forms.commands.*;import leadtools.ocr.*;
Inside the run() method add the following to set the library path to where the CDLL files are located, as well as load the LEADTOOLS library that was previously imported. Also, change the inputFile string, containing the file path passed into the LoadImage() method to "C:\\LEADTOOLS22\\Resources\\Images\\mrz_sample.jpg".
public static void main(String[] args) throws IOException{new _Main().run(args);}private void run(String[] args) {try {Platform.setLibPath("C:\\LEADTOOLS22\\Bin\\CDLL\\x64");Platform.loadLibrary(LTLibrary.LEADTOOLS);Platform.loadLibrary(LTLibrary.CODECS);Platform.loadLibrary(LTLibrary.OCR);SetLicense();RasterCodecs codecs = new RasterCodecs();String inputFile = "C:\\LEADTOOLS22\\Resources\\Images\\mrz_sample.jpg";//String outputFile = "C:\\Temp\\test.jpg";RasterImage image = LoadImage(inputFile, codecs);ExtractMRTD(image);//SaveImage(image, outputFile, codecs);}catch(Exception ex) {System.err.println(ex.getMessage());ex.printStackTrace();}}
Add a new method to the _Main class called ExtractMRTD(RasterImage image). Call this method inside the run() method below the call to the LoadImage() method, as shown above. The method's parameter will be the RasterImage loaded in RasterImage image = LoadImage(inputFile, codecs);. For this tutorial use this MRTD sample image.
Add the below MRTD detection and recognition code inside the new method.
void ExtractMRTD(RasterImage image){MRTDReader mrtdReader = new MRTDReader();OcrEngine ocrEngine = OcrEngineManager.createEngine(OcrEngineType.LEAD);ocrEngine.startup(null, null, null, "C:\\LEADTOOLS22\\Bin\\Common\\OcrLEADRuntime");mrtdReader.setOcrEngine(ocrEngine);// Process ImagemrtdReader.processImage(image);// Output valuesif (mrtdReader.getErrors() == MRTDErrors.NO_ERROR.getValue()){for (var value : mrtdReader.getResults().entrySet()){System.out.println(String.format("Data Element Field: %s", value.getKey().toString()));System.out.println(String.format("Data Element Value: %s", value.getValue().getReadableValue()));System.out.println(String.format("Data Element Code : %s", value.getValue().getMrzCharacters()));System.out.println(String.format("Data Element Valid: %s", value.getValue().isValid()));System.out.println("************************************");}}}
Run the Project
Run the project by pressing Ctrl + F11, or by selecting Run -> Run.
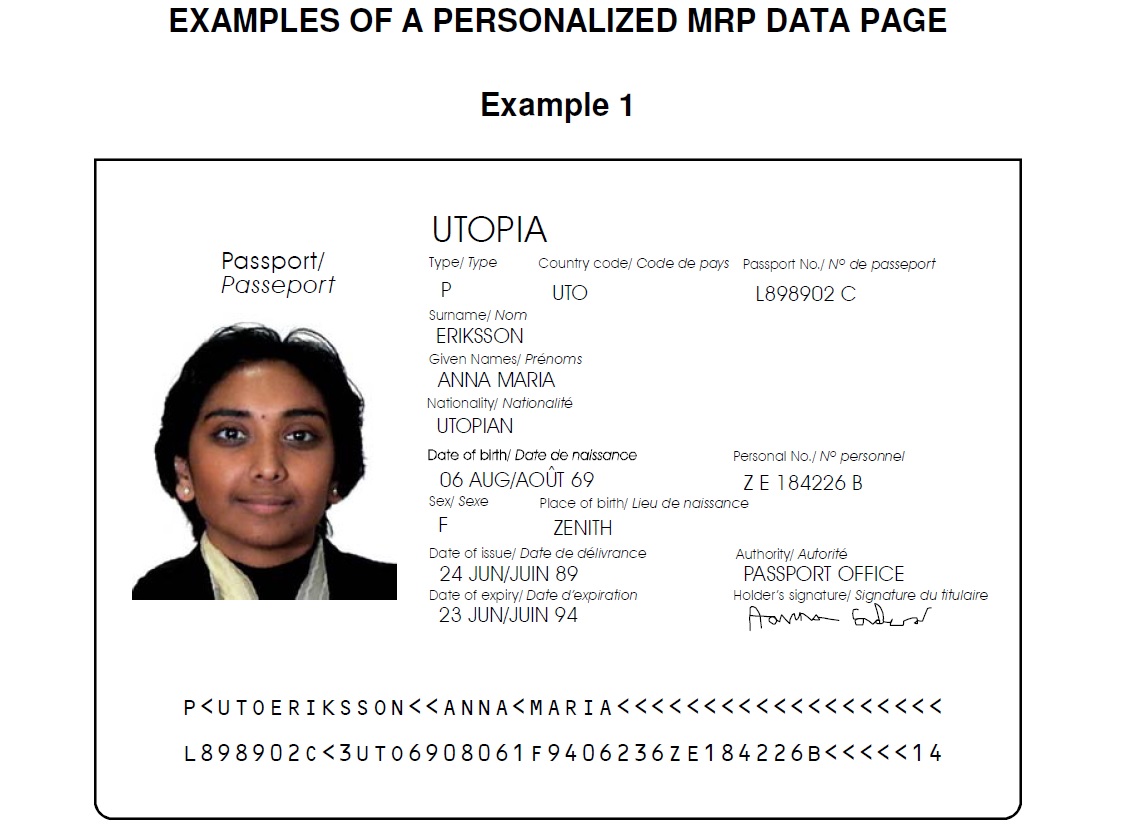
If the steps were followed correctly, the application runs and displays the passport image's extracted MRTD information.

Wrap-Up
This tutorial showed how to load an image of a Machine Readable Passport's (MRP) page and used the MRTDReader class to extract its MRTD data.
