Medical Web Viewer Demo User Guide
1. Introduction
The Medical Web Viewer Demo enables users to view and manipulate a wide variety of medical images.
HTML5-Compliant
Requires no installation on the client’s behalf and is compatible with any HTML5-compliant web browser (including Google Chrome, Microsoft Internet Explorer 9 and up, Microsoft Edge, Mozilla Firefox, MacOS Safari, iPad, iPhone, Android, and more).
Image Sources and Network Sharing
Digital Images from a variety of different sources (including CT, MRI, Ultrasound Units, imaging sources etc.) can be analyzed, displayed, manipulated, stored, and sent across different networks.
Powerful Viewing and Processing Options
There are several different functions for viewing images. Some of these functions include annotation and measurement of regions of the image, image stacking, window width, and level manipulation.
3D images can be rendered through VRT , MIP , and MPR (3D) functions.
2. Using HTML5 Web Viewer
Default Toolbar


3. Quick Reference Guide
3.1 Layout Tools Table
| Tool Name | Description | Image |
|---|---|---|
| Compose Layout | Used to utilize the Merge Cells tool, Saving Hanging Protocol , Save Study Structured Display tool, and the Delete Study Structured Display tool. |  |
| Merge Cells | Used to combine multiple cells into a single cell. |  |
| Save Hanging Protocol | Used to save the Hanging Protocol settings. |  |
| Save Study Structure Display | Used to save any manipulation done when in the Compose Layout settings. |  |
| Delete Study Structured Display | Used to delete a previously saved Study Structured Display. |  |
| Change Series Layout | Used to change how the series is viewed. |  |
| Change Study Layout | Used to change how to view the study. |  |
| Delete Cell | Used to unload a series from the selected Image Box. |  |
3.2 Window Viewing Options Tools Table
| Tool Name | Description | Image |
|---|---|---|
| Fit | Returns an image that has been zoomed in to the size of the original frame holding the image. |  |
| One to One | Zooms in (or out) on an image so that it is displayed at the same resolution as the screen. |  |
| True Size Display | Used to display the image to its physical size. |  |
| Toggle Full Screen | Tool used to make the image into a full screen image. |  |
| Sort Series | The Sort Series tool is used to sort a multi-frame/multi-image instance series. |  |
3.3 Saving Images Table
| Tool Name | Description | Image |
|---|---|---|
| Print To PDF | Used to save a DICOM image into a local PDF |  |
| Save as Derived | Used to save a processed image into a new series |  |
3.4 Syncing Image Tools Table
| Tool Name | Description | Image |
|---|---|---|
| Link Images | Used to link all the images within a stack/series to change when one image is manipulated |  |
| Link Cells | Used to link multiple series (image cells) for manipulation. |  |
| Toggle Study Time Line | The Toggle Study Time Line tool is used to show all available series that are for the selected patient. |  |
| Synchronize Series | Used to make all images in different series that have the same stack orientation to have the ability to be scrolled in sync. |  |
| Stack | Used to convert multiple images into one stack that can be scrolled through. |  |
| Scroll Frame | The Scroll Frame tool is used to scroll a frame at a time when viewing a stacked series in grid view. |  |
| Scroll Row | Used to scroll a row at a time when viewing a stacked series in grid view. |  |
| Scroll Column | Used to scroll a column at a time when viewing a stacked series in grid view. |  |
| Scroll Page | Used to scroll a page at a time when viewing a stacked series in grid view |  |
| Toggle Cine | Used to animate an image stack. |  |
| Cine Player | Used to change the settings that are associated with the Toggle Cine tool. |  |
3.5 Manipulation and Analysis Tools Table
| Tool Name | Description | Image |
|---|---|---|
| Line Profile | Used to see the intensity value underneath a line that is drawn on the image. |  |
| Probe Tool | Used to identify the actual pixel value underneath the cursor, while also giving the (x,y) coordinates for location referencing. |  |
| Stretch Histogram Color | Used to improve the contrast within the image. The image must be in color. |  |
| Brightness/contrast Color | Used to manipulate the brightness and contrast of the image. The image must be in color. |  |
| HSL (Hue, Saturation, Lightness) Color | Used to manipulate the image by the Hue, Saturation, and Lightness. Image must be of color. |  |
| Window Level | Used to adjust the brightness and contrast of an image. |  |
| Custom Window Level | Allows custom brightness and contrast templates to be used to manipulate an image. |  |
| Invert | Used to make the image the complete opposite color from what is displayed. |  |
| Rotate Clockwise | Used to rotate images 90 degrees clockwise. |  |
| Rotate Counterclockwise | Used to rotate images 90 degrees counterclockwise. |  |
| Flip | Used to mirror an image horizontally. |  |
| Reverse | Used to mirror an image vertically. |  |
| Align Center | Used to center the image along the y-axis in the viewer |  |
| Align Left | Used to bring the image to the left side of the viewer along the y-axis. |  |
| Align Right | Used to bring the image to the right side of the viewer along the y-axis. |  |
| Align Top | Used to bring the image to the top of the viewer along the x-axis. |  |
| Align Bottom | Used to bring the image to the bottom of the viewer along the x-axis. |  |
| Align Middle | Used to bring the image to the middle of the viewer along the x-axis. |  |
3.6 Adjusting Image Viewing Tools Table
| Tool Name | Description | Image |
|---|---|---|
| Pan | Used to move the image around the area of the screen. |  |
| Zoom | Used to zoom in on the image. |  |
| Reload | Used to reset back to the original image. |  |
| Shutter Object | Used to take a geometric mask of combined shapes in order to neutralize the display of pixels located outside of the shutter shape |  |
| Enhance Edges | Used to detail the edges of an image in a clearer view |  |
| Toggle Endodontic | Used to view the dental pulp in a clearer view. |  |
| Toggle Periodontal | Used to view the gums in a clearer view. |  |
| Toggle Dentin | Used to view the hard-boney tissue that is beneath the enamel. |  |
| Spyglass | The Spyglass tool used to look at the image through a focused magnified image. |  |
| Spyglass Invert | Used to look at the image through the invert function but in a more focused view than the whole image. |  |
| Spyglass Clahe | Clahe stands for Contrast Limited Adaptive Histogram Equalization. The Spyglass Clahe tool used to view the magnified image in enhanced contrast. |  |
| Spyglass Reveler | Used to view the magnified image through a specialized image processing filter. |  |
3.7 Annotation Images and Measurement Tools Table
| Tool Name | Description | Image |
|---|---|---|
| Select | Used to have a default cursor. |  |
| Arrow | Used to draw an arrow. |  |
| Point | Used to create a small circle with an x in the center. |  |
| Rectangle | Used to create an outline of a rectangle. |  |
| Ellipse | Used to create an outline of an oval. |  |
| Curve | Used to draw a line that will have a curve in it. |  |
| Line | Used to create a line. |  |
| Free Hand | Used to create a line in any direction on the x,y-axis plane. |  |
| Polyline | Used to create a straight line in any direction within the x,y-axis. |  |
| Polygon | Used to create a polygon in any shape. |  |
| Text | Used to create a text box that will overlay on the image. |  |
| Note | Used to create a sticky note that will be displayed on the image. |  |
| Highlight | Used to create an area that will be highlighted. |  |
| Text Pointer | Used to create a text box and an indicating line. |  |
| Ruler | Used to measure the actual distance from one point to another on an image (Refer to Measurement Tools ). |  |
| Poly Ruler | Similar to the Ruler tool but used for non-linear measurements (Refer to Measurement Tools ). |  |
| Protractor | Used to measure angles (Refer to Measurement Tools ). |  |
| Calibrate Ruler | Used to measure an object of known size and then to manually put in the length of the object. |  |
| Show/Hide/Annotations | Used to toggle all of the annotations on the image, on and off. |  |
| Delete Annotations | Used to delete selected annotations. |  |
| Clear Annotations | Used to remove all the annotations from a single selected image just by clicking the button. |  |
| Clear All Annotations | Used to remove all the annotations on an entire series. |  |
| Save Annotations | Used to save any annotation to a selected image. |  |
| Load Annotations | Used to export the series. |  |
3.8 3D imaging tools Table
| Tool Name | Description | Image |
|---|---|---|
| Cross Hair | Provides a cross hair on the Axial, Coronal, and Sagittal planes that move in sync with each other providing the same location. |  |
| Show Reference Line | Shows the intersection of the selected image within an orthogonal/oblique stack (3D image). |  |
| Show First and Last Reference Line | Shows where the first and last image in the Image set are located. |  |
| 3D Cursor | The 3D Cursor tool is used to locate a point on an image in different image boxes. |  |
| VRT (Volumen Rendering Technique) | VRT stands for Volume Rendering Technique. The VRT tool used to make a solid 3D rendering of the 3D image set selected. |  |
| MIP (Maximum Intensity Projection) | MIP stands for Maximum Intensity Projection. The MIP tool used to make a MIP 3D image of the 3D image set selected. |  |
| MPR (Multiplanar Reconstruction) | MPR stands for Multiplanar Reconstruction. The MPR (3D) tool used to cut the 3D rendered image into the sagittal, axial, and coronal planes. |  |
| 3D Settings | Used to change the General, MPR/Volume settings for the 3D object within the MPR window. |  |
| Panoramic | Used to create and view images through paraxial slices. |  |
| Rotate 3D Object | The Rotate 3D Object tool used to rotate the 3D image. |  |
| Head Orientation | Used to turn the 3D rendered image to be viewed anatomically from the head looking down to the feet. |  |
| Feet Orientation | Used to turn the 3D rendered image to be viewed anatomically from the feet looking up the head. |  |
| Left Orientation | Used to turn the 3D rendered image to be viewed anatomically from the left side looking right. |  |
| Right Orientation | Used to turn the 3D rendered image to be viewed anatomically from the right side looking left. |  |
| Anterior Orientation | Used to turn the 3D rendered image to be viewed anatomically from the anterior to posterior side of the object. |  |
| Posterior Orientation | Used to turn the 3D rendered image to be viewed anatomically from the posterior to the anterior side of the object. |  |
3.9 DICOM Imaging Table
| Tool Name | Description | Image |
|---|---|---|
| Toggle Overlays | Used to toggle the main DICOM tags on and off. |  |
| Show DICOM | Shows a complete list of the DICOM information that is associated with the image. |  |
3.10 Audio Tools Table
| Tool Name | Description | Image |
|---|---|---|
| Waveform Basic Audio | Allows for any audio notes associated with the DICOM file to be listened to. |  |
3.11 Exporting Images Tool Table
| Tool Name | Description | Image |
|---|---|---|
| Export | Used to save DICOM images locally |  |
4. Retrieving and Viewing Images
In order to view an image on the HTML5 Web Viewer, use the following steps:
-
Select the "Search" Tab.

-
Search for a Patient by entering: either the “PATIENT ID”, “PATIENT Name”, “Accession #”, “Referring Dr. Name”, or “Modality”.

-
Select the “Search” Button.

-
Select the Patient whose images you want to view.

-
Select the Image within the Series that is wished to be viewed.

4.1 Uploading an Image
In order to upload a DICOM image in the HTML5 Web Viewer, use the following steps:
-
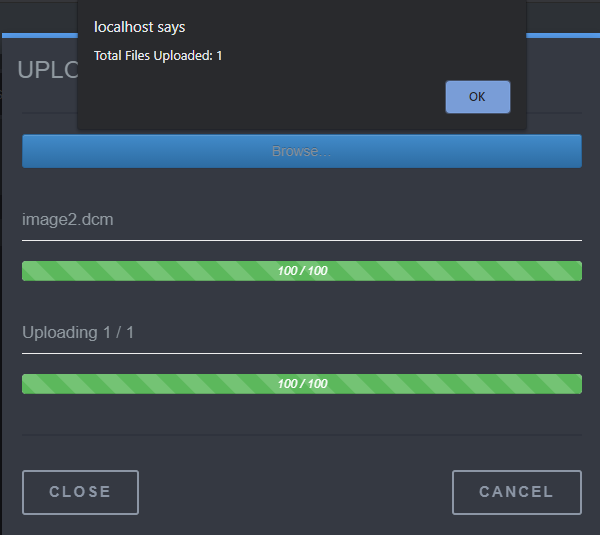
Select the "UPLOAD" Tab.

-
Select "Browse" and input a DICOM image.
4.2 Emailing an Image
In order to email a DICOM image in the HTML5 Web Viewer, use the following steps:
-
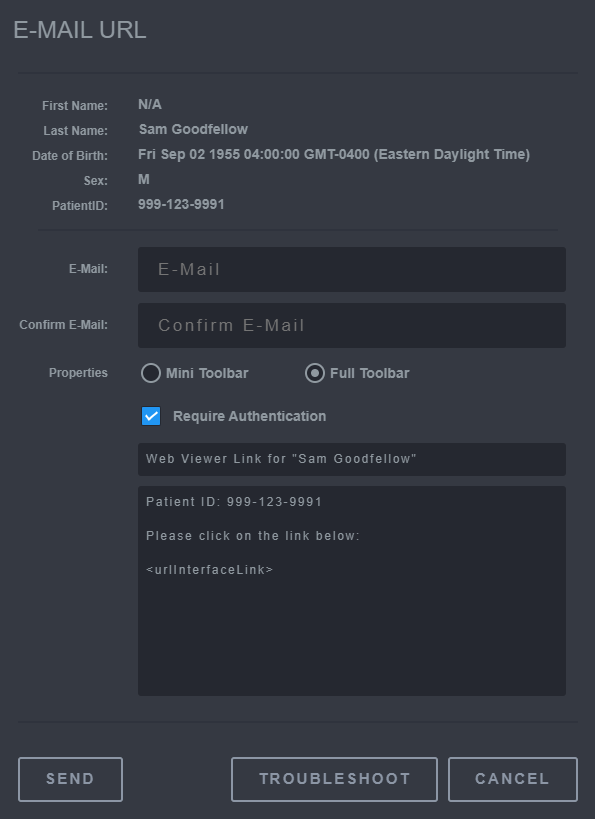
With a series open, select the "E-MAIL" Tab.

-
Input the email the image will be sent to. Select properties to enable features for viewing.
-
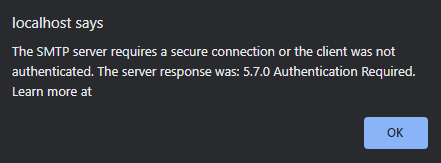
Select Send, if an exception occurs select the TROUBLESHOOT button.
-
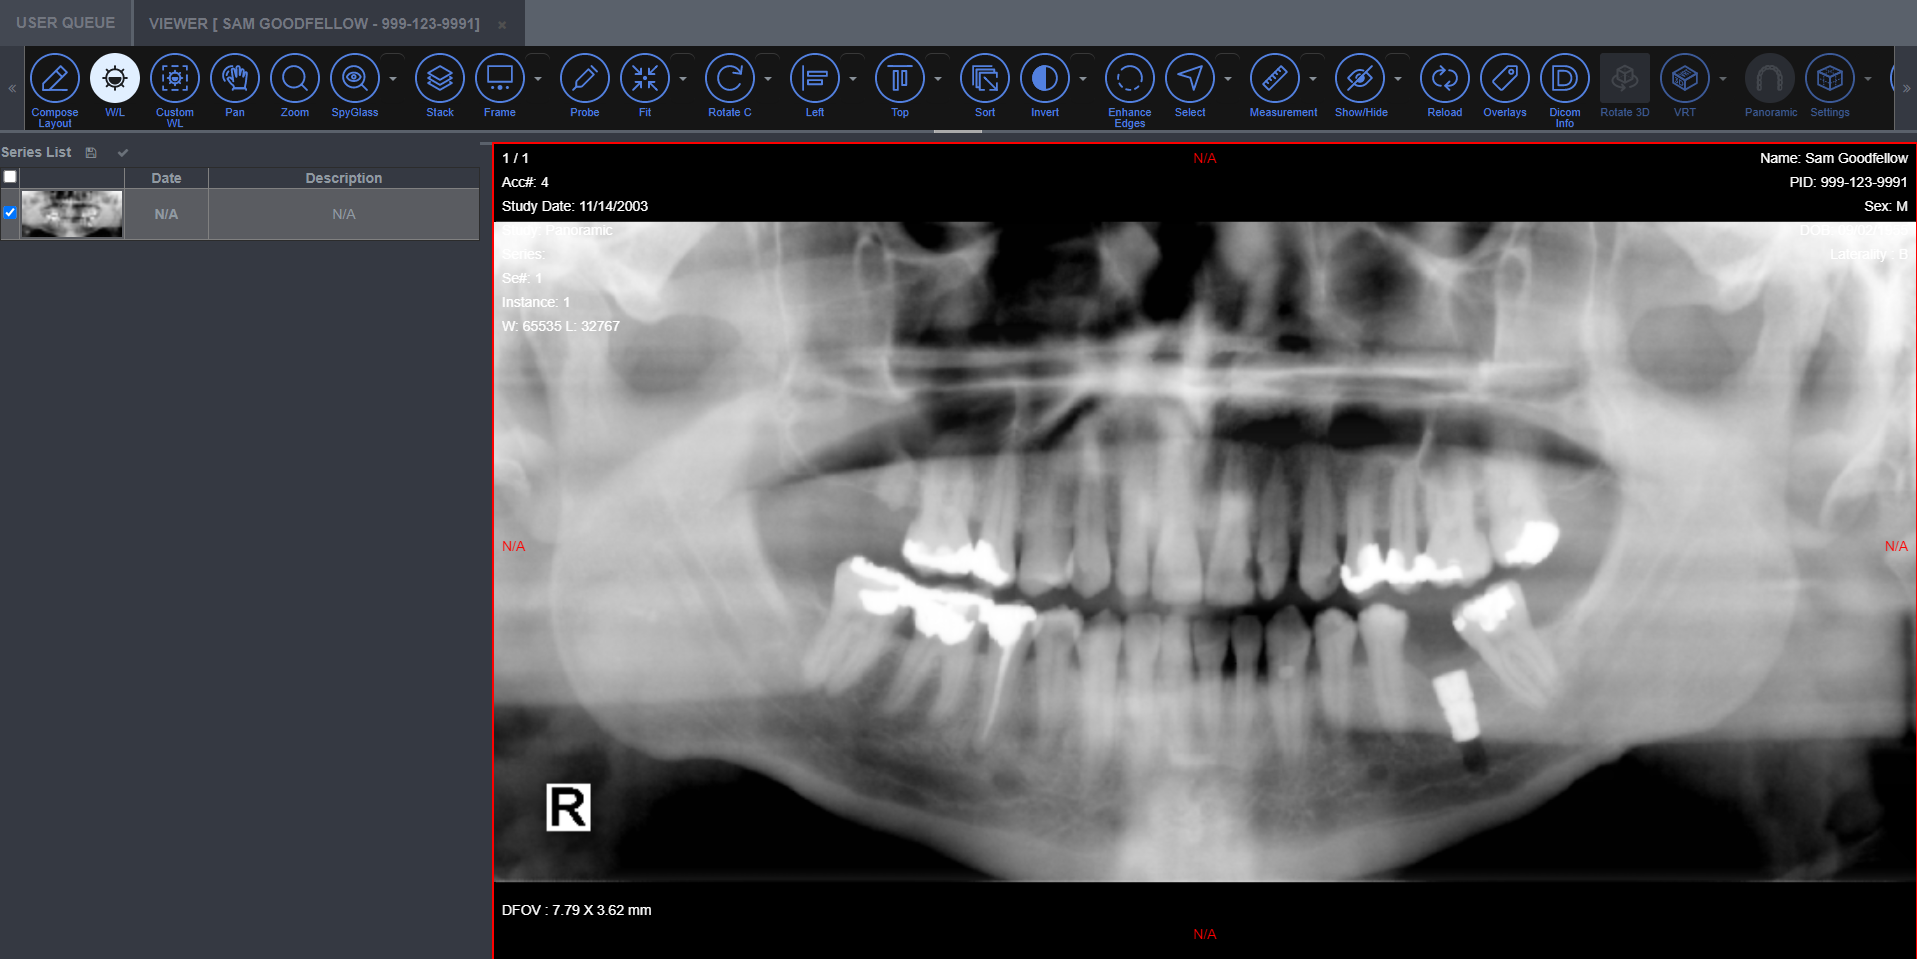
Open the URL sent through the provided email to view the DICOM image.
5. Layout Options
The Layout Options provides the HTML5 Medical Viewer support for grid (row and column base) and non-grid (rectangles of multiple shape and sizes) layouts for image display. They can be applied at series level or study level. A user with template editing rights, can also create display templates using the Template Editor ,and save it for other user to use during image viewing. Users can enable the study timeline to see the thumbnail representation of all the available series of a patient, and select the Series or Study layout to setup the image box layouts. A user can also drag a series thumbnail representing the series from the study timeline view and drop it on an image box for viewing. If a user wants to save the currently displayed layout as a DICOM Structured Display or create a DICOM Hanging Protocol (for an imaging procedure type), they can do so by clicking on the Compose Layout button.
5.1 Compose Layout
The Compose Layout tool provides a wizard used for saving DICOM Structured Display and Hanging Protocol. In addition, the Merge Cells tool allows the creation of a non-grid layout from a grid-layout efficently. Select the desired study or series layout by selected appropriate options from the Series and Study layout drop down menu. Drag and drop images from the study timeline to appropriate a cell, and create the desired view (zoom, fit, invert etc.) before selecting these tools.
To use this tool, select the Compose Layout button. This allows for the following tools to be used: Merge Cells button, Saving Hanging Protocol button, Save Study Structured Display button, and the Delete Study Structured Display tool.

5.2 Merge Cells
The Merge Cells tool is used to combine multiple cells into a single cell.
To use this tool, first select the Compose Layout button. Then hold down the Ctrl key to select the cells that are needed to be merged. Then, when the cells are selected, click the Merge Cell button to merge the cells.

5.3 Saving Hanging Protocol
The Save Hanging Protocol tool will start a wizard that is used to generate the DICOM Hanging Protocol from displayed studies. Hanging Protocol provides a generic set of rules which lay out how a set of images are viewed.
To use this tool, first select the Compose Layout button. Then, select the Saving Hanging Protocol button. The settings can then be changed to the desired information (i.e., Name, Description, Level, Hanging Protocol Definitions, Image Sets, Display Sets). After a change is made, click the save button before moving to another setting screen.

Saving Hanging Protocol Setting Options
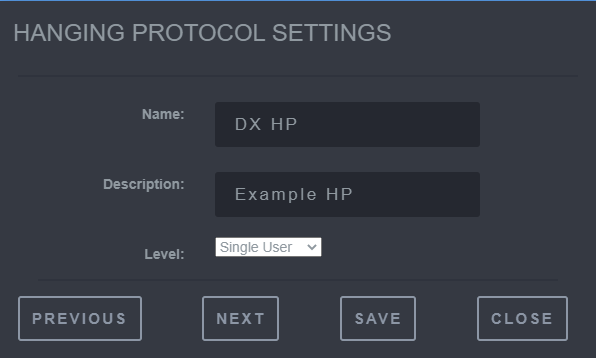
To get to the different setting options click next:
Saving Hanging Protocol Step 1
-
Provide the Name, Description, and Level for which the Hanging Protocol will be applied to.
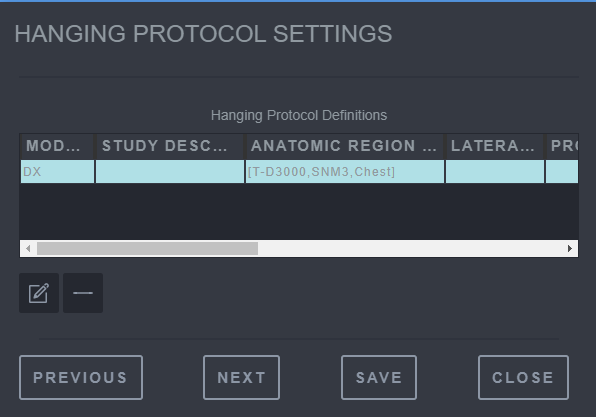
Saving Hanging Protocol Step 2
-
This is the Hanging Protocol Definition overview that can be used to edit an existing definition, or add a new one.
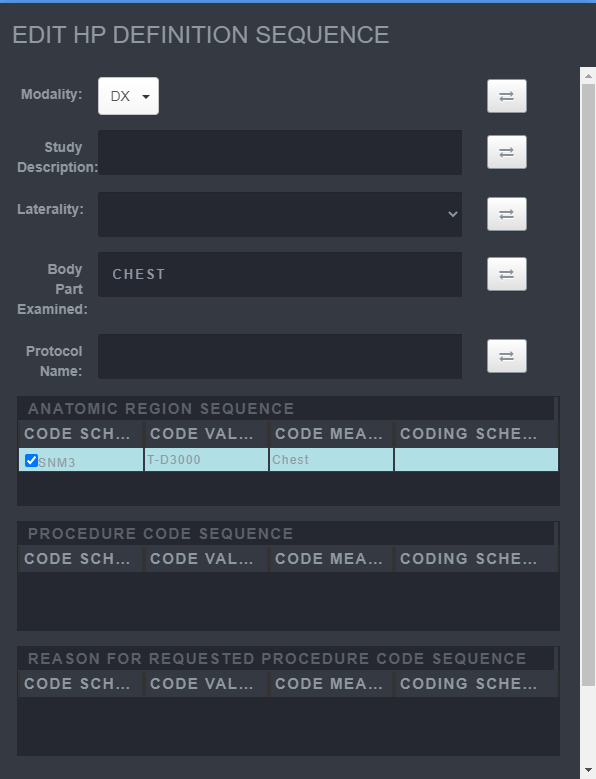
Saving Hanging Protocol Step 3
-
Add the new Hanging Protocol Definition by supplying a String or using the Anatomic Region Sequence.
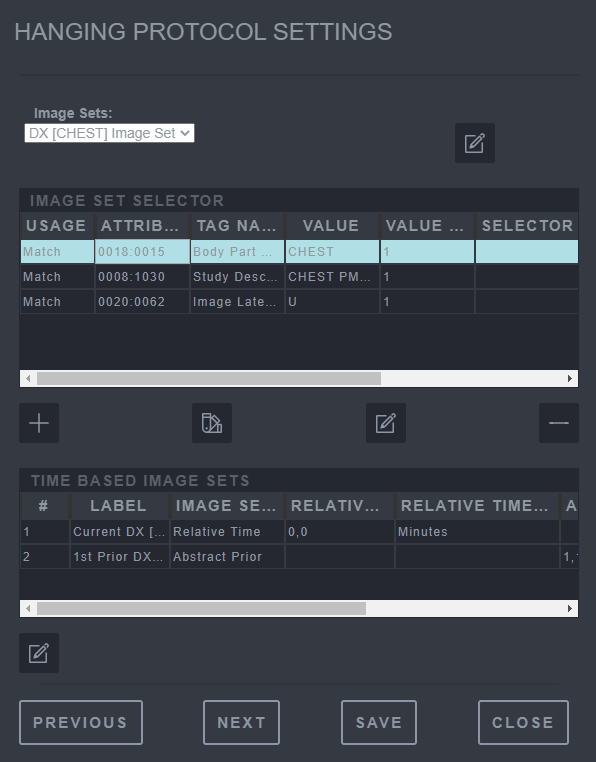
Saving Hanging Protocol Step 4
-
This is the image set and time based image set overview that can be used to edit or add a new image set.
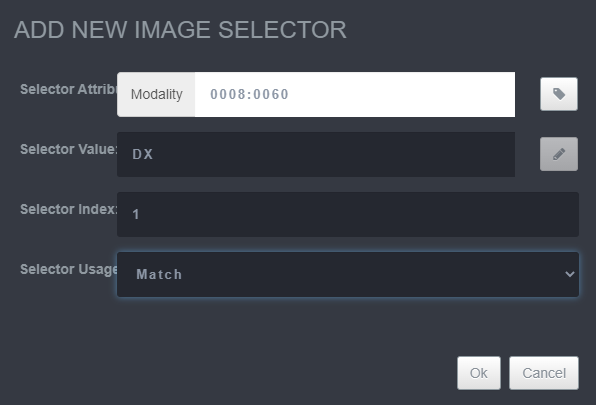
Saving Hanging Protocol Step 5
-
Add the new image set based on an attribute.
Saving Hanging Protocol Step 6
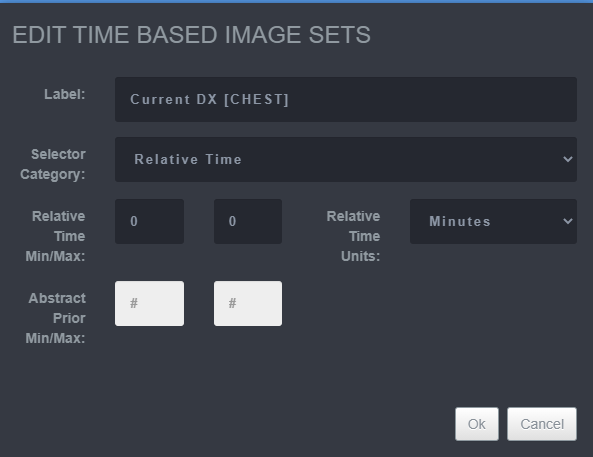
-
Add the new time based image set by supplying an applicable time.
Saving Hanging Protocol Step 7
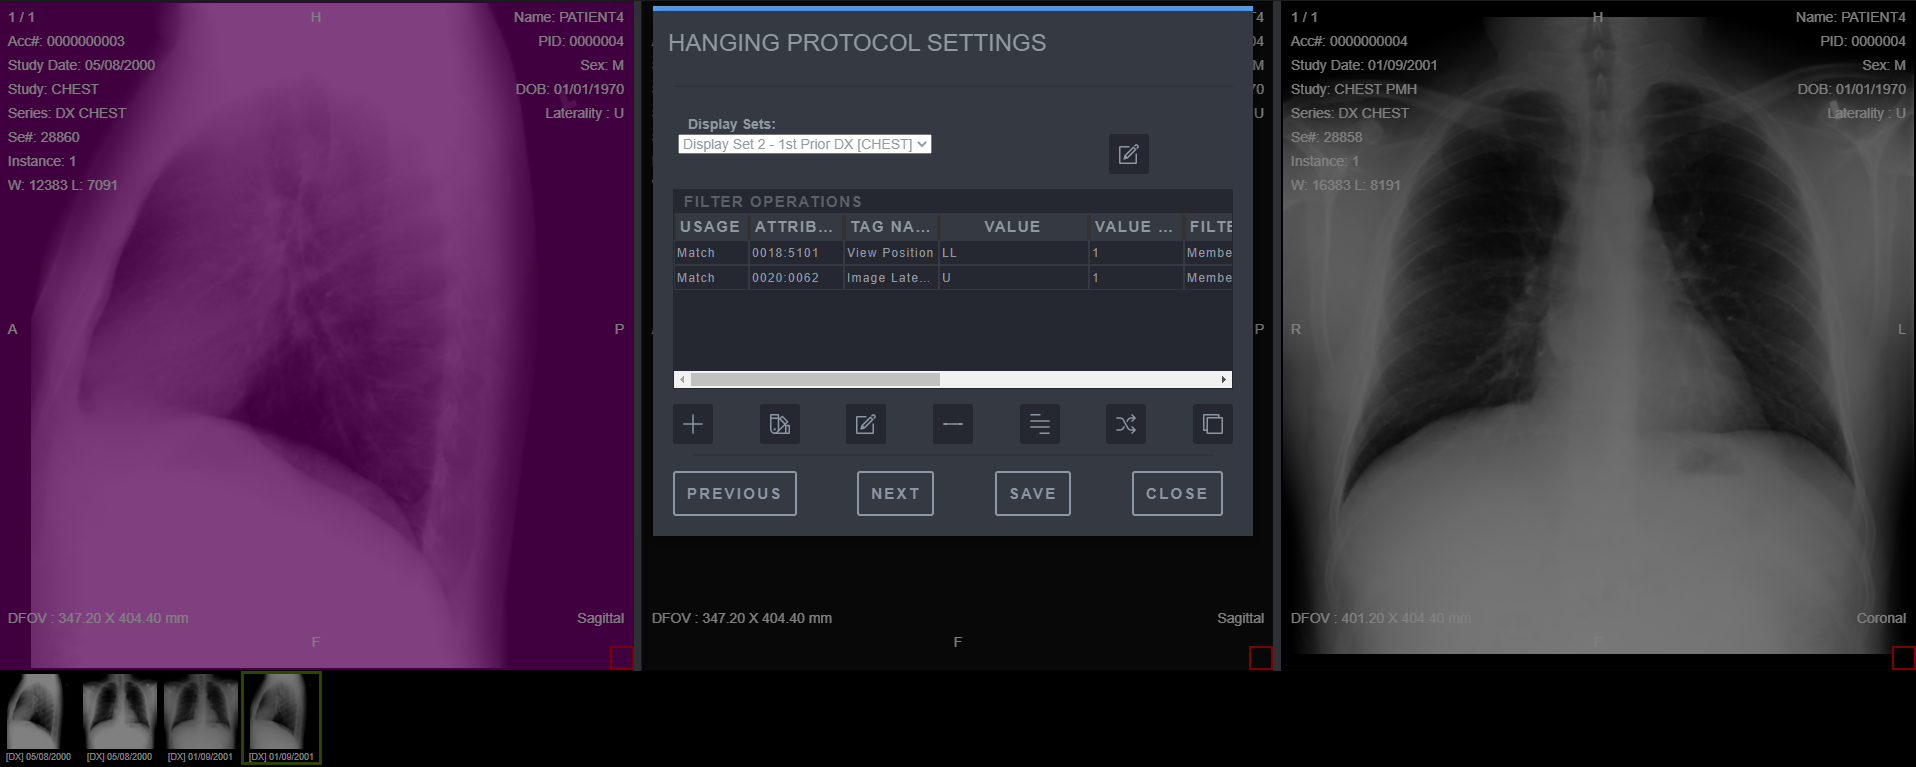
-
Select the display to apply the setting.
Saving Hanging Protocol Step 8
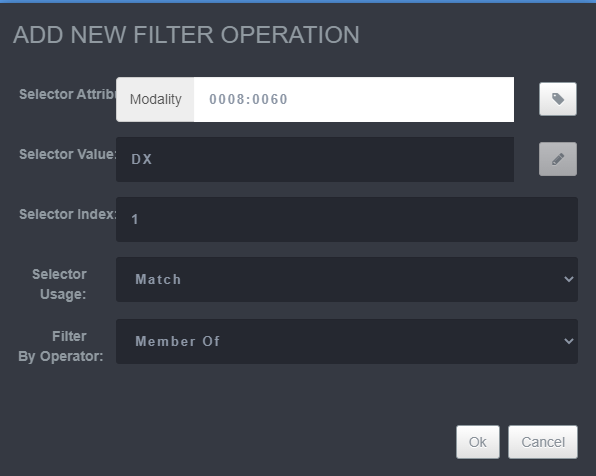
-
Add the filer operation. Select Ok and Save to create the Hanging Protocol.
Saving Hanging Protocol Step 9
-
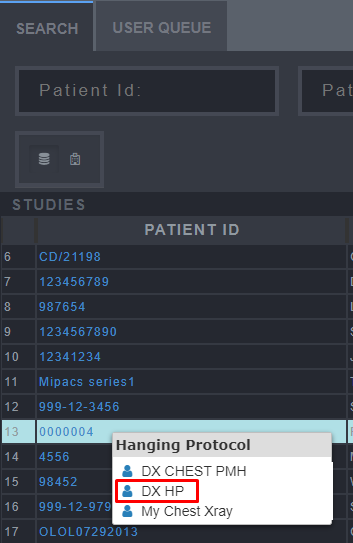
Right-click on the Study to load the study while using the Hanging Protocol.
5.4 Save Study Structured Display
The Save Study Structured Display tool is used to save the current patient's image view into a DICOM Structured Display object.
To use the Save Study Structured Display tool, first select the Compose Layout button. Then place the series in the different image boxes. Make sure to orientate, layout the image and apply the tools (synchronized stacking, etc.) desired to the image. Once the study is laid out in the desired format, click the Save Study Structured Display button to save the DICOM Structured Display into the existing study.

5.5 Delete Study Structured Display
The Delete Study Structured Display is used to delete a previous layout saved from the Save Study Structured Display button.
To use the Delete Study Structured Display tool, first select the Compose Layout button. Then manipulate the study structure and save it. Once a study structure is saved, click the Delete Study Structured Display to delete the once saved study structure.

5.6 Change Series Layout
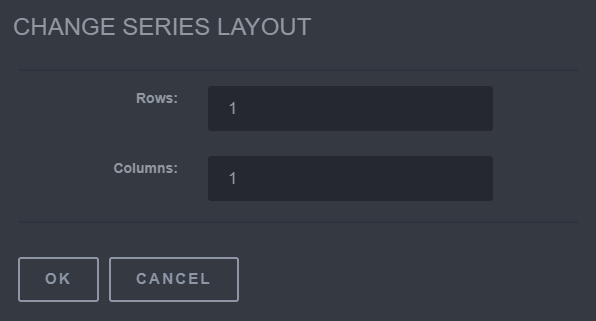
The Change Series Layout used to change how the series is viewed. The Rows and Columns can both be changed. To use this tool, click on the Change Series Layout button and a Change Series Layout screen will appear. In this screen the ability to change the Rows and Columns is available.

Steps to Change a Series Layout
- Click the Change a Series Layout button
- Next, change the Rows or Columns to the desired number
- Click OK to apply the changes.
Change Series Layout Options
5.7 Change Study Layout
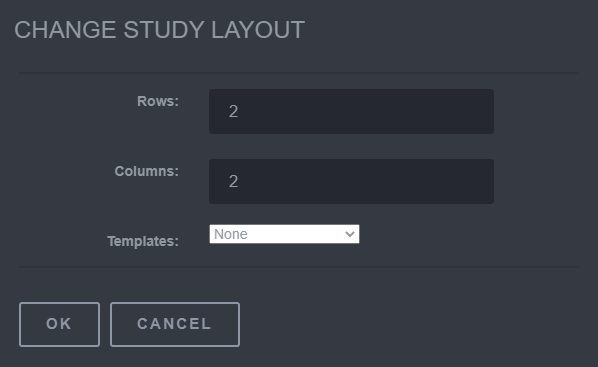
Change Study Layout is used to change how to view the study. The Rows, Columns, and Templates can all be changed.


Steps to use the Change Study Layout
To use this tool, click on the Change Study Layout button and a Change Study Layout screen will appear. This window provides the ability to change the Rows and Columns. The Templates section provide preconceived views that the study layout can be changed to. A custom template can also be created through the use of the Template Editor .
5.8 Delete Cell
The Delete Cell tool is used to unload an image from the selected Image Box. This tool does not delete the series from the database.
To use the Delete Cell tool, have a series displayed in the viewer. Then, click the Delete Cell button. If multiple images are displayed, select an image within the series to unload. Then, click the Delete Cell button and it will unload the selected series and leave a blank cell next to the unselected series.

6. Window Viewing Tools
The Window Viewing Tools are used to change how the image is viewed from within the viewer. They allow images to fit the window viewer and provide the ability to compare the images.
6.1 Fit
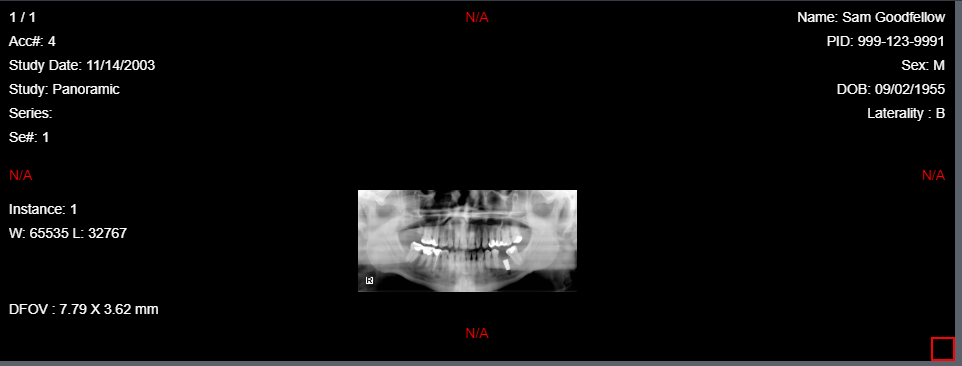
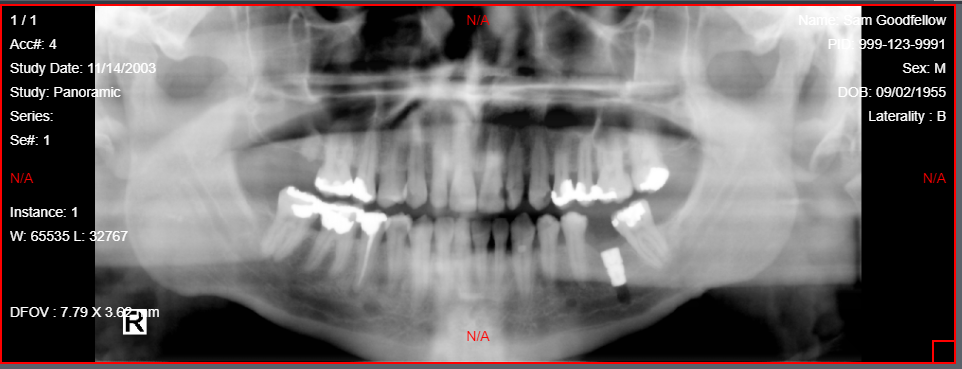
The Fit tool returns an image that has been zoomed in to the size of the original frame holding the image. To use this tool, select the Fit button while the image is displayed on the screen.


Steps to use the Fit Tool
- Select the image that needs to be manipulated.
- Next, click the Fit button.
Original Image
Fit Image
6.2 One to One
The One to One tool is used to perform a pixel to pixel display where one pixel of an image is represented by one pixel on the screen. The image will be displayed at the same resolution as the screen, providing the clearest quality.
To use this tool, select the One to One button while the image is displayed on the screen.

Steps to use the One to One Tool
- Select the image that needs to be manipulated.
- Click the One to One Tool.
6.3 True Size Display
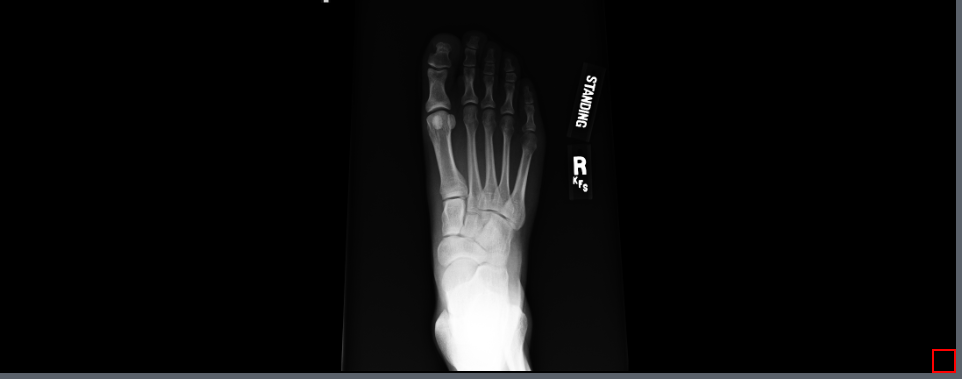
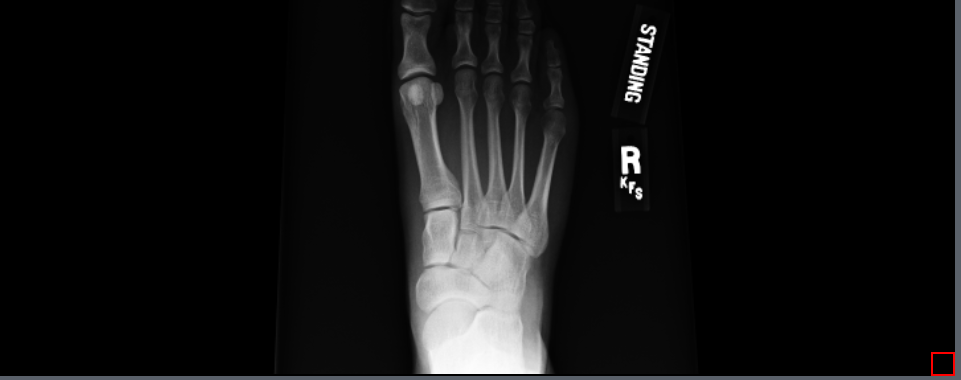
The True Size Display tool is used to display the image in a matching physical size of anatomy. This is calculated based on pixel X and Y resolution in the DICOM dataset. To use this tool, select the image in need of manipulation and then click the True Size Display button. To revert the image back to its original form, click the reload button, or select another render option.

Steps to use the True Size Display button
- Select the image that needs to be manipulated.
- Click the True Size Display Tool
6.4 Sort Series
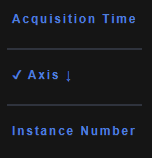
The Sort Series tool can be used to sort a multi-frame/multi-image instance series. The series can be sorted by Acquisition Time, Axis, and Instance Number.
To use this tool, select the Sort Series button, then choose one of the three options from the drop-down menu. In order for the button to function an image within the series must be selected.

6.5 Enlarge a Photo
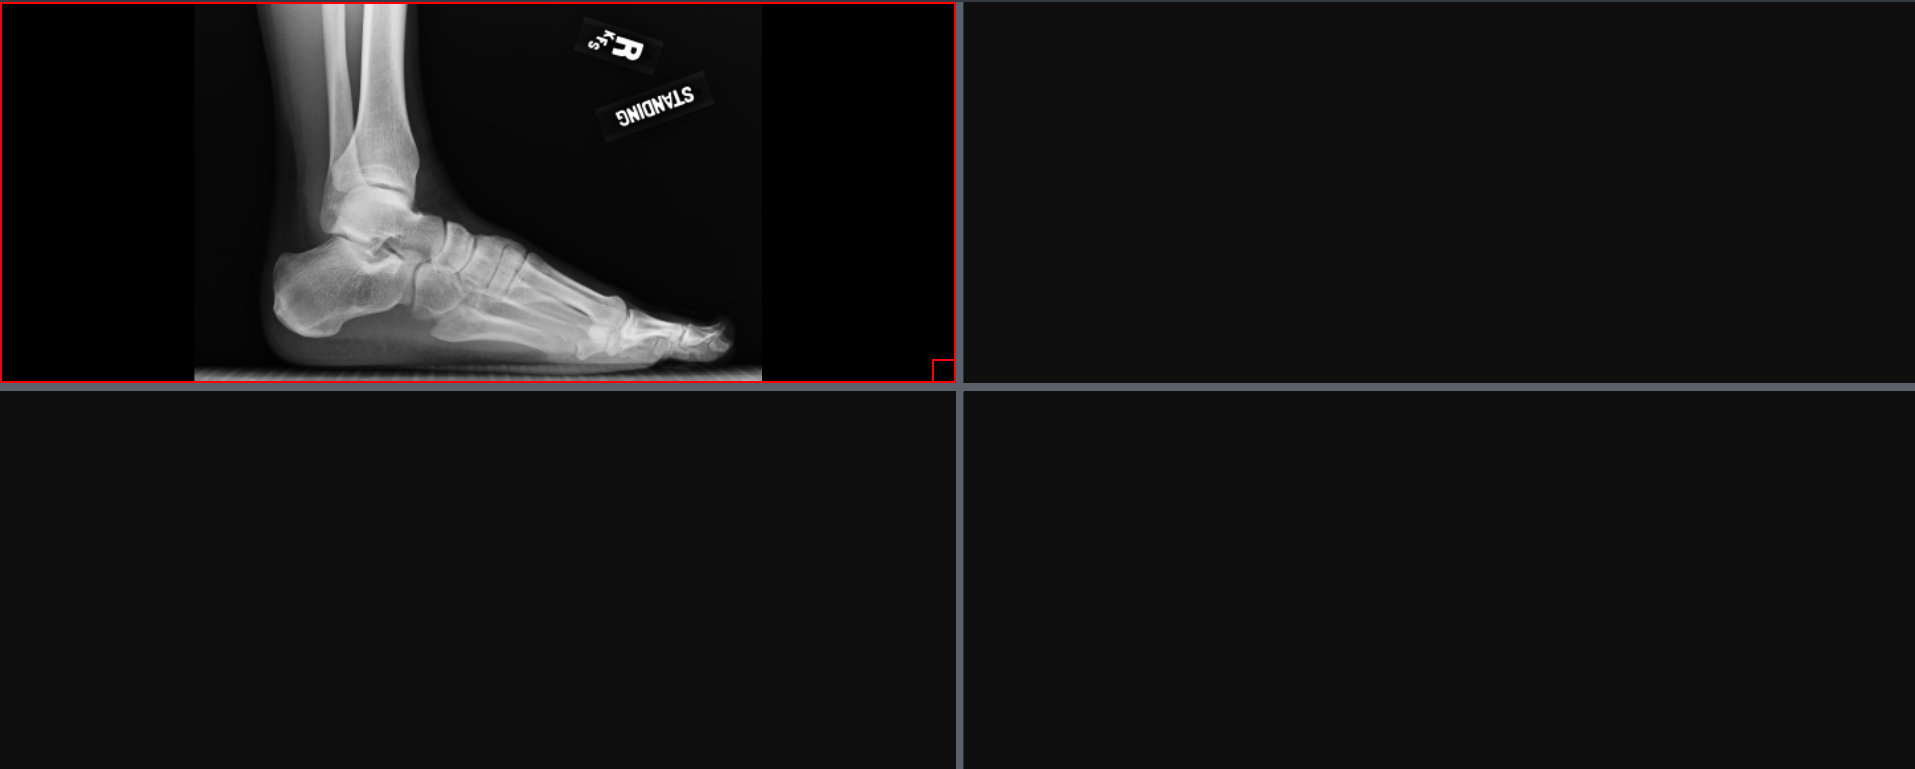
By double clicking the image, it will fill the entire viewing window with the image. This is also known as performing an Explode and Implode of the image.
Steps to Selecting and Enlarging an image
- Click image once to select the image.
- Then double click to toggle between seeing the full series and a single image from the series.

7. Saving Images
The saving image section shows how to save images within the viewer.
7.1 Print To PDF
The Print To PDF is used to save a DICOM image into a PDF. This button can be used to save changes made to a DICOM image to a PDF that can be viewed locally. To use this tool, click on the Print To PDF button to save the DICOM image to PDF. The PDF will then be downloaded and saved on the local computer.


7.2 Save as Derived
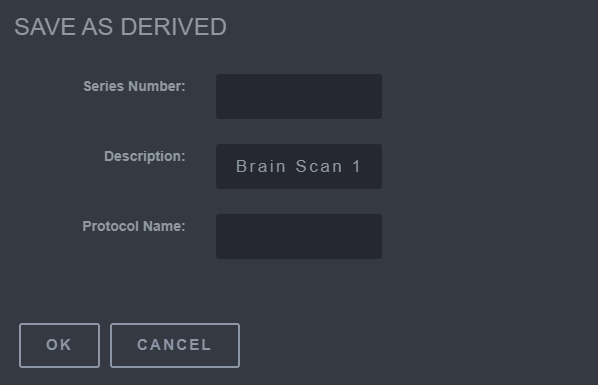
The Save as Derived is used to save the processed image into a new series. When any of the buttons on the toolbar are used and the image is manipulated, the changed image can be saved using this tool. To use this tool, click on the Save as Derived button and it will save the image. The image will then be populated in the Series.

Steps to Save an Image as Derived
- Click the Save as Derived button.
- Change the Series Number, Description, and Protocol Name.
- Click OK to apply the changes.
8. Syncing Image Tools
The Syncing Image Tools are used to connect images within a series together. When one image is manipulated (e.g., applying Zoom in or out), the changes will be reflected in all of the images.
8.1 Link Images
The Link Images tool used to link all the images within a stack/series to change when one image is manipulated. When the Link Images tool is not selected then only the image selected will be manipulated.

Steps to use the Link Images Tool
- Choose a series that has multiple images within in the viewer.
- Click the Link Images button.
- Make manipulations to the one image and all images will be manipulated in the same way.
8.2 Link Cells
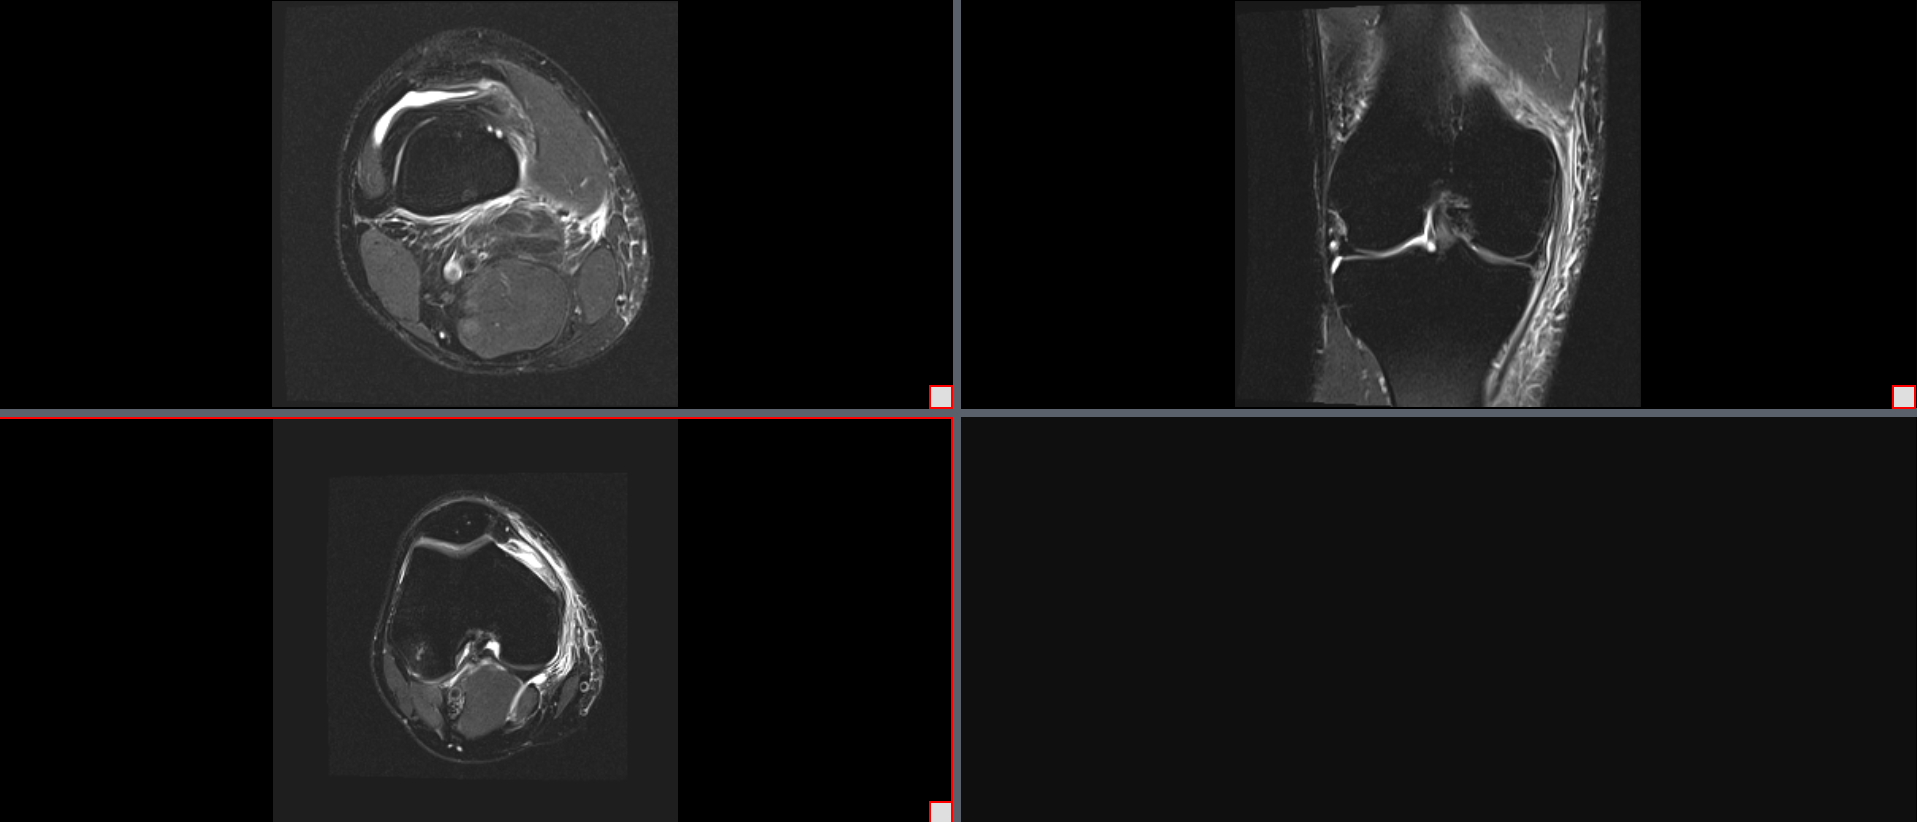
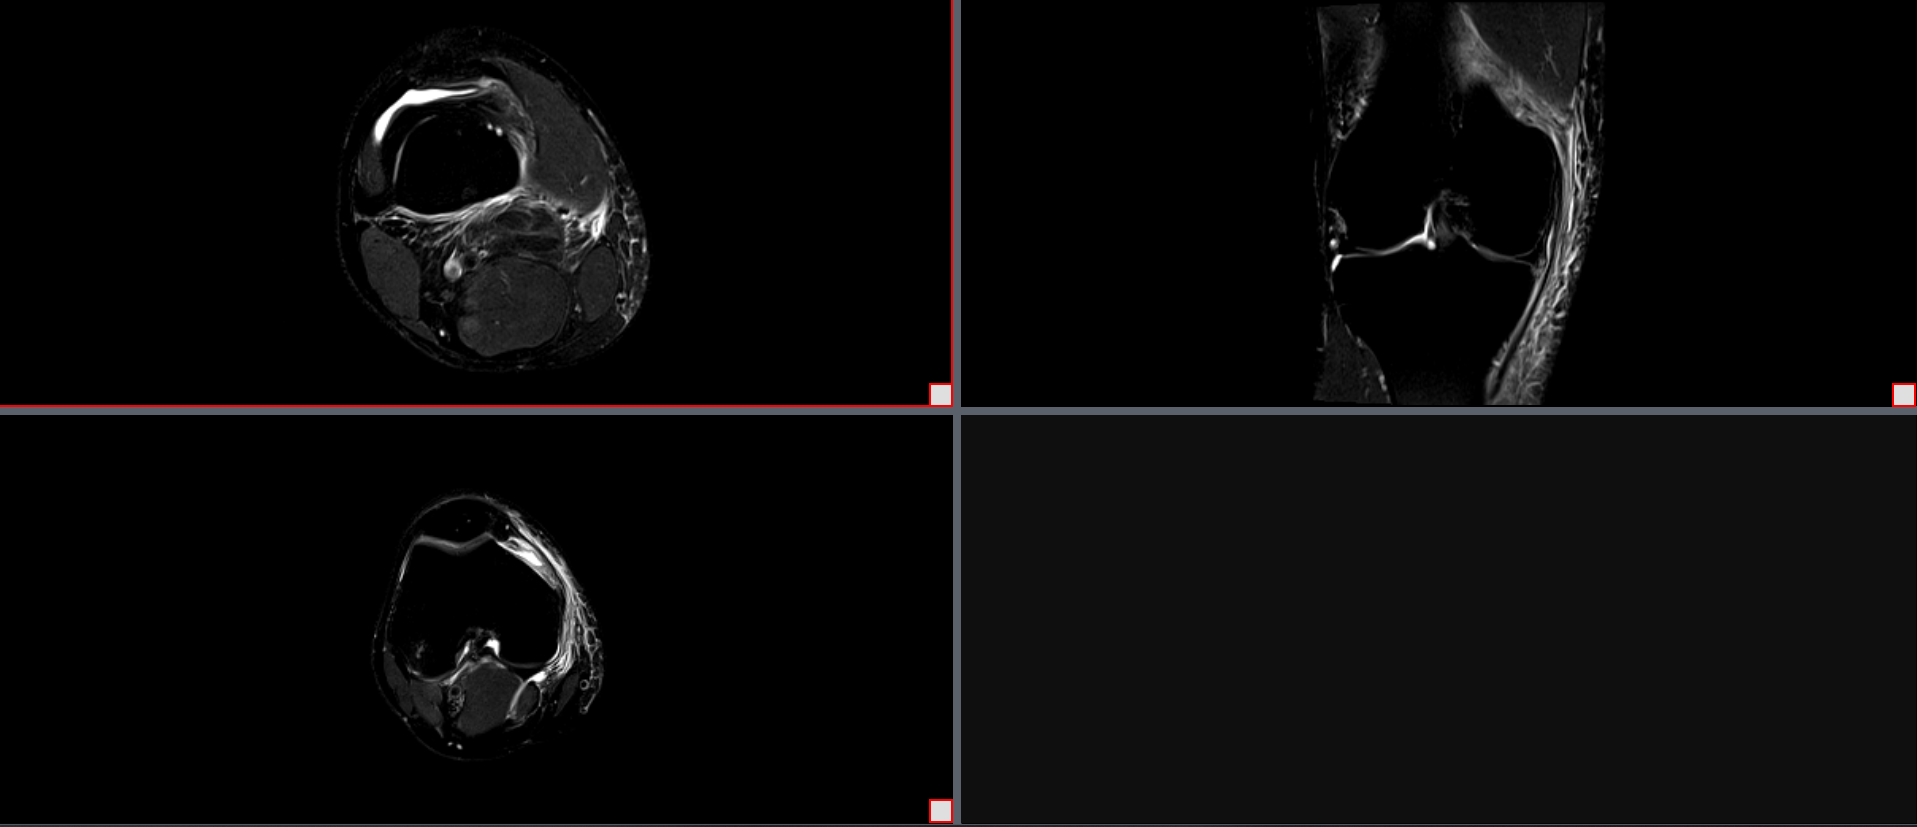
The Link Cells tool is used to link multiple series from different studies so that they can be manipulated together (e.g., synchronized scrolling).
To use this tool, two side-by-side series must be displayed in the viewer. Then select the red box in the lower right-hand corner. Once they are selected, click the Link Cells button. This will allow the cells to be linked to each other.

Link Cells: Side-by-Side Series
8.3 Toggle Study Time Line
The Toggle Study Time Line tool is used to show all available series that are currently selected for the patient. These are organized by time order and can be clicked and dragged onto a new cell. These will appear at the bottom of the screen with a description and a date.
To use the tool, click the Toggle Study Time Line. There needs to be more than one study associated to the name to see the study time line toggled.

Steps to use the Toggle Study Time Line
- Choose a series that has multiple images within in the viewer.
- Click the Link Images button.
- Make manipulations to the one image and all images will be manipulated in the same way.
8.4 Synchronize Series
The Synchronize Series tool is used to make all images in different series that have the same stack orientation to have the ability to be scrolled in sync. If the series are linked or they are in the same frame of reference, this will synchronize the operations. This can be a precursor to using other tools such as Scroll Row , Scroll Page , and Brightness/Contrast Color . To use this tool, there will need to be two or more series present in the viewer. First, select the right box in the bottom right hand corner. Then click the Synchronize Series button. This will sync the two series.

Steps to use the Synchronize Series
- Choose a series that has multiple images within the viewer.
- Click the Link Images button.
- Make manipulations to the one image and all images will be manipulated in the same way.
8.5 Stack
The Stack tool is used to scroll through the slices of a multi-slice image.

Steps to use the Stack button
- Select the Stack button
- Next, click and hold the left mouse button and move the mouse up or down to go through the slices of an image.
8.6 Scroll Frame
The Scroll Frame tool is used to scroll a frame at a time when viewing a stacked series in grid view.
To use this tool, the images need to be in a multi-imaged instance series or a multi-frame instance series that is displayed in a tiled layout. Once the layout is achieved click the Scroll Frame button. This allows the scroll wheel to scroll by the frame. This is the default setting.


8.7 Scroll Row
The Scroll Row tool is used to scroll a row at a time when viewing a stacked series in grid view.
To use this tool, the images need to be in a multi-imaged instance series or a multi-frame instance series that is displayed in a tiled layout. Then select the Scroll Row button. This allows the scroll wheel to scroll by the row. So, each image in the row in chronological order will scroll up or down. For example, if the tile layout is set up to be 5 frames/images in the row, then, the images will scroll up and down in rows of 5s.

8.8 Scroll Column
The Scroll Column tool is used to scroll a column at a time when viewing a stacked series in grid view.
To use this tool, the images need to be in a multi-imaged instance series or a multi-frame instance series that is displayed in a tiled layout. Then select the Scroll Column button. This allows the scroll wheel to scroll by the column. So, each image in the column in chronological order will scroll up or down. For example, if the tile layout is set up to be 5 frames/images in the column, then, the images will scroll up and down in columns of 5s.

8.9 Scroll Page
The Scroll Page tool is used to scroll a page at a time when viewing a stacked series in grid view.
To use this tool, the images need to be in a multi-imaged instance series or a multi-frame instance series that is displayed in a tiled layout. Then select the Scroll Page button. This allows the scroll wheel to scroll by the page. For example, if the tile layout is a 5 x 5, then, when the Scroll Page button is activated the next/previous 25 slices will appear when the scroll wheel is moved up or down.

8.10 Toggle Cine
The Toggle Cine tool is used to animate an image stack. If there are multiple cells with different image stacks selected, then they will animate in sync.
To use this tool, there needs to be at least one image stack selected. Then, click the Toggle Cine button to turn on/off the animation. Unless the animation is a loop, the Toggle Cine button will need to be off in order to use the scroll wheel function back and forth through the image stack.

8.11 Cine Player
The Cine Player tool is used to change the settings that are associated with the Toggle Cine tool.
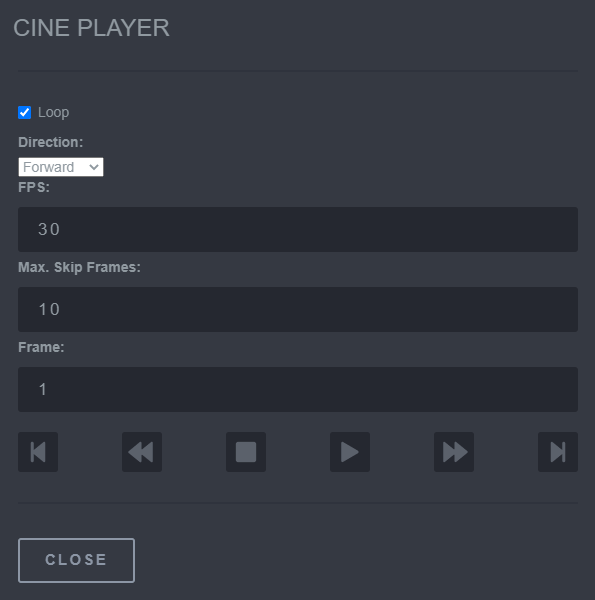
To use this tool, click the Cine Player button. A small window will pop up with Cine Player at the top. Within this window, click the First, Previous, Stop, Play, Next, and Last buttons to navigate through the stack. There are five other settings that can be changed. To turn the Loop function on and off, click the box next to the word Loop. The Loop function will put the animation of the stack into a continuous loop. The Direction settings allow the animation to know which direction through the stacked images the animation will go. The options are Forward (first to last), Backward (last to first), Shuffle (random order), and Sweep (first to last and back to first). The next setting is FPS (Frames per Second). This setting can be manipulated to provide how many images the user sees per second. Ultimately the speed in which the animation goes through the images is controlled here. The Max Skip Frames setting will skip over the specified number of frames during the shuffle in the direction setting. The Frame setting will simply state what image within the stack is being viewed currently. The frame number will be within the range of the stacked images.


Cine Player: Settings
9. Manipulation and Analysis Tools
The Manipulation and Analysis Tools are used to alter the image or obtain analytical information.
9.1 Analysis Tools
9.1.1 Line Profile
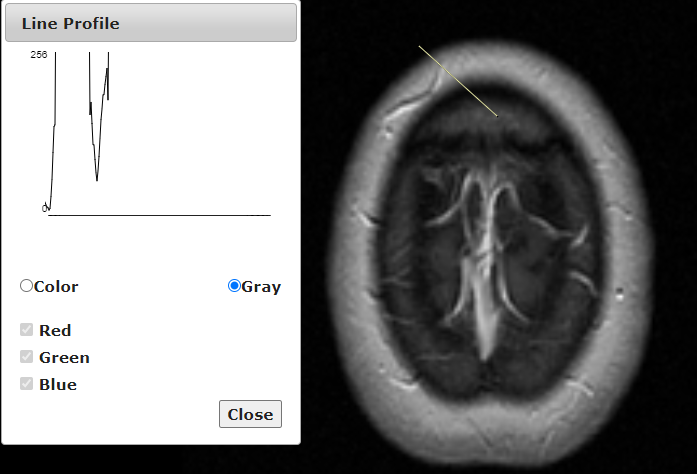
The Line Profile tool used to see the intensity value underneath a line that is drawn on the image. The intensity value is displayed in graph form. To use this tool, select an image. Then click the Line Profile button and the Line Profile will be displayed. The option to choose a Gray or Color scale in which to measure will be presented. The Color scale will measure in a default function of Red, Green, or Blue. Then click and hold anywhere on the image and draw a line. While drawing the line, the graph will show the intensity values as the line is drawn longer. Once the desired length of the line is drawn let go of the mouse and manipulate the red circle underneath the graph to see the part of the line desired.
Steps to use the Line Profile Tool
- Click the Line Profile button.
- Then, Click and draw a line across the desired section of the image.
- Drag the mouse cursor underneath the graph to get a value at a specific location along the line path.
9.1.2 Probe Tool
The Probe Tool allows to identify the density (pixel value) underneath the cursor, while also giving a x and y coordinate for location referencing. When looking at a CT image, the value underneath the cursor is displayed in X-ray attenuation using Hounsfield units (HU). For a grey scale image pixel value is the brightness of an image and Hue value is the number attributed to the shade of color. To use this tool, select the image that to use the Probe Tool button on. Click the Probe Tool button and then click again when the cursor is over the image to see the x,y and pixel value (Hue value for CT). Hold down the left-click of the mouse in order to see the information.

Steps to use the Probe Tool
- Click the Probe Tool button.
- Click and hold the mouse.
- Drag the cursor over the image to see the x,y coordinates and density on the image.
9.2 Manipulation Tools
9.2.1 Stretch Histogram Color
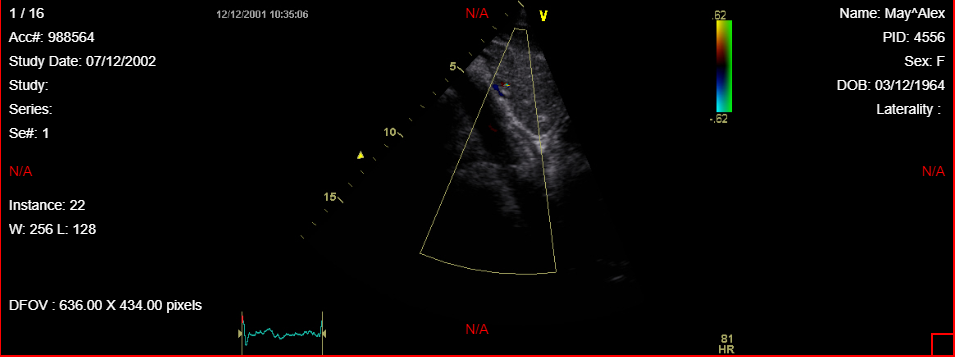
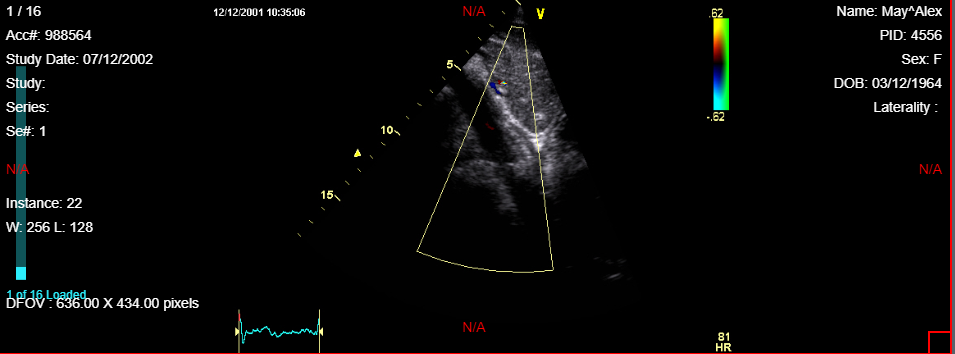
The Stretch Histogram Color tool used to improve the contrast within the image. To use this tool, select the Stretch Histogram Color button or the drop-down button consisting of the Brightness/Contrast Color / HSL (Hue, Saturation, Lightness) Color / Invert button and select the Stretch Histogram color button. Click repeatedly on the Stretch Histogram function button to contrast the image more.
Note
Stretch Histogram Color tool can only be activated when the image is in color.

Steps to use to the Stretch Histogram Color Tool
Click the Stretch Histogram Color button repeatedly until the desired effect is established.
Or
- Click the Stretch Histogram Color button.
- Click and drag the cursor to the left to apply the contrast.
9.2.2 Brightness/Contrast Color
The Brightness/Contrast Color Tool used to manipulate the brightness and contrast of the image. To use this tool, select the Brightness/Contrast Color Button from the drop-down button. Then, under each respective section, move the cursor left and right to get the desired effect.
Note
Brightness Contrast Color tool can only be activated when the image is in color.

Steps to use the Brightness/Contrast Color Tool
- Click on the Brightness/Contrast Color button.
- Slide the Brightness/Contrast buttons to adjust the brightness and contrast.
- Click OK to apply changes.

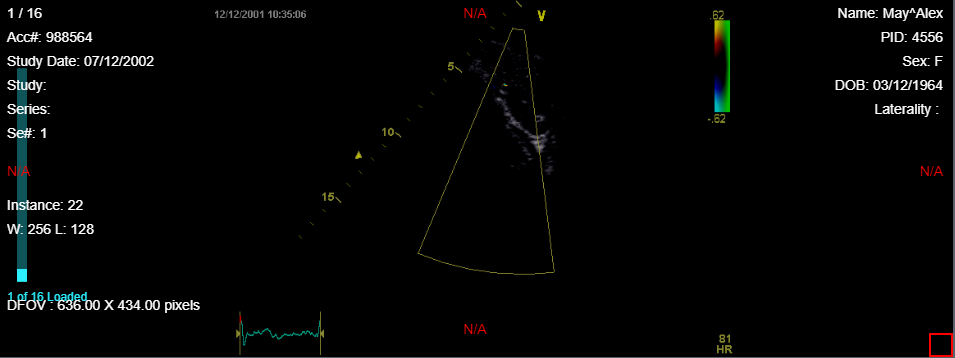
9.2.3 HSL (Hue, Saturation, Lightness) Color
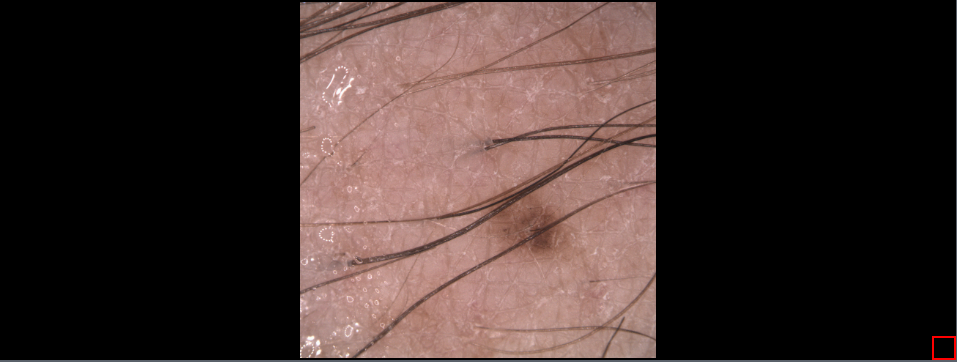
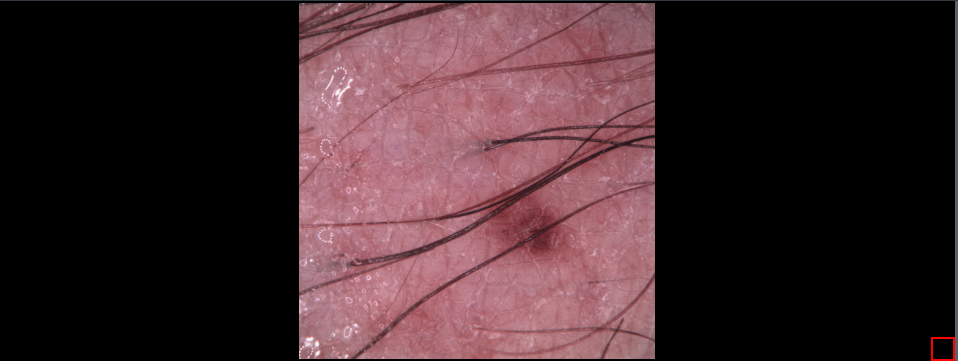
The HSL tool used to manipulate the image by the Hue, Saturation, and Lightness. The Hue, Saturation, and Lightness all are at a default of zero. To use this tool, select the HSL button or from the drop-down button. Then under each respective section move the cursor left and right to get the desired effect.
Note
HSL tool can only be activated when the image is in color.
Steps to use the HSL Tool
- Click the HSL button.
- Manipulate the Hue, Saturation, and Lightness of the image.
- Click OK to apply changes.
9.2.4 Window Level
The Window Level tool is used to adjust the brightness and contrast of an image. To apply this effect, select the Window Level button and click on an image and hold the left mouse button down. Move the mouse left and right to adjust the brightness. Move it up and down to adjust the contrast. To stop adjusting, let up on the left mouse button.

Steps to Change a Series Layout
- Click Window Level button
- Click and drag the cursor left/right or up/down to manipulate the contrast/brightness respectively.
9.2.5 Custom Window Level
The Custom Window Level tool is used to create and implement custom brightness and contrast templates.
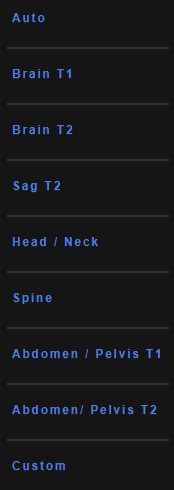
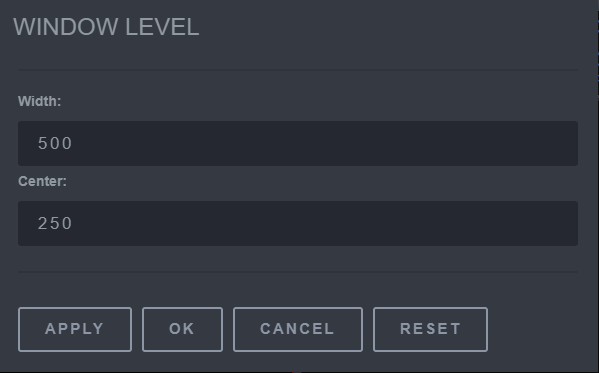
To apply the custom templates, click the Custom Window Level button. Then choose the desired custom template or click the custom button to manipulate the brightness (center) and contrast (width) to the desired effect.

Steps to use the Custom Window Level Tool on an X-Ray
- Click the Custom Window Level button.
- Adjust the Width (contrast) and Contrast (brightness).
- Click Apply.
- Click OK.
Steps to use the Custom Window Level Tool on 3D Image
- Click the Custom Window Level button.
- Chose a custom window level template.
- Click Apply.
- Click OK.
9.2.6 Invert
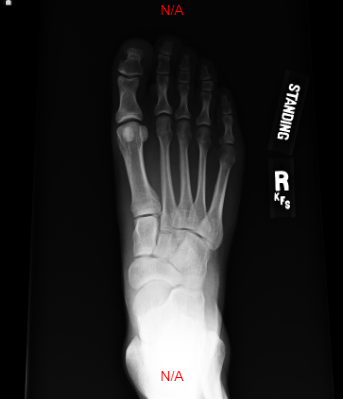
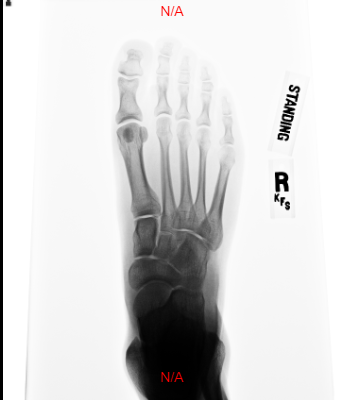
The Invert Tool used to make the image the complete opposite color from what is displayed. To use this tool, select the Invert Button or from the drop down button. The Invert function can be toggled on and off by one click of the Invert button.


Steps to use the Invert Tool
Click the Invert button to toggle invert button on/off
9.2.7 Rotate Clockwise
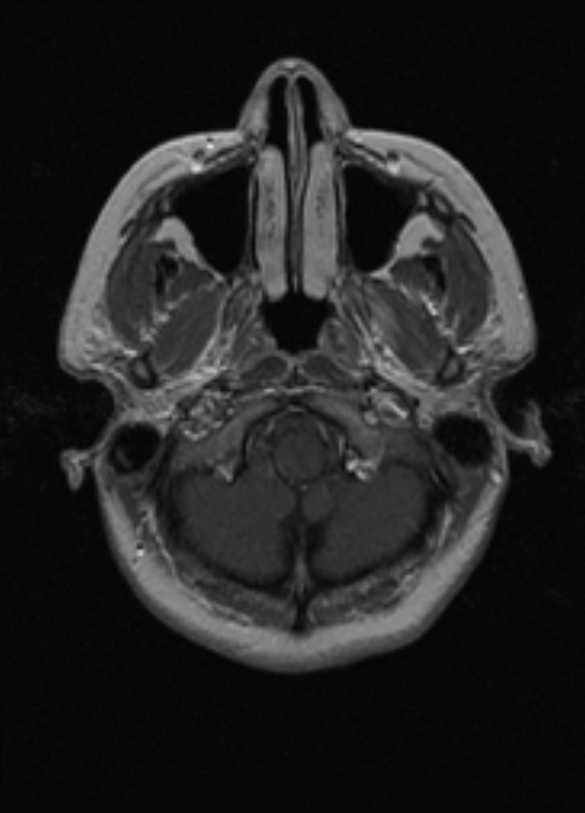
The Rotate Clockwise tool is used to rotate images 90 degrees clockwise with each click. To use this tool, select the Rotate Clockwise button or from the drop-down menu next to Rotate Counterclockwise / Flip / Reverse , and select the Rotate Clockwise button for each 90 degrees clockwise rotation.


Steps to use the Rotate Clockwise tool
Click the Rotate Clockwise image repeatedly to rotate the image in a 90 degrees clockwise motion.
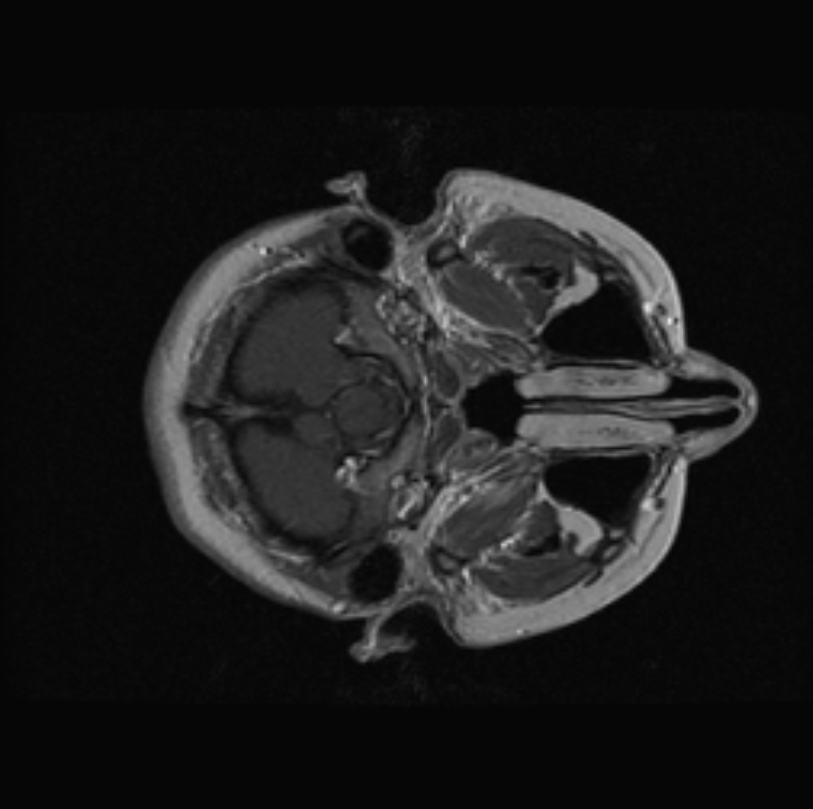
9.2.8 Rotate Counterclockwise
The Rotate Counterclockwise tool is used to rotate images 90 degrees counterclockwise with each click. To use this tool, select the Rotate Counterclockwise button or the drop-down menu next to Rotate Clockwise / Flip / Reverse and select the Rotate Counterclockwise for each 90 degrees counterclockwise rotation.

Steps to use the Counterclockwise Tool
Click the Rotate Counterclockwise image repeatedly to rotate the image in a 90 degrees counterclockwise motion.

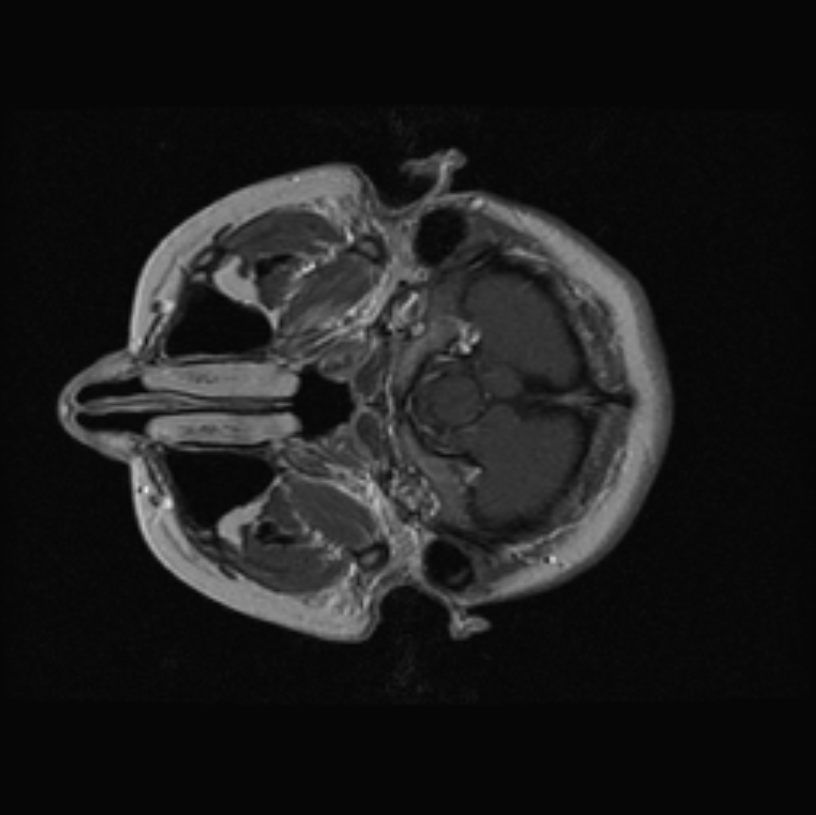
9.2.9 Flip
The Flip tool is used to mirror an image horizontally. The Flip tool button will flip the image across the x-axis. To use this tool, select the Flip button or the drop-down menu next to Rotate Clockwise / Rotate Counterclockwise / Reverse and select the Flip button every time that the horizontal mirror effect is wanted to apply to the image.

Steps to use the Flip Tool
Click the Flip button repeatedly to toggle the image between the original image and the flipped image.

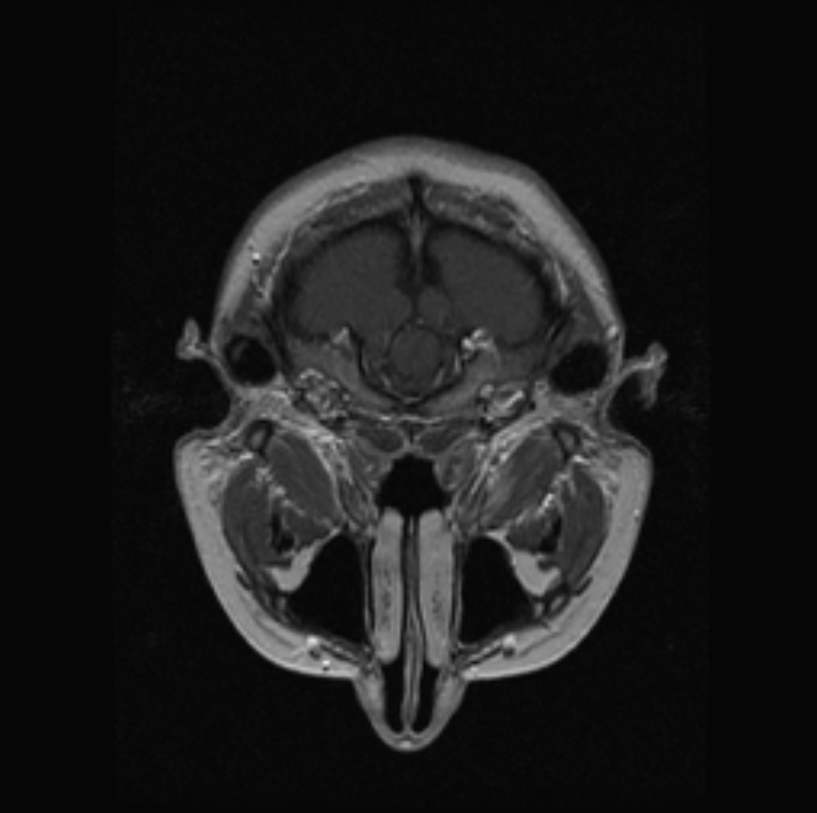
9.2.10 Reverse
The Reverse tool used to mirror an image vertically. The Reverse tool button will flip the image across the y-axis. To use this tool, select the Reverse button or the drop-down menu next to Rotate Clockwise / Rotate Counterclockwise / Flip and select the Reverse button every time that the vertical mirror effect is wanted to apply to the image.

Steps to use the Reverse Tool
Click the Reverse button repeatedly to toggle the image between the original image and the reversed image.

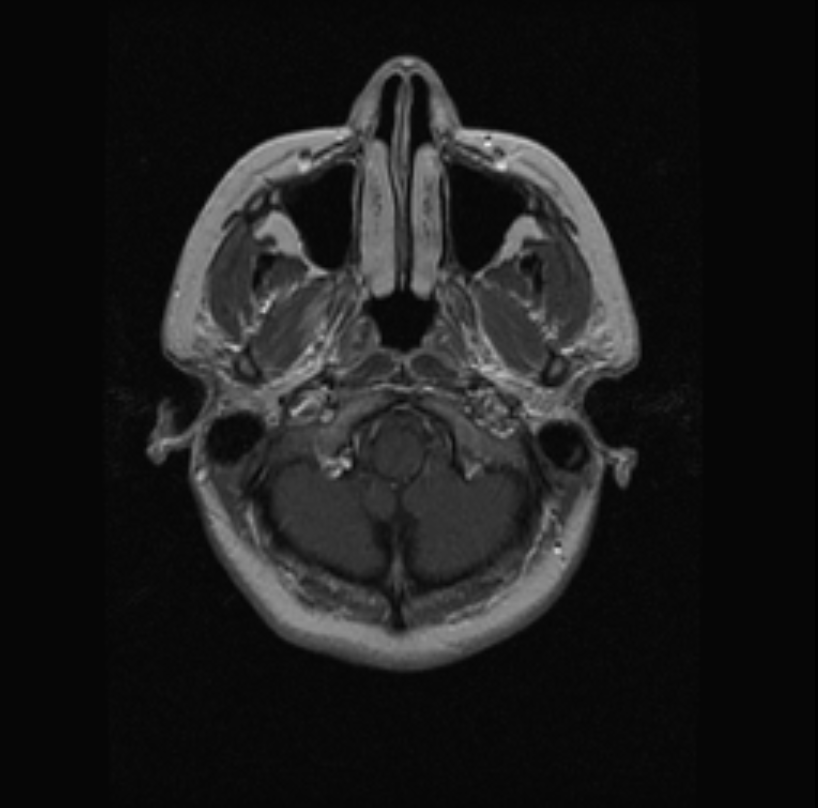
9.2.11 Align Center
The Align Center tool used to center the image along the y-axis in the viewer with one click. To use this tool, select the Align Center button or the drop-down menu next to the Align Left / Align Right button and select the Align Center button to center the image in the viewer along the y-axis.

Steps to use the Align Center Tool
Click the Align Center button.


9.2.12 Align Left
The Align Left tool used to bring the image to the left side of the viewer along the y-axis with one click. To use this tool, select the Align Left button or to the drop-down menu next to the Align Center / Align Right button and select the Align Left button to bring the image to the left side of the viewer along the y-axis.


Steps to use the Align Left Tool
Click the Align Left button.

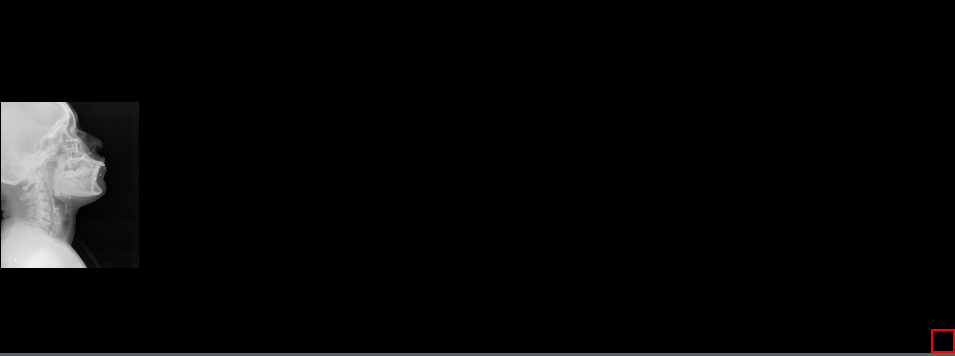
9.2.13 Align Right
The Align Right tool used to bring the image to the right side of the viewer along the y-axis with one click. To use this tool, select the Align Right button or to the drop-down menu next to the Align Left / Align Center button and select the Align Right button to bring the image to the left side of the viewer along the y-axis.

Steps to use the Align Right Tool
Click the Align Right button.

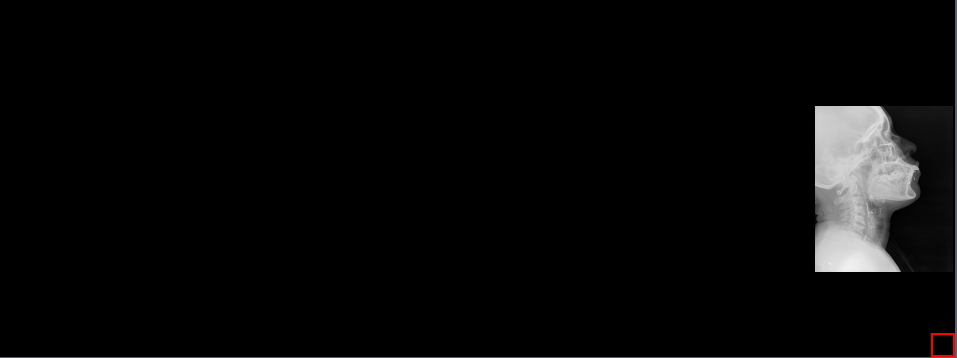
9.2.14 Align Top
The Align Top tool used to bring the image to the top of the viewer along the x-axis with one click. To use this tool, select the Align Top button or to the drop-down menu next to the Align Right / Align Middle button and select the Align Top button to bring the image to the top of the viewer along the x-axis.


Steps to use the Align Top Tool
Click the Align Top button.


9.2.15 Align Bottom
The Align Bottom tool used to bring the image to the bottom of the viewer along the x-axis with one click. To use this tool, select the Align Bottom button or to the drop-down menu next to the Align Middle / Align Top button and select the Align Bottom button to bring the image to the bottom of the viewer along the x-axis.

Steps to use the Align Bottom Tool
Click the Align Bottom button.


9.2.16 Align Middle
The Align Middle tool used to bring the image to the middle of the viewer along the x-axis with one click. To use this tool, select the Align Middle button or to the drop-down menu next to the Align Bottom / Align Top button and select the Align Middle button to bring the image to the bottom of the viewer along the x-axis.

Steps to use the Align Middle Tool
Click Align Middle button.


10. Adjusting Image Viewing Tools
The Adjusting Image Viewing Tools are used to hone in on specific parts of the image and create different views of the image to allow for a better understanding of what is being observed.
10.1 Pan
The Pan tool is used to move the image around the area of the screen. To use this tool, select the Pan button. Click and hold the left mouse button down on the image and drag to the area on the screen that is desired.

Steps to use the Pan Tool
- Click the Pan button.
- Click and hold the image.
- Move the image to the desired area of the viewer.
10.2 Zoom
The Zoom tool used to zoom in on the image. To use this tool, select the Zoom button. Click and hold the left mouse button down and move the mouse up or down to zoom in or zoom out.

Steps to use the Zoom Tool
- Click the Zoom button.
- Click and hold, then move the mouse forward/backwards to adjust the zoom level.
10.3 Toggle Full Screen
The Toggle Full Screen tool used to make the image into a full screen image. To use this tool, click the Toggle Full Screen button to switch between full screen and regular screen.

Steps to use the Toggle Full Screen Tool
- Click the Toggle Full Screen
- Click Esc to go back to the original image.
10.4 Reload
The Reload tool is used to reset back to the original image. This does not deal with any of the annotations on the image but brings the image back to the original captured image. To use this tool, select the Reload button and the image should rest to its original.

Steps to use the Reload Tool
Click the Reload button to revert to the original image.
10.5 Shutter
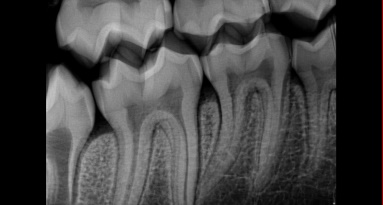
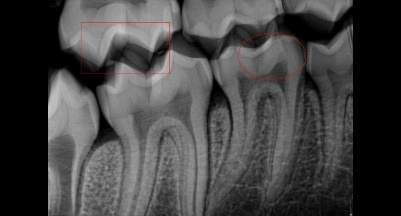
The Shutter Object tool is used to take a screen capture of a small section of the image and then removes everything in the image that is not selected. To use this tool, select the Rectangle , Ellipse , or Polygon tool and draw a shape around the image that is desired to be viewed. Then click the Shutter Object. This will show the part of the image within the shape that was created.

Steps to use the Shutter Object Tool
- Click the Rectangle or Ellipse Tool.
- Draw the rectangle/oval around the desired section.
- Click the Shutter Object button.
10.6 Edge Enhancement
The Edge Enhancement tool is used to view the lines composing an image in a clearer view. To use this tool, select the Edge Enhancement button. Click on the Edge Enhancement button and select the weight of sharpness.

Steps to use the Edge Enhancement Tool
- Click the Edge Enhancement button.
- Click the degree of sharpness to apply.
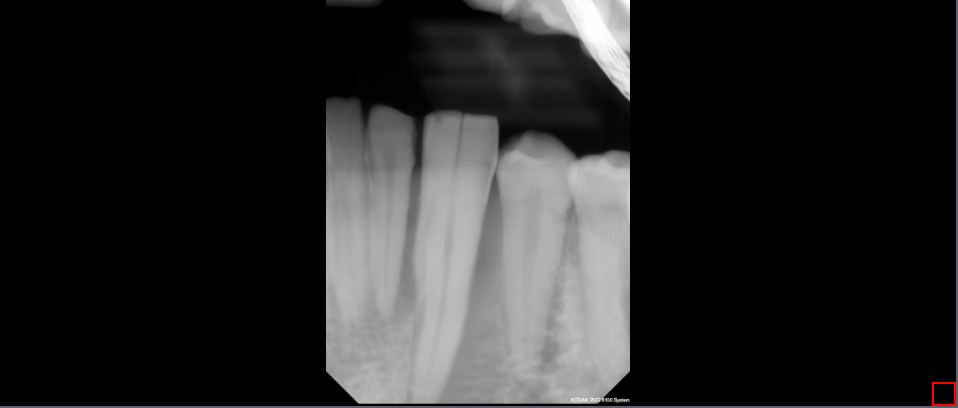
10.7 Toggle Endodontic
The Toggle Endodontic tool is used to view the dental pulp in a clearer view. To use this tool, select the Toggle Endodontic button. Click on the Toggle Endodontic button to turn the filter on or off.

Steps to use the Toggle Endodontic Tool
Click the Toggle Endodontic Tool button to toggle the Endodontic function on/off.

10.8 Toggle Periodontal
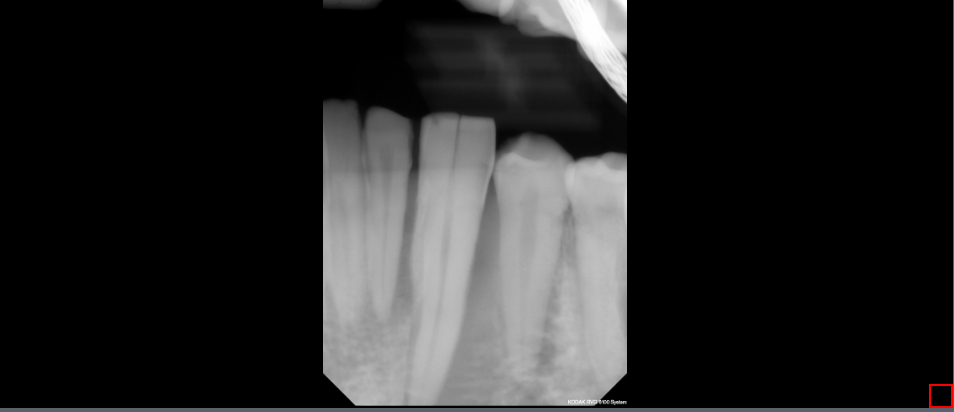
The Toggle Periodontal tool is used to view the gums in a clearer view. To use this tool, select the Toggle Periodontal button. Click on the Toggle Periodontal button to turn the filter on or off.

Steps to use the Toggle Periodontal Tool
Click the Toggle Periodontal Tool button to toggle the Periodontal function on/off.

10.9 Toggle Dentin
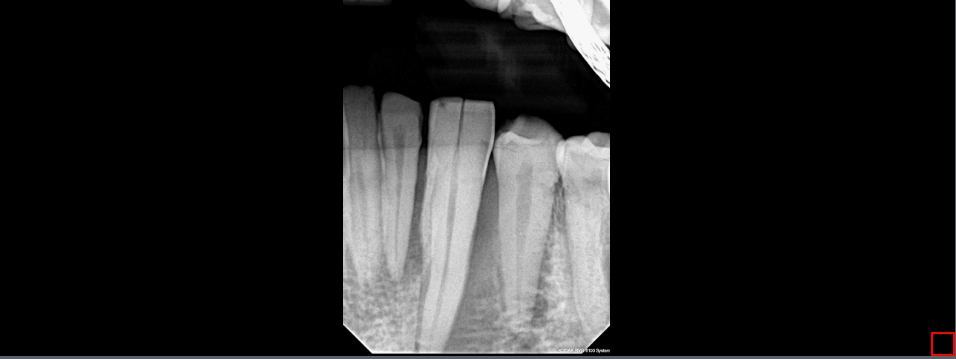
The Toggle Dentin tool used to view the hard-boney tissue that is beneath the enamel. To use this tool, select the Toggle Dentin button. Click on the Toggle Dentin button to turn the filter on or off.

Steps to use the Toggle Dentin Tool
Click the Toggle Dentin Tool button to toggle the Dentin function on/off.

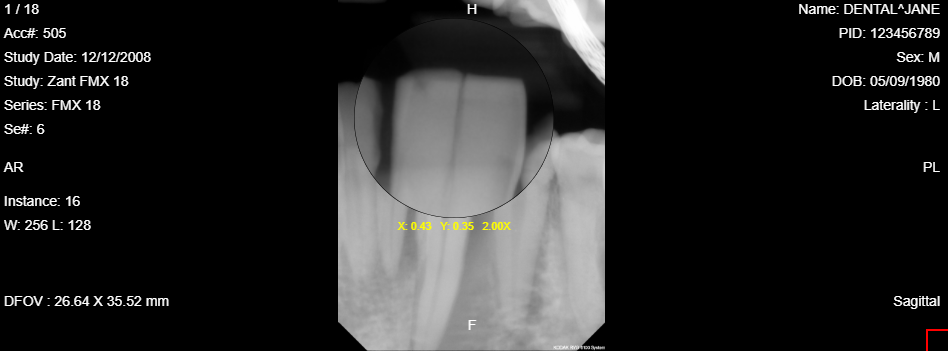
10.10 Spyglass
The Spyglass tool used to look at the image through a focused magnified image. To use this tool, click the Spyglass button and move the cursor around. Click and hold in order to use the tool and see the magnified portion of the image. It will provide a positioning by x and y beneath the magnifying glass. Also, there is the amount of magnification that is being provided, placed next to the x and y position numbers. Finally, the size of the magnifying glass can be increased or decreased by the scroll wheel.

Steps to use the Spyglass Tool
- Click the Spyglass button.
- Click and hold to see a magnified view of the image.
- Use the scroll wheel to adjust the size of the magnified view.
10.11 Spyglass Invert
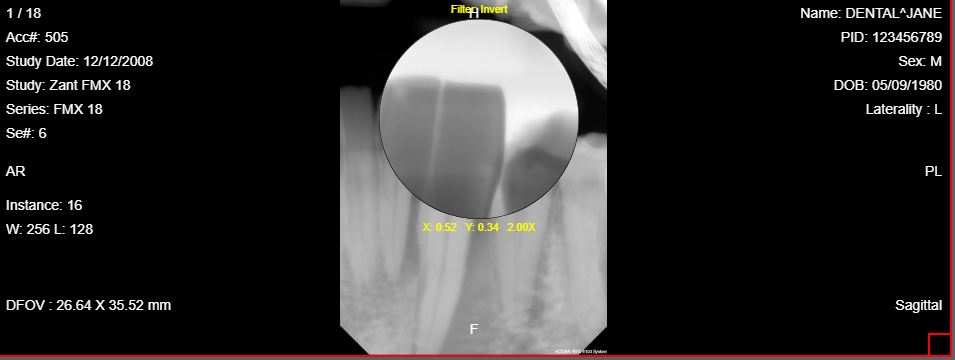
The Spyglass Invert tool used to look at the image through the invert function but in a more focused view than the whole image. The image is also magnified so a close up of that particular part of the image can be viewed. To use this tool, click the Spyglass Invert button. Then, click and hold to move the spyglass tool around to view the image through the spyglass. It will provide positioning by x and y beneath the magnifying glass. Also, there is the amount of magnification that is being provided, placed next to the x and y position numbers. Finally, the size of the magnifying glass can be increased or decreased by the scroll wheel.

Steps to use the Spyglass Invert Tool
- Click the Spyglass Invert button.
- Click and hold to see a magnified view of the image.
- Use the scroll wheel to adjust the size of the magnified view.
10.12 Spyglass Clahe
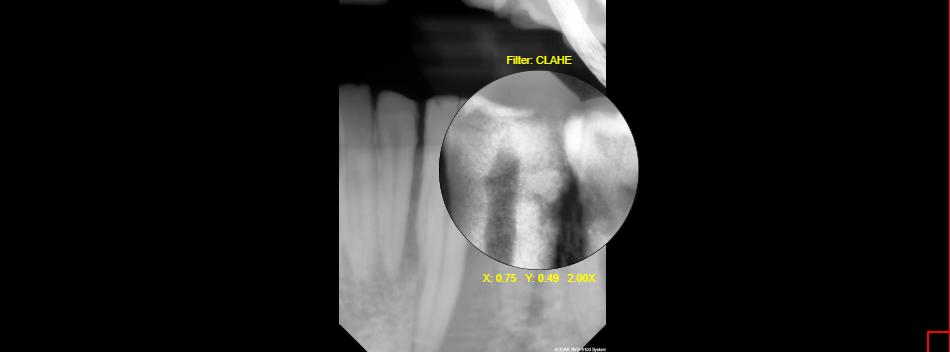
The Spyglass Clahe tool is used to view the magnified image in enhanced contrast. Clahe stands for Contrast Limited Adaptive Histogram Equalization. To use the tool, click on the Spyglass Clahe and move the cursor around. Click and hold to move the spyglass tool around when viewing the image through the spyglass. It will provide positioning by x and y beneath the magnifying glass. Also, there is the amount of magnification that is being provided, placed next to the x and y position number. Finally, the size of the magnifying glass can be increased or decreased by the scroll wheel.

Steps to use the Spyglass Clahe
- Click the Spyglass Clahe button.
- Click and hold to see a magnified view of the image.
- Use the scroll wheel to adjust the size of the magnified view.
10.13 Spyglass Reveler
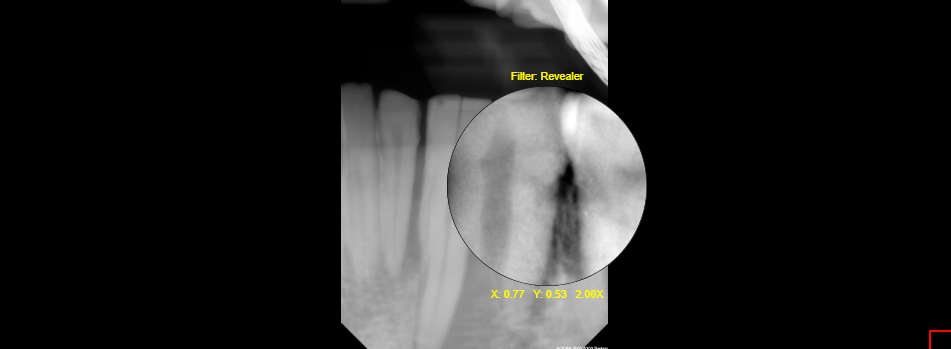
The Spyglass Reveler tool used to view the magnified image through a specialized image processing filter. This specialized image processing filter shows more detailed information underneath a magnified view. To use the tool, click on the Spyglass Reveler and move the cursor around. Click and hold to move the spyglass tool around when viewing the image through the spyglass. It will provide a positioning by x and y beneath the magnifying glass. Also, there is the amount of magnification that is being provided, placed next to the x and y position number. Finally, the size of the magnifying glass can be increased or decreased by the scroll wheel.

Steps to use the Spyglass Reveler
- Click the Spyglass Invert button.
- Click and hold to see a magnified view of the image.
- Use the scroll wheel to adjust the size of the magnified view.
11. Annotation Images and Measuring Tools
Annotation Images and Measuring Tools tools can be found on the Viewer Tab by selecting the Annotations button. These tools can be used to measure or highlight areas on an image. All effects that are placed on the image using these tools can be done without losing the original image.
11.1 Annotation Tools
11.1.1 Select
The Select tool used to have a default cursor.
To use this tool, select the Select tool button or the drop-down menu button next to one of the buttons from the list below. Then select the Select tool button. With one click, a default cursor will become the cursor.
- Arrow
- Curve
- Ellipse
- Free Hand
- Highlight
- Line
- Note
- Point
- Polygon
- Polyline
- Rectangle
- Text
- Text Pointer


Steps to use the Select Tool
Click on the Select button.
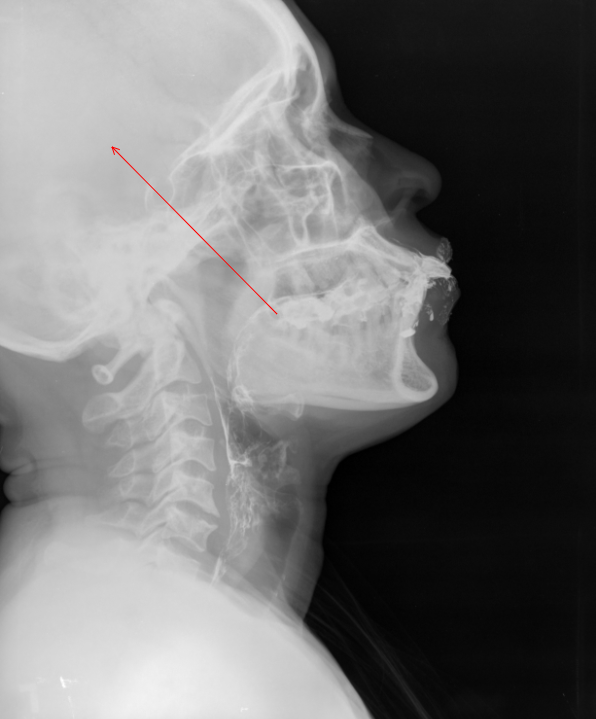
11.1.2 Arrow
The Arrow tool used to draw an arrow. It provides two green dots as a guide for where the arrow will be pointing. Moving the big green dot allows the arrow to orbit the smaller green dot. There are two small boxes used to manipulate the arrows length.
To use this tool, select the Arrow tool button or the drop-down menu button next to one of the buttons from the list below. Then select the Arrow tool button. The Arrow tool works well with the Point tool.
- Curve
- Ellipse
- Free Hand
- Highlight
- Line
- Note
- Point
- Polygon
- Polyline
- Rectangle
- Select
- Text
- Text Pointer

Steps to use the Arrow Tool
- Click the Arrow button.
- Click and drag the cursor to make any size arrow.
- Adjust the size of the arrow by the boxes on either side of the arrow.
- Adjust the direction of the arrow by the manipulating the two green dots.
- Click on the arrow to reset it on the image.
11.1.3 Point
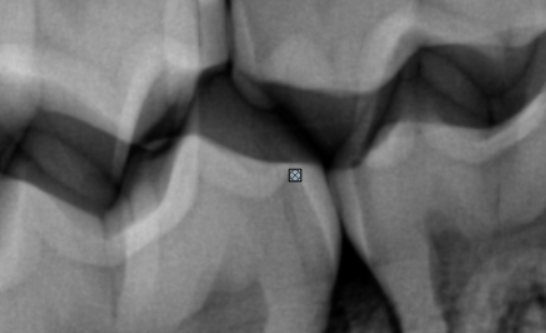
The Point tool used to create a small circle with an x in the center.
To use this tool, select the Point tool button or the drop-down menu button next to one of the buttons from the list below. Then select the Arrow tool button. The Point tool works well with the Arrow tool.
- Arrow
- Curve
- Ellipse
- Free Hand
- Highlight
- Line
- Note
- Polygon
- Polyline
- Rectangle
- Select
- Text
- Text Pointer

Steps to use the Point Tool
- Click the Point
- Click the spot where to place the Point tool.
- Click off the Point to set the point on the image.
- Click on the Point tool to reset the point.
11.1.4 Rectangle
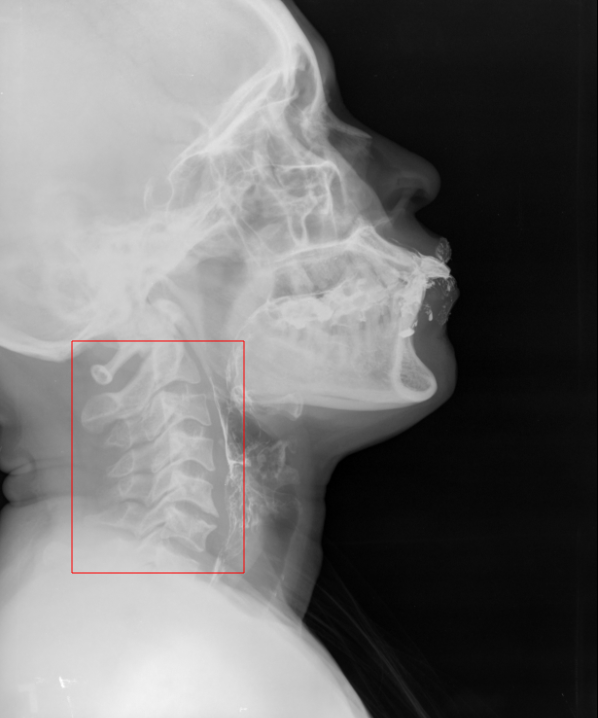
The Rectangle tool used to create an outline of a rectangle. The rectangle can be resized and rotated by selecting an already created rectangle and manipulating the small boxes and green dots.
To use this tool, select Rectangle tool button or the drop-down menu button next to the one of the buttons from the list below. Then select the Rectangle tool button and draw the rectangle to the size desired.

Steps to use to the Rectangle Tool
- Click the Rectangle button.
- Click and drag the cursor to create a rectangle.
- Manipulate the size by clicking and dragging the small boxes.
- Click on the Point tool to reset the point.
11.1.5 Ellipse
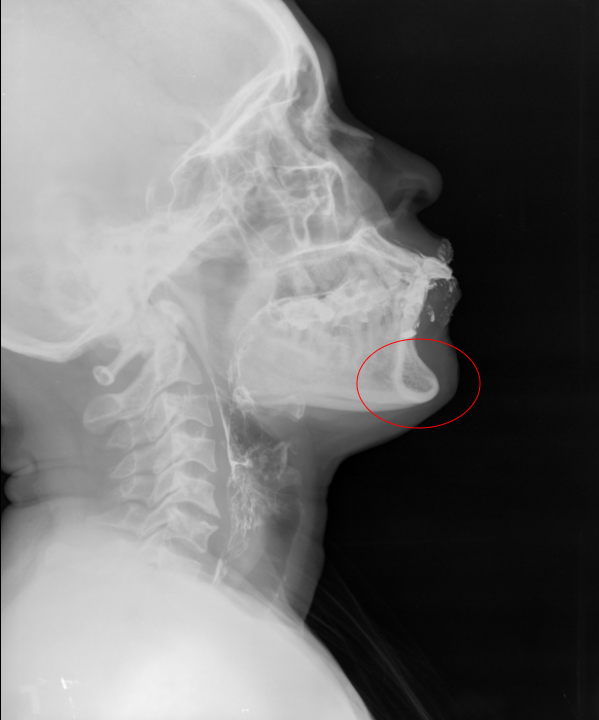
The Ellipse tool used to create an outline of an oval. The oval can be resized and rotated by selecting an already created rectangle and manipulating the small boxes and green dots.
To use this tool, select the Ellipse button or the drop-down menu button next to one the buttons from the list below and then select the Ellipse tool button.

Steps to use to the Ellipse Tool
- Click the Ellipse button.
- Click and drag the cursor to create a Oval.
- Manipulate the size by clicking and dragging the small boxes.
- Click on the Point tool to reset the point.
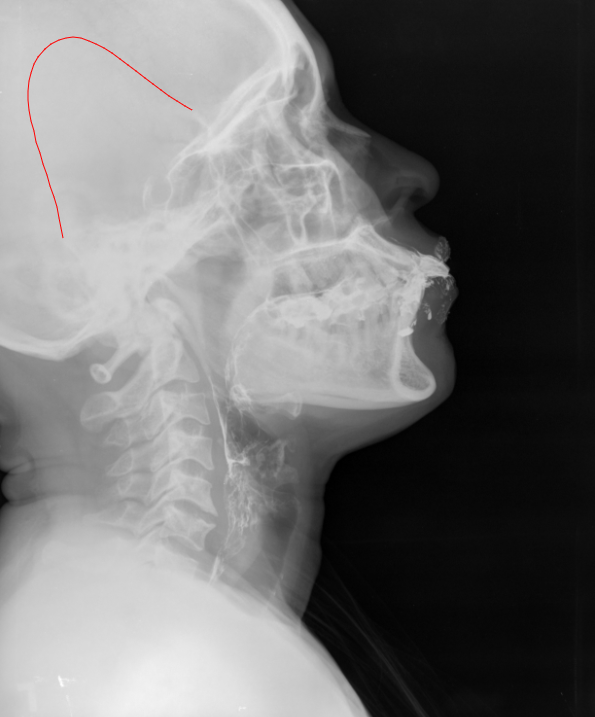
11.1.6 Curve
The Curve tool used to draw a line that will have a curve in it.
To use this tool, select the Curve button or the drop-down menu button next to a button from the list below and select the Curve tool button. Then click on the image and draw a line that is desired. The next click will then make the line curve. This creates a start point, apex, and end point.
- Arrow
- Ellipse
- Free Hand
- Highlight
- Line
- Note
- Point
- Polygon
- Polyline
- Rectangle
- Select
- Text
- Text Pointer

Steps to use the Curve Tool
- Click the Curve button.
- Click and drag the cursor to create a line.
- Click on another part of the image to create the curve.
- Next, click on another part of the image to continue making a curved line or double click to set the line.
- Manipulate the curve by moving the boxes or manipulate the two green circles.
- Click on the curve to reset it on the image.
11.1.7 Line
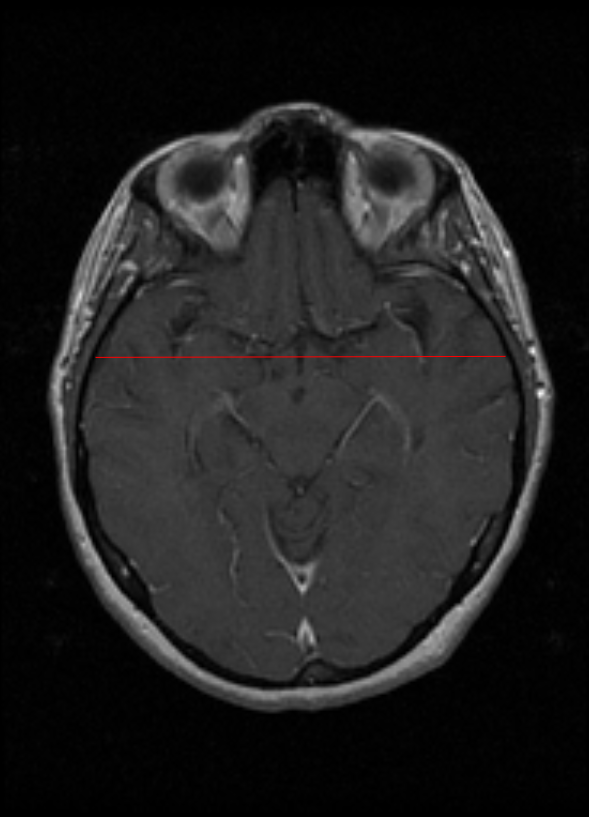
The Line tool used to create a line. The line can be resized and rotated by selecting an already created line and manipulating the small boxes and green dots.
To use this tool, select Line tool button or the drop-down menu button next to a button from the list below and then select the Line tool button. Then draw the Line to the size desired.
- Arrow
- Curve
- Ellipse
- Free Hand
- Highlight
- Note
- Point
- Polygon
- Polyline
- Rectangle
- Select
- Text
- Text Pointer

Steps to use the Line Tool
- Click the Line button.
- Click and drag the cursor to create the size line desired.
- Click on the small boxes or two green circles to manipulate the line.
- Click off the image to set the line.
11.1.8 Free Hand
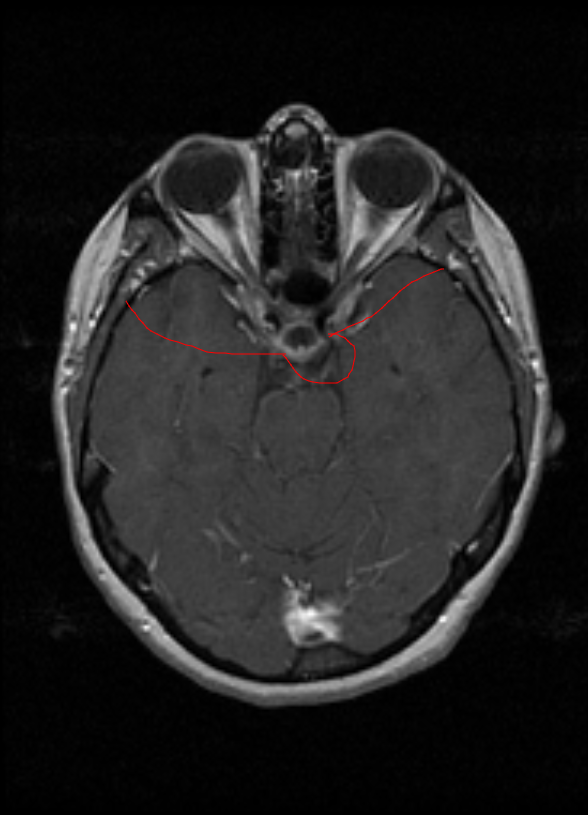
The Free Hand tool is used to simulate the drawing of a pen. The lines can be resized and rotated by selecting an already created line and manipulating the small boxes and green dots.
To use this tool, select Free Hand tool button or the drop-down menu button next to one of the buttons listed below and select the Free Hand tool button. Then draw the Free hand to the size desired.

Steps to use the Free Hand Tool
- Click the Free Hand button.
- Click and draw a line.
- Click on the small boxes or two green circles to manipulate the line.
- Click off the image to set the line.
11.1.9 Polyline
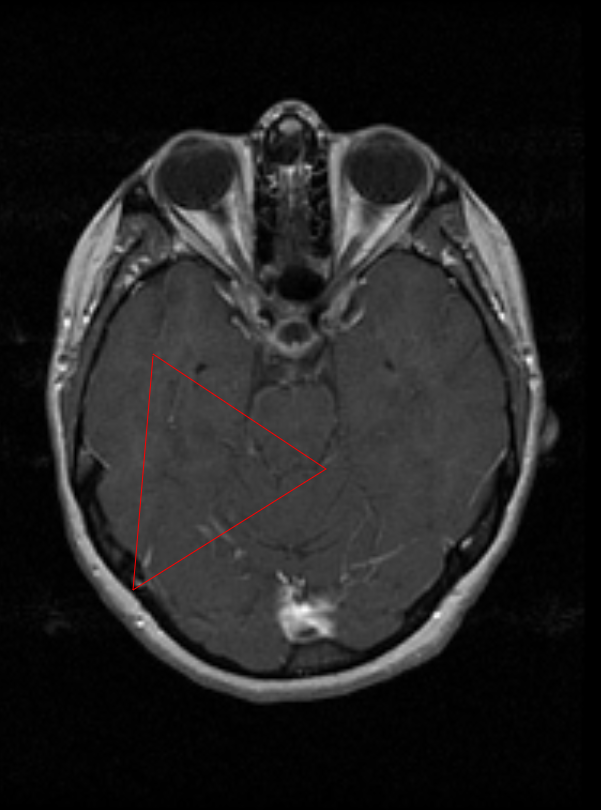
The Polyline tool used to create a line in any direction within the x,y-axis.
To use this tool, select Polyline tool button or the drop-down menu button next to one of the buttons from the list below and then select the Polyline tool button. Then draw the Polyline to the shape and size desired by clicking after each line is set. Double click to allow access the resizing and rotation function.

Steps to use the Polyline Tool
- Click the Polyline button.
- Click and drag to create a line.
- Click repeatably to create more lines to draw a polygon.
- Double click to set the polyline.
- Click on the polyline.
- Click on the small boxes or two green circles to manipulate the line.
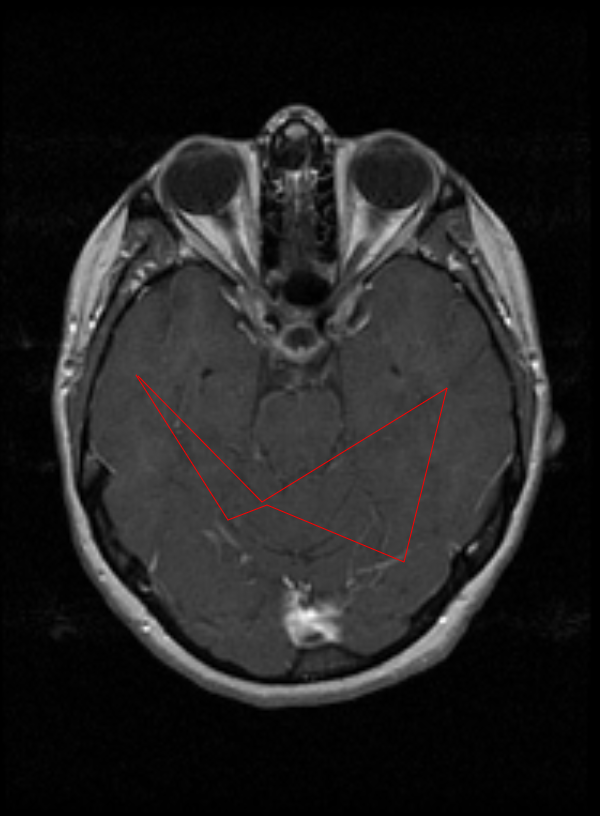
11.1.10 Polygon
The Polygon tool is used to create three or more connected lines to create a closed shape. The Polygon can be resized and rotated by selecting an already created polygon and manipulating the small boxes and green dots.
To use this tool, select Polygon tool button or the drop-down menu button next to one of the buttons listed below and then select the Polyline tool button. Then draw the Polygon to the shape and size desired. Once the finished drawing is in the desired shape, double click to close out shape.

Steps to use the Polygon Tool
- Click the Polygon button
- Click and drag to create a line.
- Click repeatedly to create a polygon.
- Double click to close the polygon.
- Click on the polygon.
- Click on the small boxes or two green circles to manipulate the line.
11.1.11 Text
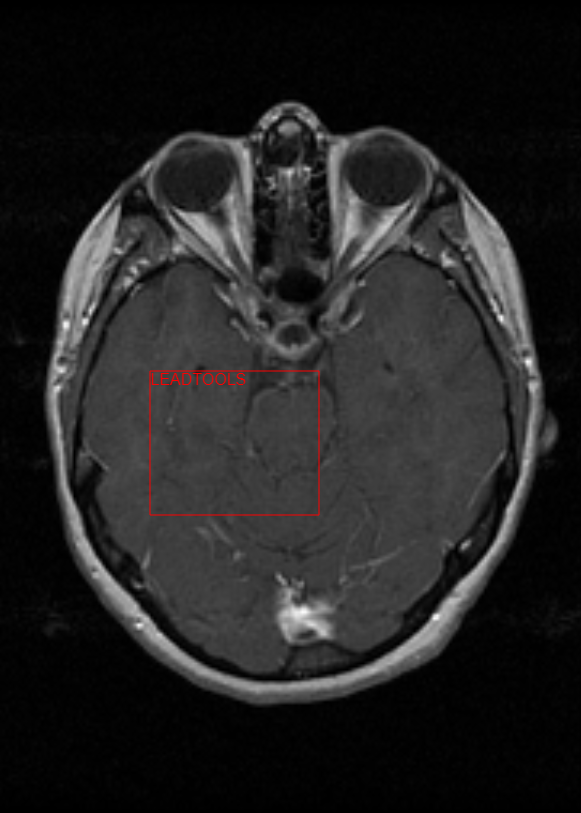
The Text tool used to create a text box that will overlay on the image. The Text tool can be resized and rotated by selecting an already created Text box and manipulating the small boxes and green dots.
To use this tool, select Text tool button or the drop-down menu button next to one of the buttons listed below and then select the Text tool button. Then draw the Text box to the shape and size desired. Once the Text box is created, click on the box to have the ability to write in it.
- Arrow
- Curve
- Ellipse
- Free Hand
- Highlight
- Line
- Note
- Point
- Polygon
- Polyline
- Rectangle
- Select
- Text Pointer

Steps to use the Text Tool
- Click the Text button.
- Click and drag to create a Text box.
- To manipulate the size and the rotation of the Text box click the small boxes and the green circles.
- Double click the Text box to have the ability to write in the text box.
- Click on the image to set the Text box.
- To reset the Text box click on the Text box.
11.1.12 Note
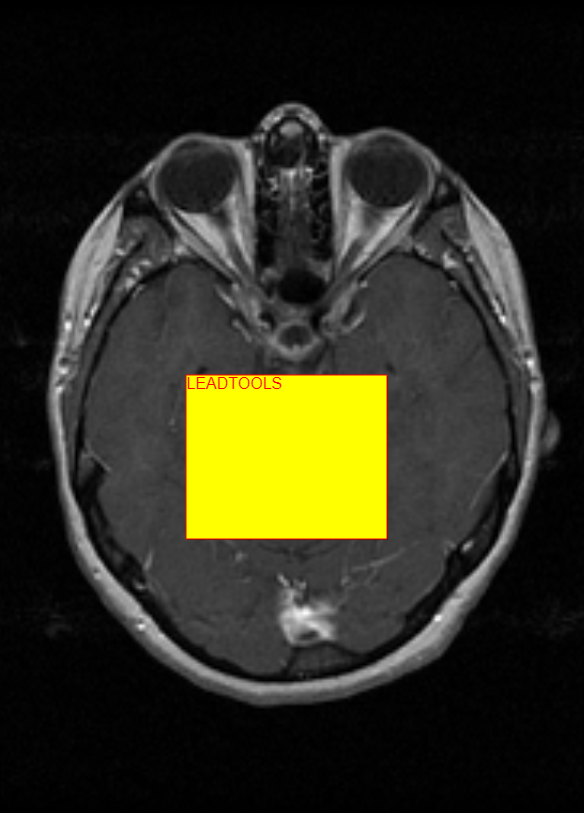
The Note tool used to create a sticky note that will be displayed on the image. The Note tool can be resized and rotated by selecting an already created Note box and manipulating the small boxes and green dots.
To use this tool, select Note tool button or the drop-down menu button next to one of the buttons listed below and then select the Note button. Then draw the sticky note to the shape and size desired. Once the Note is created, click on the box to have the ability to write in it.
- Arrow
- Curve
- Ellipse
- Free Hand
- Highlight
- Line
- Point
- Polygon
- Polyline
- Rectangle
- Select
- Text
- Text Pointer

Steps to use the Note Tool
- Click the Note button.
- Click and drag to create a Text box.
- To manipulate the size and the rotation of the Text box click the small boxes and the green circles.
- Double click the Text box to have the ability to write in the text box.
- Click on the image to set the Text box.
- To reset the Text box click on the Text box.
11.1.13 Highlight
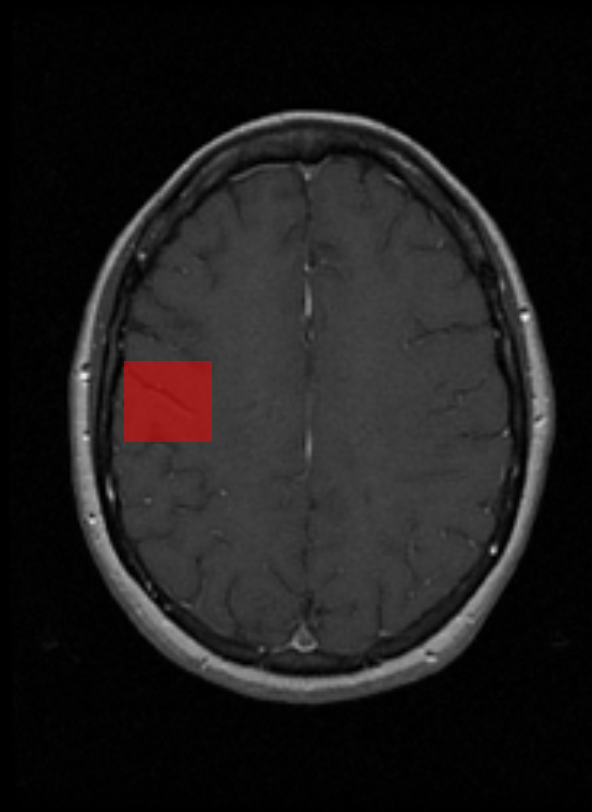
The Highlight tool used to create an area that will be highlighted. The Highlight tool can be resized and rotated by selecting an already created highlighted area and manipulating the small boxes and green dots.
To use this tool, select Note tool button or the drop-down menu button next to one of the buttons listed below and then select the Highlight button. Then draw the highlight to the shape and size desired.

Steps to use the Highlight Tool
- Click the Highlight button.
- Click and drag to highlight the area desired.
- To manipulate the size and the rotation of the Text box click the small boxes and the green circles.
- Click on the image to set the Highlight tool.
- Click on the Highlighted area to reset the tool.
11.1.14 Text Pointer
The Text Pointer tool used to create a text box with the first click and then a line on the second click. The Text Pointer tool can be resized and rotated by selecting an already created highlighted area and manipulating the small boxes and green dots.
To use this tool, select Text Pointer tool button or the drop-down menu button next to the one of the buttons listed below and then select the Text Pointer button. Then draw the Text Pointer box to the shape and size desired. Once the Text Pointer is created, click where the line from the text box is going to go. To write in the box, click on the box and a blinking cursor will appear.

Steps to use the Text Pointer Tool
- Click the Text Pointer button.
- Click and drag to create a Text box.
- Click on a point to drag the pointer to.
- To manipulate the size and the rotation of the Text box click the small boxes and the green circles.
- Click on the image to set the Text Pointer Tool.
- Click on the Text Pointer Tool to reset the Text box and Pointer.
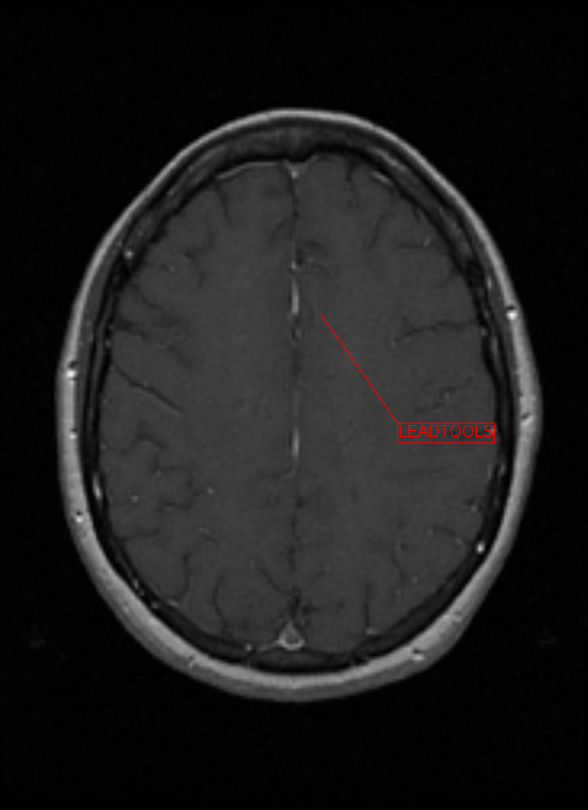
11.2 Measurement Tools
A set of Measurement Tools is available to measure distance or angles on an image (e.g., Ruler ).

11.2.1 Ruler
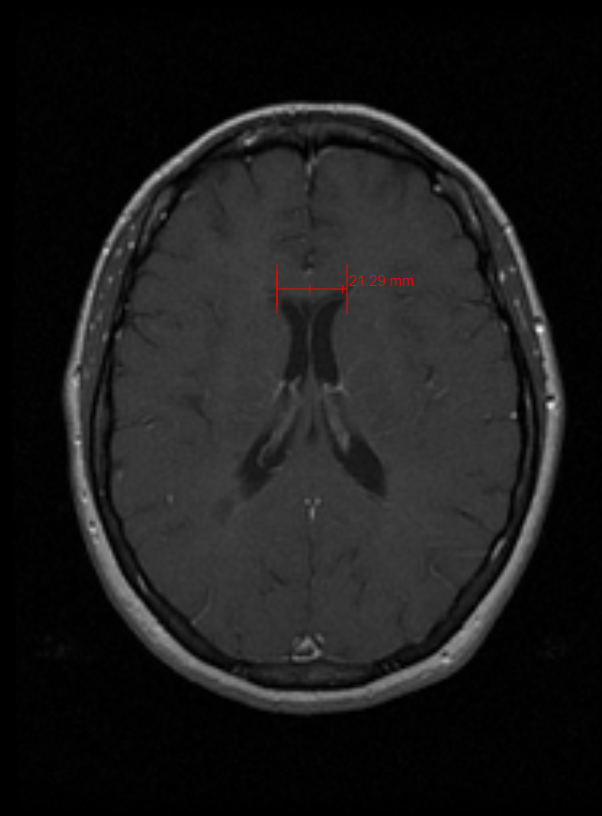
The Ruler tool used to measure the actual distance from one point to another on an image.
WARNING
Due to limitations in data acquisition, the calculations are approximate.
To use the Ruler tool, select the Ruler button or the drop-down menu button next to one of the buttons listed below and then select the Ruler button. Click and hold on an image at the first point of measurement. Drag to the second point and let up on the mouse. The measurement will be displayed in a unit of measure selected. Millimeters is the default unit of measure.


Steps to use the Ruler Tool
- Click the Ruler Tool.
- Click and drag the Ruler to the length desired.
- To manipulate the size and the rotation of the Text box click the small boxes and the green circles.
- Click on the image to set the Ruler Tool.
- Click on Ruler to reset it.
11.2.2 Poly Ruler
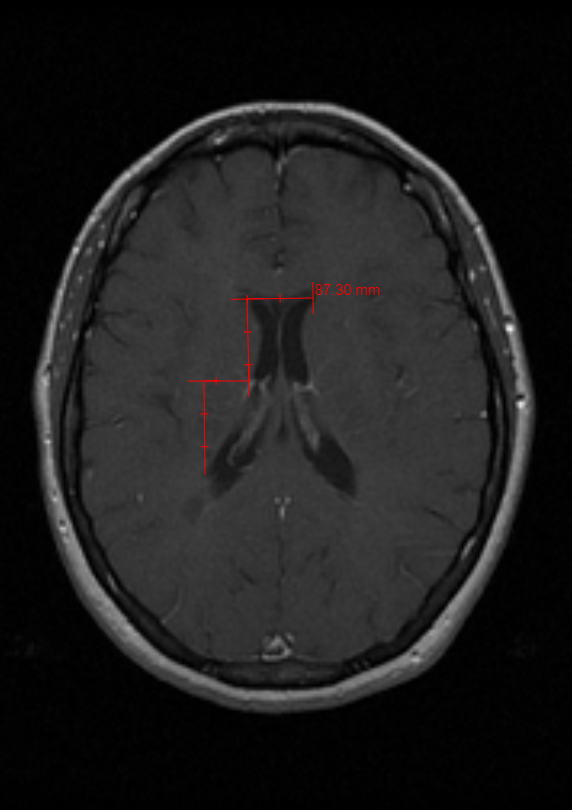
The Poly Ruler tool is similar to the Ruler tool but is used for non-linear measurements.
WARNING
Due to limitations in data acquisition, the calculations are approximate.
To use the Poly Ruler tool, click on the Poly Ruler button or the drop-down menu button next to one of the buttons listed below and then select the Poly Ruler button. Click and drag on the first point of the measurement, then click and drag on the second point of the measurement, then the third, and so on until finished creating a measured line. The measurement will be displayed in millimeters by default.

Steps to use the Poly Ruler Tool
- Click the Poly Ruler Tool.
- Click and drag the Poly Ruler to the length desired.
- Click continuously to change the direction of the Poly Ruler.
- To manipulate the size and the rotation of the Text box click the small boxes and the green circles.
- Double-click on the image to set the Poly Ruler Tool.
- Click on Poly Ruler to reset it.
11.2.3 Protractor
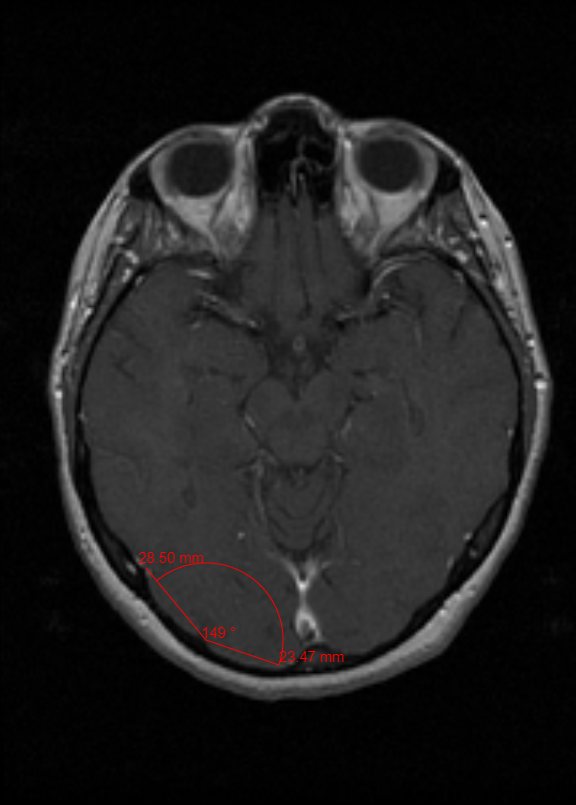
The Protractor tool is used to measure angles.
WARNING
Due to limitations in data acquisition, the calculations are approximate.
To use the Protractor tool, select the Protractor button. Click and drag starting from the point where the angle will be measured to the point where the first line will end. Then click and drag to the point where the second line will end. The measurement of the angle will appear in red.

Steps to use the Protractor Tool
- Click the Protractor button.
- Click and drag the line.
- Click and drag the other line to create the angle.
- To manipulate the size and the rotation of the Text box click the small boxes and the green circles.
- Double-click on the image to set the Protractor Tool.
- Click on the Protractor to reset it.
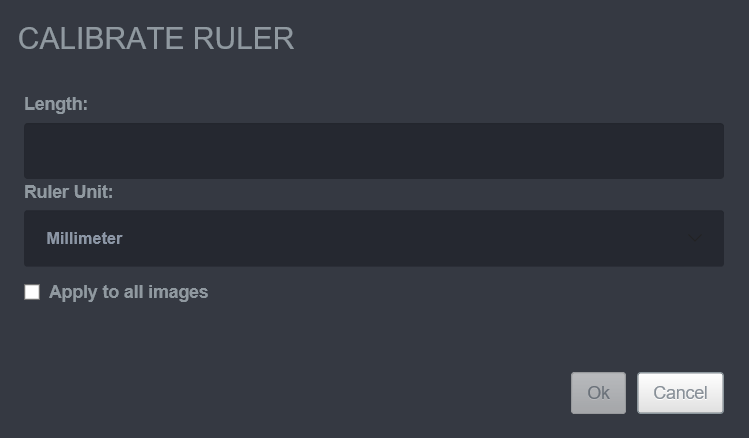
11.2.4 Calibrate Ruler
The Calibrate Ruler tool used to measure an object of known size and then used to manually put in the length of the of the object. This will calibrate the other Ruler functions ( Ruler , Poly Ruler ) to then use the measurement from the Calibration Ruler as the standard for anything measured after that.

Steps to Calibrate Ruler
To use this tool, select the Ruler tool button and measure the object with the known measurement. Then click the drop-down menu next to the Ruler button and click the Calibrate Ruler button. The length of the known object and the unit of measure that the object is in can then be inputted. There is also a small button on the screen that says Apply to all Images. The Apply to all Images box will need to be selected before clicking OK, in order for the Ruler and Poly Ruler to measure in the calibrated measurement for all measurements on the image.
- Select one of the Rulers/Poly Rulers on the image.
- Click the Calibrate Ruler button.
- Change the Length, the Ruler Unit, and check/uncheck the Apply to all images.
- Click OK.
11.3 Annotation Management Tools
11.3.1 Show/Hide Annotations
The Show/Hide Annotations tool used to toggle all of the annotations on the image on and off.
To use this tool, select the Show/Hide Annotations tool or click the dropdown menu next to the Delete Annotations , Clear Annotations , Clear All Annotations , Save Annotations , or Load Annotations button and click the Show/Hide Annotations tool. Then, click the Show/Hide Annotations it to manipulate all of the annotations on and off.


Steps to use the Show/Hide Annotations
To toggle the annotations click the Show/Hide Annotations button.
11.3.2 Delete Annotations
The Delete Annotations tool used to delete selected annotations.
To use this tool, select the annotation that will be deleted and then click the Delete Annotations button or click the dropdown menu next to the Show/Hide Annotations , Clear Annotations , Clear All Annotations , Save Annotations , or Load Annotations button and click the Delete Annotations tool.

Steps to use the Delete Annotations
- Click on the annotation that is desired to be removed.
- Click the Delete Annotations.
11.3.3 Clear Annotations
The Clear Annotations tool used to remove all the annotations from a single selected image just by clicking the button.
To use this tool, select the Clear Annotations tool or click the dropdown menu next to the Show/Hide Annotations , Clear All Annotations , Save Annotations , or Load Annotations button and click the Clear Annotations tool and click it.

Steps to use the Clear Annotations Tool
Click the Clear Annotations button.
11.3.4 Clear All Annotations
The Clear All Annotations tool used to remove all the annotations on an entire series.
To use this tool, select the Clear All Annotations tool or click the dropdown menu next to the Show/Hide Annotations , Clear Annotations , Save Annotations , or Load Annotations button and click the Clear All Annotations tool and click it.

Steps to use the Clear All Annotations Tool
Click the Clear All Annotations button.
11.3.5 Save Annotations
The Save Annotations tool used to save any annotation to a selected image. This allows access to the Load Annotations button, which is used to load annotations back onto the image even if it gets cleared. This button can not be used unless there are annotations displayed on the image.
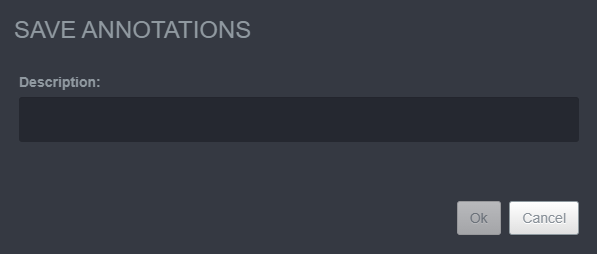
To use this tool, select the Save Annotations button or click the dropdown menu next to the Show/Hide Annotations , Clear Annotations , Clear All Annotations , or Load Annotations button and click the Save Annotations. This will bring a pop-up window where a description of the annotations can be logged. Then, click OK to save.

Steps to use the Save Annotations Tool
- Click the Save Annotations button.
- Write in the Description for the annotations.
- Click OK.
- Click OK on the to save the annotations.
11.3.6 Load Annotations
The Load Annotations tool used to load saved annotations. This button cannot be accessed if there are no annotations saved.
To use this tool, select the Load Annotations button or click the dropdown menu next to the Show/Hide Annotations , Delete Annotations , Clear Annotations , Clear All Annotations , or Save Annotations button and click the Load Annotations. Then, choose the annotation file that is intended to be uploaded. The annotations will then appear on the image that it was saved to. If one image is selected and wrong annotation file is clicked, then no annotations will load to the selected image but to the corresponding image in the series.

Steps to use the Load Annotations Tool
- Click the Load Annotations button.
- Click the desired annotation.
- Click OK to load the desired annotation.
OR
Click Cancel to exit the Load Annotations menu.
OR
- Select an annotation.
- Click the Delete button to delete the annotation from the Load Annotations menu.
- Click the OK/Cancel button.
12. 3D Imaging Tools
The 3D Imaging Tools can be found on the top of the Viewer Tab by selecting the 3D Imaging Tools. These tools can be used to increase the diagnostic quality of the image. All effects that are placed on the image using these tools can be done without losing the original image.
12.1 3D Tools
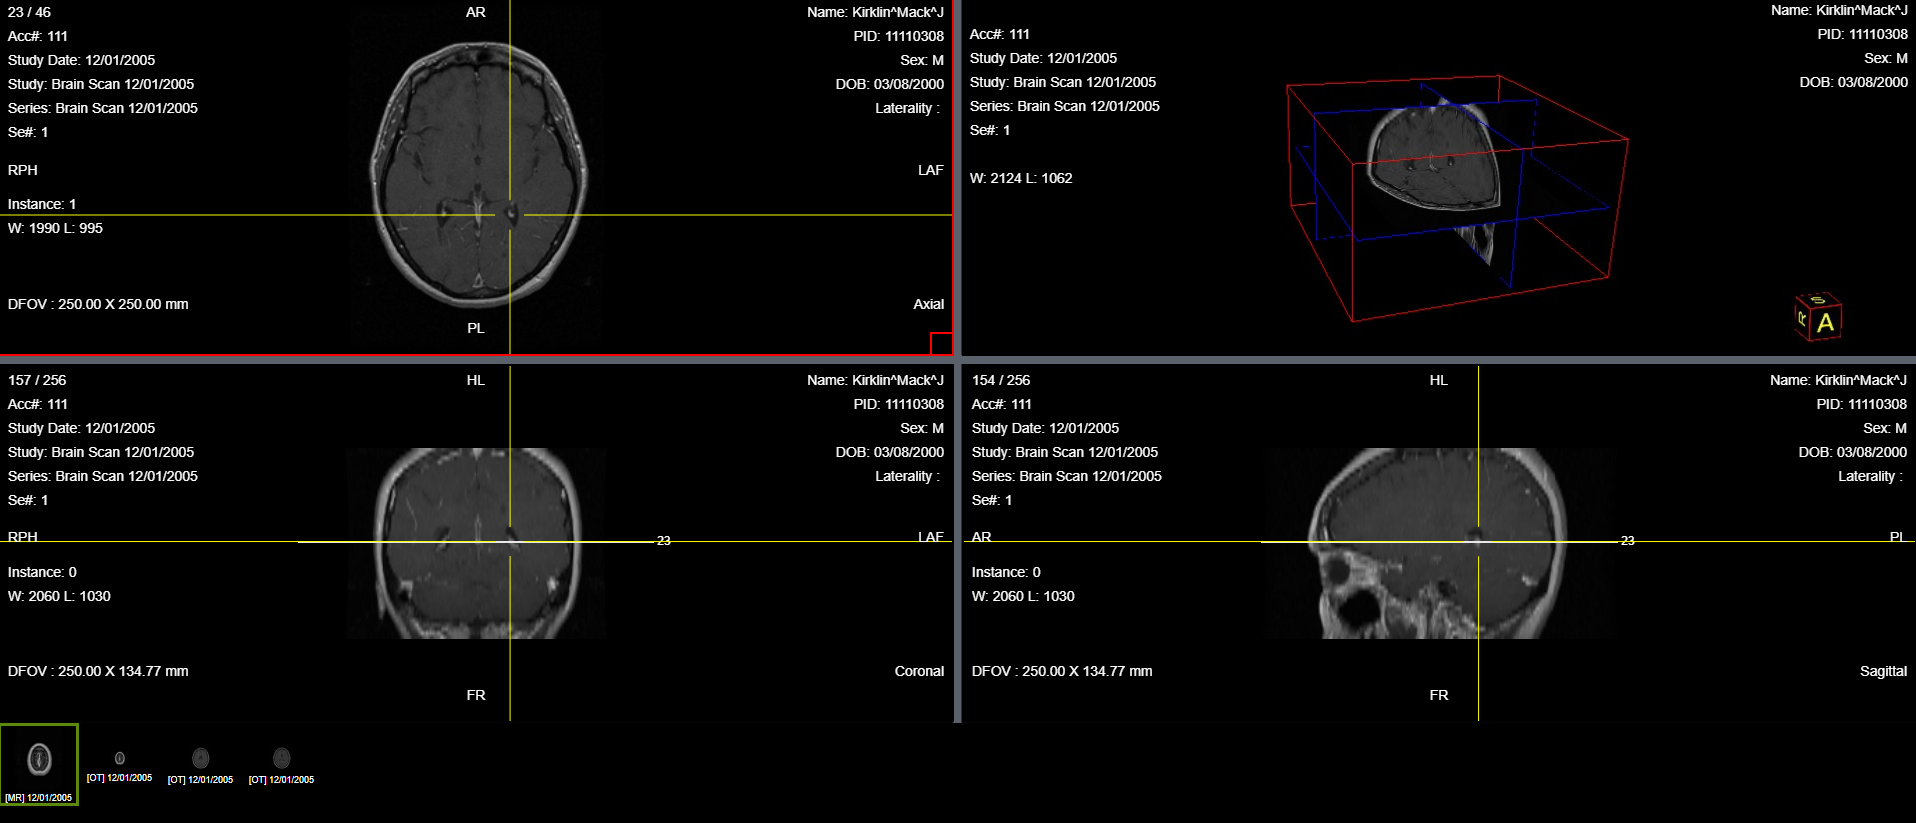
12.1.1 Cross Hair
The Cross-Hair tool is used to help navigate the 3D Image. The Cross-Hair tool provides a cross hair on the Axial, Coronal, and Sagittal planes that move in sync with each other providing the same location. The reason there is symmetry between the cross hairs is due to the orthogonal projections being generated from the axial stack with the MPR generation of the three planes. To use this tool, click on the Cross-Hair button. Then click any of the three plane windows. The cross hair will formulate on the window that is selected, then select one of the other two windows to get the other windows to produce the cross hair.

Steps to use the Cross Hair Tool
- Click the Cross Hair button.
- Then, click the screen within the viewer.
12.1.2 Show Reference Line
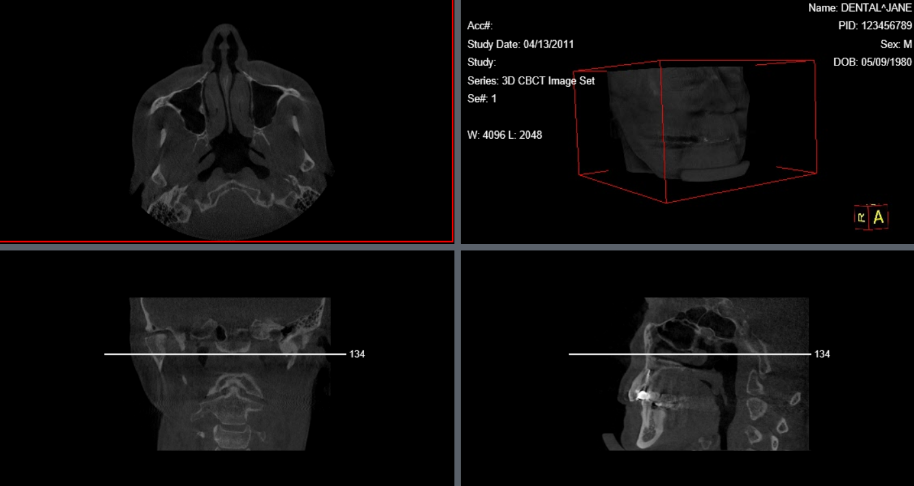
The Show Reference Line Tool shows the intersection of the selected image with in an orthogonal/oblique stack (3D image). A line will appear in the adjoining views where the intersection is taking place as well as a number that corresponds to the image that is being intersected.
To use this tool, select an image. Then click the Show Reference Line button. An intersecting line will populate in the other two views, as well as a number that corresponds to the image slice.

Steps to use the Show Reference Line Tool
- Click one of the windows within the 3D image set.
- Next, click the Show Reference Line button to toggle the reference line on/off.
- Click on different windows to see the reference line intersect in the other windows.
12.1.3 Show First and Last Reference Line
The Show First and Last Reference Line tool shows where the first and last image in the Image set are located. This tool helps give orientation to the 3D image.
To use this tool, select the original image in the Axial View. Then click the Show First and Last Reference Line button. This should allow two horizontal blue reference lines with numbers associated to the first and last image in the set, appear at the top and bottom of the Coronal and Sagittal view. Also, when the Show First and Last Reference Line button is applied, and the Sagittal View is selected, two vertical blue reference lines will appear in the Coronal and Axial view. Select the Coronal window with the Show First and Last Reference Image button and a single vertical blue line will appear in the Sagittal view.
Steps to use the Show First and Last Reference Line
Click the Show First and Last Reference Line to toggle between on/off.

12.1.4 3D Cursor
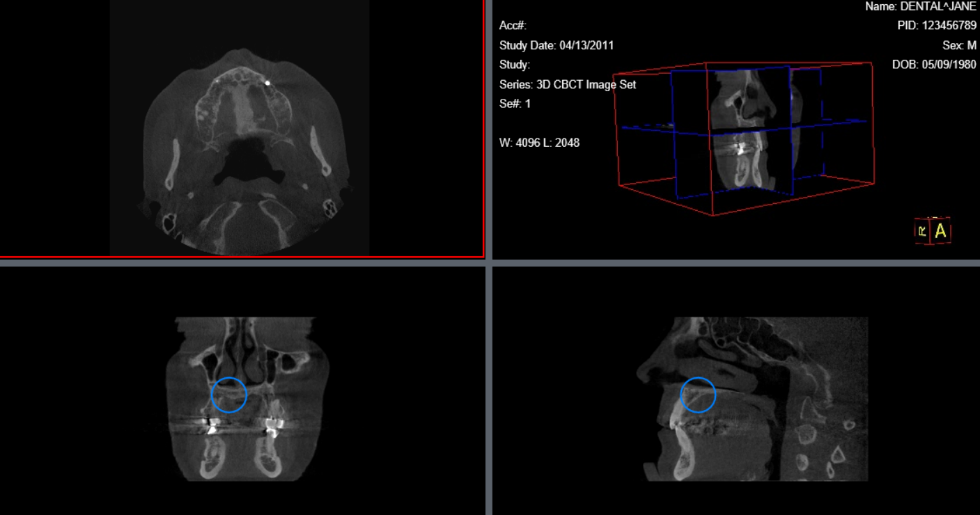
The 3D Cursor tool is used to locate a point on an image in different image boxes. When the image is clicked a blue circle will show up in the other orthogonal stacks.
To use the 3D Cursor tool, select the image plane that is intended to be viewed. Then, click the 3D Courser button. Once the 3D Cursor button is selected, click and hold to use the 3D Cursor. When the cursor is moved around, there will be blue circles that are in orthogonal stacks that are moving in symmetry with the cursor. To stop using the 3D cursor release the left-click button.


Steps to use the 3D Cursor
- Click the 3D Cursor button.
- Click and hold over the image to use the 3D Cursor.
12.2 3D Rendering Tools
12.2.1 VRT
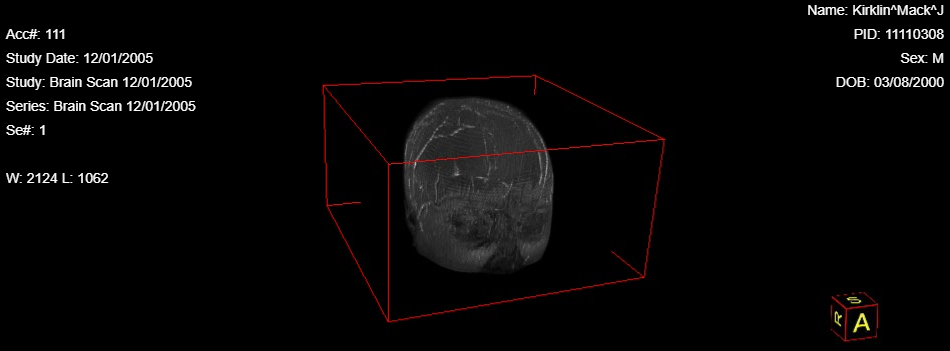
VRT stands for Volume Rendering Technique. The VRT tool is used to make a solid 3D rendering of the 3D image set selected.
To use this tool, select the 3D image set and then click the VRT button or the drop down menu next to the MIP , MPR (3D) , and then click the MIP button. This should provide a window with the 3D image set in a red box and rendered by the VRT.


Steps to use the VRT Tool
Click the VRT button.

12.2.2 MIP
MIP stands for Maximum Intensity Projection. MIP consits of projecting the voxel with the highest attenuation value on every view throughout the volume onto a 2D image. Only the pixel with the highest Hounsfield number along the Z-axis is represented, so in a single bidimensional image all dense structures in a given volume are observed.
To use this tool, select the 3D image set and then click the MIP button or the drop-down menu next to the VRT , MPR (3D) , and then click MIP button. This should provide a window with the 3D image set in a red box and rendered by the MIP.

Steps to use the MIP Tool
Click the MIP button.
12.2.3 MPR (3D)
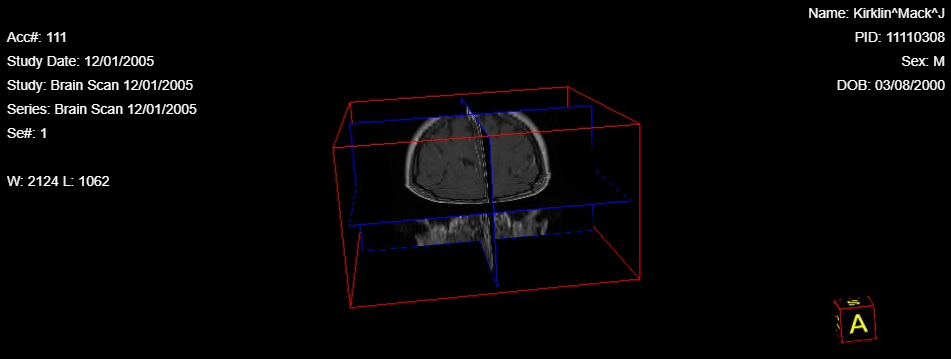
MPR stands for Multiplanar Reconstruction. The MPR tool used to cut the 3D rendered image into the sagittal, axial, and coronal planes.

Steps to use the MPR Tool
To use the MPR tool, select the 3D image set and then click the MPR button or the drop-down menu next to the VRT , MIP , and then click MPR button. This should provide a window with the 3D image set in a red box and the planes of the MPR are shown on the 3D rendered image.
Click the MPR button.
12.3 3D Settings
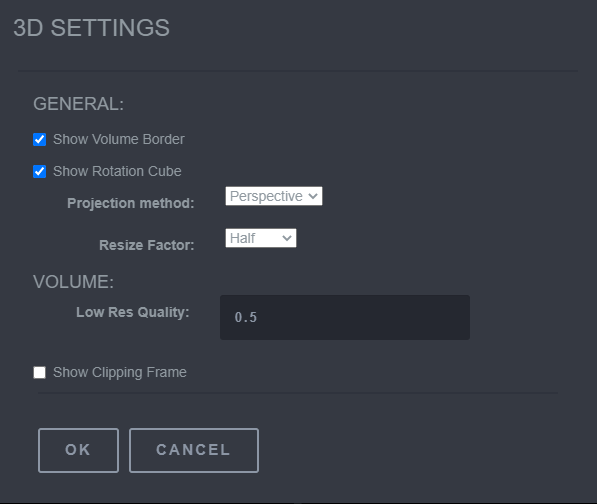
The 3D Settings tool is used to change the settings for the 3D rendered object in the MPR (3D) window. To use this tool, select the 3D rendered object. Then click on the 3D Settings tool. This will populate a pop window titled 3D Settings. There are two main sections that can be changed, the General functions and the MPR/Volume function.


Steps to use the 3D Settings
The functions that can be manipulated within the General section is Show Volume Border, Show Rotation Cube, Projection Method (Perspective, Orthogonal), Resize Factor (Full, Half, Quarter). Toggling the Show Volume Border on/off will remove/add the red 3D box around the 3D Image. Toggling the Show Rotation Cube on/off will remove/add the small cube in the bottom right hand corner of the 3D rendered objects window. The Projection Method can be changed between Perspective mode, (description perspective), and Orthogonal mode, (descriptions of Orthogonal mode). The Resize Factor function allows the 3D rendered object to change the size. The MPR/Volume Function can be altered depending on which type of filter the 3D Object is being rendered. The MPR section can be changed when the MPR filter is activated. The MPR section allows the Show Cross Lines to be toggled on/off. The Volume section can be changed when the VRT , MIP , or MPR (3D) filter is activated. With in the Volume section, the Low Res Quality can be changed. Also the Show Clipping Frame can be toggled on and off.
- Click 3D object window.
- Select the 3D Settings button.
- Change the 3D Settings within the menu.
- Select the OK button to apply the changes.
- Select Cancel if no changes are to be made.
12.4 Dental Panoramic
The Panoramic tool is used to generate and view Paraxial Cuts from a 3D image.
To use this tool, click the Dental Panoramic button. Once clicked, left-click to apply points onto the image. Right-clicking on a point will allow the deletion of the point or polygon. To stop creating points onto the image hold left-click and right-click. This should now provide a window which will display the Paraxial cut.

Steps to use the Panoramic
- Select the Dental Panoramic button.
- Left-click onto the image to apply points.
- Hold left-click and then right-click to view the slice.

12.5 3D Orientation Tools
12.5.1 Rotate 3D Object
The Rotate 3D Object tool used to rotate the 3D image.
To use this tool, click the Rotate 3D Object button and then the ability to rotate the 3D object is available.

Steps to use the Rotate 3D Object
- Select the 3D object window.
- Click the Rotate 3D Object button.
- Use the cursor to rotate the 3D object within the objects window.
12.5.2 Head Orientation
The Head Orientation tool used to turn the 3D rendered image to be viewed anatomically from the head looking down to the feet.
To use this tool, select the 3D Rendered Image and then click on the H button or the drop-down menu next to 3D Settings , Cross Hair , F, L, R, A, P and then click the H button.

Steps to use the Head Orientation Tool
- Select the 3D object window.
- Click the Head Orientation button.
12.5.3 Feet Orientation
The Feet Orientation tool used to turn the 3D rendered image to be viewed anatomically from the feet looking up the head.
To use this tool, select the 3D Rendered Image and then click on the F button or the drop-down menu next to 3D Settings , Cross Hair , H, L, R, A, P and then click the F button.

Steps to use the Feet Orientation Tool
- Select the 3D object window.
- Click the Feet Orientation button.
12.5.4 Left Orientation
The Left Orientation tool used to turn the 3D rendered image to be viewed anatomically from the left side looking right.
To use this tool, select the 3D Rendered Image and then click on the L button or the drop-down menu next to 3D Settings , Cross Hair , H, F, R, A, P and then click the L button.

Steps to use the Head Orientation Tool
- Select the 3D object window.
- Click the Head Orientation button.
12.5.5 Right Orientation
The Right Orientation tool used to turn the 3D rendered image to be viewed anatomically from the right side looking left.
To use this tool, select the 3D Rendered Image and then click on the R button or the drop-down menu next to 3D Settings , Cross Hair , H, F, L, A, P and then click the R button.

Steps to use the Right Orientation Tool
- Select the 3D object window.
- Click the Right Orientation button.
12.5.6 Anterior Orientation
The Anterior Orientation tool used to turn the 3D rendered image to be viewed anatomically from the anterior to posterior side of the object.
To use this tool, select the 3D Rendered Image and then click on the A button or the drop-down menu next to 3D Settings , Cross Hair , H, F, L, R, P and then click the A button.

Steps to use the Anterior Orientation Tool
- Select the 3D object window.
- Click the Anterior Orientation button.
12.5.7 Posterior Orientation
The Posterior Orientation tool used to turn the 3D rendered image to be viewed anatomically from the posterior to the anterior side of the object.
To use this tool, select the 3D Rendered Image and then click on the P button or the drop-down menu next to 3D Settings , Cross Hair , H, F, L, R, A and then click the P button.

Steps to use the Posterior Orientation Tool
- Select the 3D object window.
- Click the Posterior Orientation button.
13. DICOM Imaging Buttons
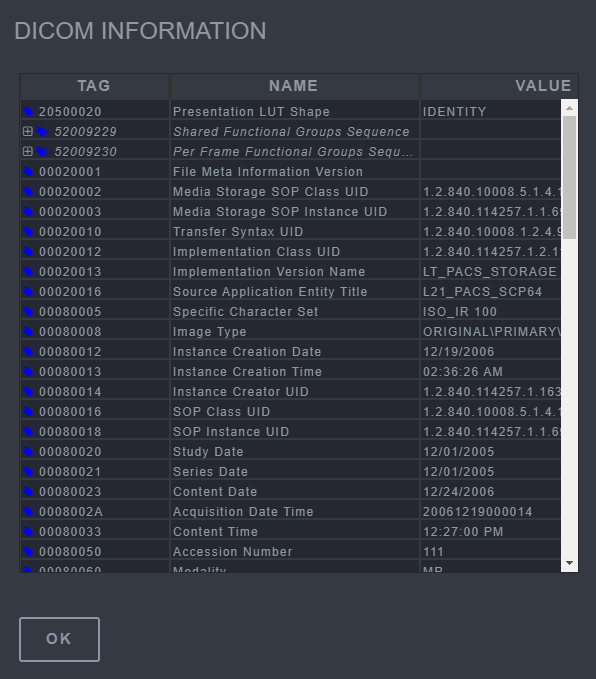
The DICOM Imaging buttons are used to see the DICOM information for each image.
13.1 Toggle Tags
Steps to use the Toggle Tags Tool
Click the Toggle Tags button to turn on and off the DICOM tags.
13.2 Show DICOM
The Show DICOM tool shows a complete list of the DICOM information that is associated with the image To use this tool, select the Show DICOM button and view the information in the pop-up viewer.

Steps use the Show DICOM button
- Select an image within the series.
- Click the Show DICOM button.
14. Capture
14.1 Capture
The Capture tool used to take a picture of the image being viewed and saving the image as a JPG file format.
To use this tool, click the Capture button. Once captured, the option to open, save, or cancel will be available.
Steps to use Capture
- Select an image within the series.
- Click Capture button.
- The image will be sent to the native image viewer.
- Save the image.
15. Audio Tools
15.1 Waveform Basic Audio
The Waveform Basic Audio tool used to play any audio from a DICOM file.
To use this tool, select the image that has the audio file. Then click the Waveform Basic Audio button to listen to the audio. If an image is selected that does not have audio attached, then a window will come up to indicate that the selected instance does not have audio.

16. Exporting Images Tool
The Exporting Images Tool is used to export or print the series images from the web viewer to the local file folder.
16.1 Export
The Export tool is used to export/print the series.
To use the tool, click the Export button and a menu will appear on the screen. There are options to change the Selection of which image(s) are being exported, the Format in which file will be exported in, create a Password for the file, and the Compression size. When the selection of different options, the Export settings allows manipulation of the file(s) even further. This can be done by selecting the Create DICOMDIR, preserve bit depth of original, reduce grayscale to 8 BPP, Burn Saved Annotations, Anonymize, Include Viewer, White background, and Print patient information. Once the export settings are configured click OK and it should export to your local file folder.

Steps to use the Export Tool
- Select the image within series.
- Choose the options with in the Export menu.
- Click OK to apply the Export.
- Click Cancel to exit the Export menu.
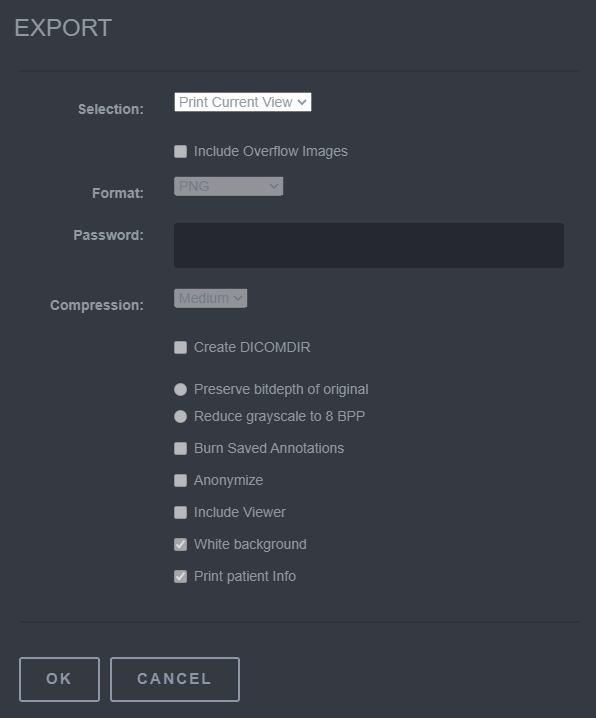
17. Configuration Settings
The Configuration Settings button is used to administer global options and other high-level configurations (e.g., changing user password).
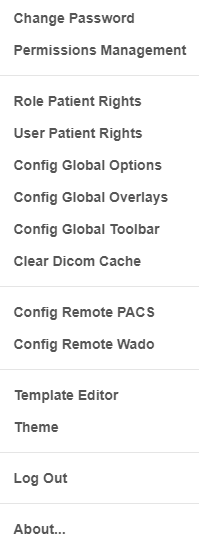
17.1 Change Password
The Change Password button can be used to change the password for a user.
To use the tool, click the Change Password button and a menu will appear on the screen. To change the password, input the original password credentials and a new password into the box.
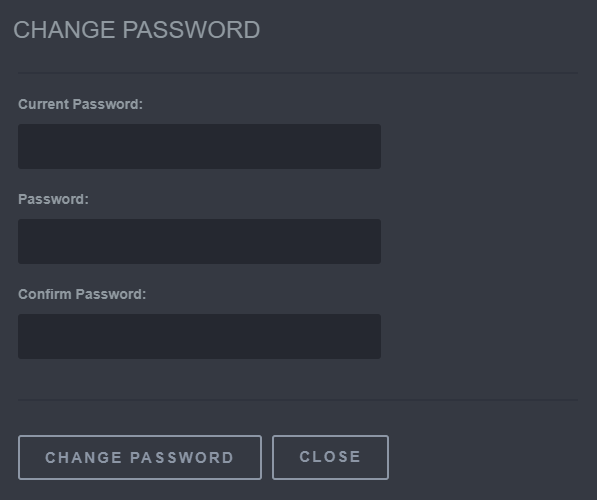
Steps to change a Password
- Select the Change Password button.
- Input the original password in the Current Password Box.
- Input the new password in the Password and Confirm Password box.
- Select the Change Password Button.
17.2 Permissions Management
The Permissions Management button allows an administrator to control the authorization a current or new user will have.
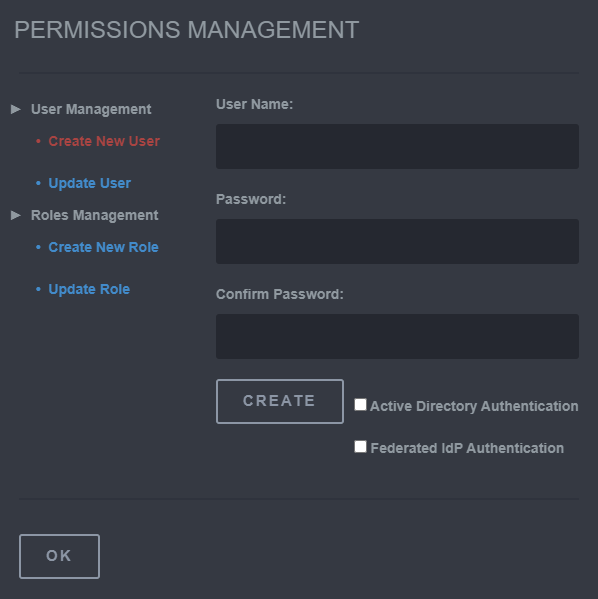
Steps to Create a new User and Role
To use this tool, click the Permissions Management button. The User Management section will provide the ability to create and update the roles authorized to a user. To create a new user, select the Create New User button and input the new User Name and Password Credentials. Selecting the Update User button will allow the administrator to change a created users password and change the permissions allowed for a user. To update a user, select a user from the drop box. Then, input a new password or enable a permission to provide new authorization via the selectable boxes.
The Roles Management section will allow an administrator to create a Role which can be used to categorize a new user. Each role can be customized to provide access or limit features when using the HTML5 Medical Viewer. To create a new role, select the Create New Role button and name a new role. After selecting the CREATE button to create the role, selecting the Update Role button will provide the ability to assign permissions via the selected role.
- Select the Permissions Mangement button.
- Select the Create New User button and input user credentials.
- Select the Create New Role button and name a new role.
- Select the Update Role button to enable the Permissions for the created role.
- Select the Update User button to select the user and assign the configured role.
17.3 Role Patient
The Role Patient button allows an administrator to control the patients that are visible to a user based on the categorized role.
To use this tool, select the Role Patient button and select a role to manipulate from the drop down box. If a role is not seen, a role can be created through Permissions Management . With a Role selected, select a check mark next to the ID table to enable or disable a patient. The items listed can be filtered by specifying an ID or name, or clicking a column to apply an assortment of order.
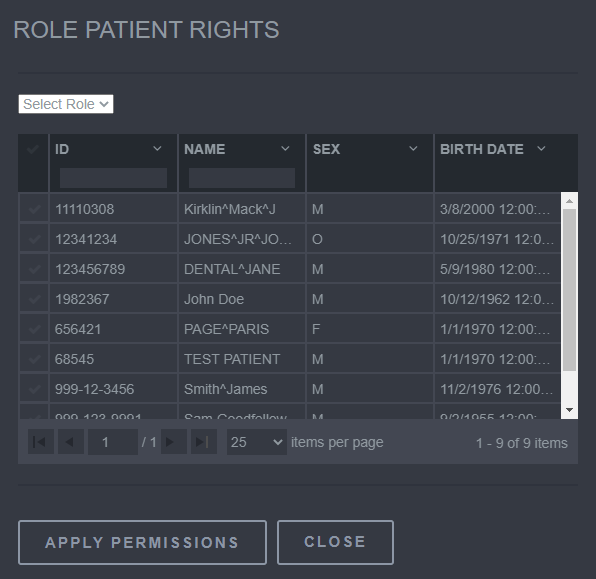
Steps to assign Role Patient Rights
- Select the Role Patient button.
- Select a Role from the drop down box.
- Enable or Disable Patients by clicking on the check marks.
- Select the Apply Permissions to save the changes.
17.4 User Patient
The User Patient button allows an administrator to control the patients that are visible to a direct user.
To use this tool, select the User Patient button and select a user to manipulate from the drop down box. If a user is authorized by an already existing role, the entry will appear italicized and cannot be modified through the window. With a User selected, select a check mark next to the ID table to enable or disable a patient. The items listed can be filtered by specifying an ID or name, or clicking a column to apply an assortment of order.
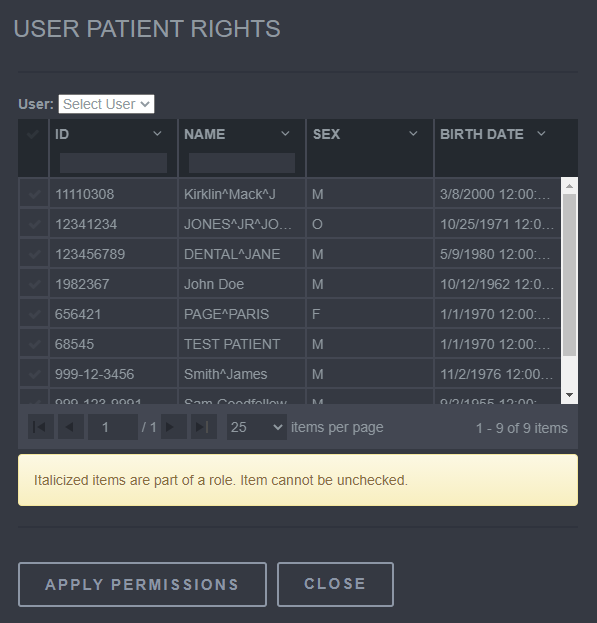
Steps to assign User Patient Rights
- Select the User Patient button.
- Select a Role from the drop down box.
- Enable or Disable Patients by clicking on the check marks.
- Select the Apply Permissions to save the changes.
17.5 Config Global Options
The Config Global Options button provides the ability to change the default behavior of the HTML5 Medical Viewer.
To use this tool, select the Config Global Options button and a window will appear where the default options used by the viewer cam be changed.
Default Series Row Count
The initial number of rows that will be used to display a series. This is only valid when the Viewer Mode is set to Study View, and the Single Series mode is set to false.

Default Series Column Count
The initial number of columns that will be used to display a series. This is only valid when the Viewer Mode is set to Study View, and the Single Series mode is set to false.

Viewer Mode
The Viewer Mode will display only one series at a time with a series list on the side to choose from and compare (when choosing Series View), or to display multiple series at the same time (when choosing Study View).

Single Patient Mode
Enable or disable the ability to view multiple patients with each patient displayed on a separate tab.

Single Series Mode
Enable or disable displaying multiple series at the same time. This is only valid when selecting “Study View” for Viewer Mode .

Show Frame Border
Show a border around the series image that will be highlighted when selected.

Enable Patient Restriction
This is reserved for future use.

Show Search Thumbnails
When selecting a patient/study the series view is populated. A thumbnail will be displayed next to each series that can be enabled or disabled.

Series Thumbnail Width
The width of the series thumbnail.

Series Thumbnail Height
The height of the series thumbnail.

Empty Cell Background Color
The empty area color that will be used to display the series. This can be seen if “Study Mode” is enabled to display multiple series. With the default rows and columns count to 2x2, a series will be displayed with 3 empty areas. These areas will have this background color.

Selected Border Color
The border color that is used when a series is selected.

Background Color
The background color of the series.

Enable Patient Id Auto Complete
Enable the autocomplete when on the search page and the patient ID text box is clicked on.

Enable Patient name Auto Complete
Enable the autocomplete when on the search page and the patient name text box is clicked on.

Derived 3D Series Description Text
The default text that will be displayed when the 3D volume is saved as derived. This is done by creating a 3D volume, then selecting the 3D volume cell, then clicking on Save as Derived .

Derived Series Description Text
The default text that will be displayed when you save a series as derived. This is done by selecting the series, then clicking on Save as Derived .

Derived Panoramic Series DescriptIon Text
The default text that will be displayed when a panoramic cell is saved as derived. This is done by creating a panoramic cell, then selecting the panoramic cell, then clicking on Save as Derived .

Enable Series Number Edit
Allow the user to set the series number when using the Save as Derived button.

Enable Protocol Name Edit
Allow the user to set the protocol name when using the Save as Derived button.

Enable Audit Log
Enable or Disable the ability to log every database request sent to the server.

Log User Activity
Enable or disable logging user activities from the list below:
- Medical web viewer launched
- Medical web viewer Exited
- Medical web viewer logged out
- Opening a patient
- Showing a series
Logging user activities are only valid when the "Enable Audit log" is set to true.

Log User Security
This is reserved for future use.

Log Setting Changes
This is reserved for future use.

Log Security Setting Changes
This is reserved for future use.

Annotation Stroke Color
The color of the annotation drawn on the series. Drawing an annotation can be done by clicking on any annotation toolbar button then clicking and dragging to create an annotation object.

Annotation Text Color
The color of the annotation Text drawn on the series. Drawing an annotation can be done by clicking on a text annotation toolbar button, then clicking and dragging to create an annotation object.

Annotation Hilite Color
The color of the Highlight annotation drawn on the series. Drawing annotation can be done by clicking on the highlight annotation toolbar button, then clicking and dragging to create an annotation object.

Enable Idle Timeout
The timeout that will happen when the viewer is not interacted with (which can be set by Idle timeout). This will send the viewer back to the login screen.

Idle Timeout
The timeout (in seconds) that will happen when the viewer is not interacted with. This will send the viewer back to the login screen. This is only valid when “Enable idle timeout” is set to true.

Idle Warning Duration
A warning that will happen when the idle timeout lapses. A small window will appear which contains the number of seconds left until the medical web viewer goes back to the login screen.

Max Study Results
The maximum number of study results that will be displayed on a search.

Max Series Results
The maximum number of series results that will be displayed when you search.

Search Other Patient Ids
When Search Other Patient Ids is true, and a value is entered in the Patient's ID of the search screen:

Patient Ids
All patients will be returned with that match the value entered in the search field in either of these DICOM elements:
(0010,0020) Patient ID DICOM Element
OR
(0010,1000) Other Patient IDs DICOM Element
When Search Other Patient Ids is false, the only patient records returned are those that match:
(0010,0020) Patient ID DICOM Element
Search Structured Display
When a search is done for a patient/study that has a structured display, it will be displayed as an item in the series list.

Template Background Color
The template background color seen when opened through the Template Editor .

Template Fore Color
The template foreground color seen when opened through the Template Editor .

Template Border Color
The template border color seen when opened through the Template Editor .

Template Border Size
The template border size seen when opened through the Template Editor .

Template Bounds Notification
If a template is open (an editable one, which is the one on the left side list without the lock), the boxes can be moved around. If it is moved outside of the viewer bounds, an animated ant border will be displayed. This behavior can be disabled or enabled with this option.

Default Script
Allows display of a default script on each template cell.

Lazy Loading Threshold
The threshold for lazy loading. Lazy loading is useful when loading a series that contains a huge amount of frames. If the series is loaded, not all all of the frames will be loaded. Lazy Loading works by only loading the visible frames, and when scrolling down or up to view new frames. If the series has frames that is less than this number, all of the frames will be loaded and lazy loading will not be activated.

Lazy Loading Mobile Threshold
The threshold for lazy loading for mobile. Lazy loading is useful when loading a series that contains a huge amount of frames. If the series is loaded, not all all of the frames will be loaded. Lazy Loading works by only loading the visible frames, and when scrolling down or up to view new frames. If the series has frames that is less than this number, all of the frames will be loaded and lazy loading will not be activated. Mobile has less memory than a desktop, so usually this threshold is less than a desktop.

Lazy Loading Buffer
This is obsolete

Date Format
This is how the date is formatted

Time Format
This is how the time is formatted

Hide Overlays
Show or hide the overlay text that is displayed on top of a cell. This contains information about the series such as patient name.

Hide Custom Layouts
Show or Hide the custom layout that will appear when using Change Study Layout or Change Series Layout .

Show Study Time Line
A timeline that will appear at the bottom of the viewer that contain all the series.

Link Images
This links the frames together. When loading a series with multiple frames and one frame is manipulated ( window level, scale, offset) the others will change as well.

Stack Single Frames
If a series contains some frames that have different orientations and positions, the viewer will separate those into multiple series and display them separately. Setting this value to true will prevent that and will display all frames in one series.

Background Size
Instead of loading a large image at once, the viewer will display a low resolution image. When the image is zoomed, only the position that is visible will be displayed in high resolution. This is the width and height of the low resolution image.

S D Background Size
Instead of loading a large image at once, the viewer will display a low resolution image. When the image is zoomed, only the position that is visible will be displayed in high resolution. This is the width and height of the low resolution image for a structured display.

Two Factors Authentication Message
The e-mail body message that will be sent when using a two factor authentication feature.

Search Page Size
The number of results that will be displayed when a search is performed. If the results are larger than this number, a paging will happen which separates the results into pages. Page size is set here.

Print Size
Print Layout
Enable the ablity to print the layout (like structured display), or just print the selected image.

Print Name
The Print To Pdf button output name. This can be tokenized which means that the dicomdataset file name information can be used. Click on the question mark at the right to display these options.

Text Background
The Print To Pdf text background color. The text will be displayed at the bottom of the pdf output.

Text Color
The Print To Pdf text color. The text will be displayed at the bottom of the PDF output.

PDF Background Color
The Print To Pdf background Color.

Mpr Render Side
The render side for the MPR (3D) . The MPR can be rendered on the client side which means the client itself will render the MPR, or it can be rendered on the server side.

Rendering Method
The rendering method used for 3D rendering. This can be software only, or it can be hardware and software for a fall back option.

Enable Okta Sign In
Enable the Okta Sign In which will be displayed at the login screen.

Enable Caching
Enable caching which will enable the viewer to load a series or 3D image faster the next time.

17.6 Config Global Overlays
The Config Global Overlays button allows an administrator to customize and create new overlays to display data from a loaded series.
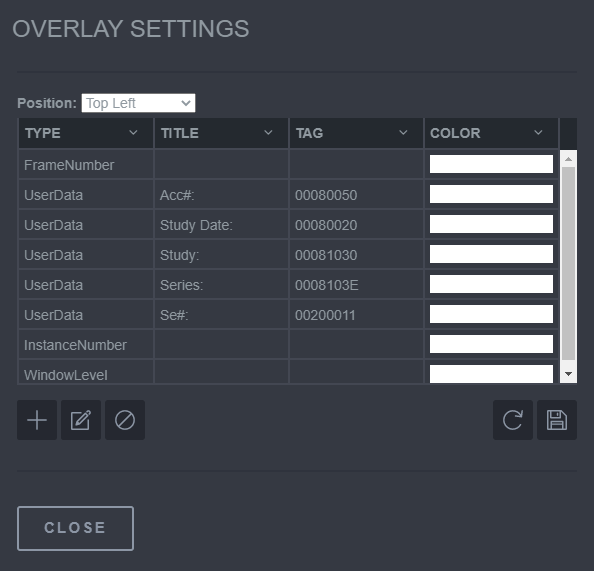
Steps to use the Config Global Overlays
To use this tool, select the Config Global Overlays button. A window will appear that can be used to change the behavior on how an overlay is displayed. The created overlays are organized by the position displayed in the drop-down list. Overlays will also be displayed in the section of a window based on the position it is created in.
To Add or Edit an overlay tag, select the button named Add overlay tag and Edit overlay tag. Next, specify an Overlay Type using the drop-down menu. When selecting the Overlay Type User Data, a valid DICOM Tag needs to be provided in accordance to where the value can be found. If User Data is not selected, the Title and Tag fields will be empty. The color of the overlay tag can be changed by clicking within the Color box. A change to the overlay settings can be undone by selecting the Undo Tag changes button. If a tag is no longer needed, it can be deleted by using the Delete selected tag button. Any changes that would like to be maintained will need to be saved by using the Save overlay tags button.
Steps to create a new overlay item
- Select the Config Global Overlays button.
- Select the Add overlay tag button.
- Select an Overlay Type.
- If User Data is selected, provide a title and a valid DICOM Tag.
- Select a color by clicking in the Color box.
- Select Ok and then use the Save overlay tags button to keep any changes.
17.7 Config Global Toolbar
The Config Global Toolbar button in the Configuration Settings allows an administrator to enable or disable features provided by the HTML5 Medical Viewer.
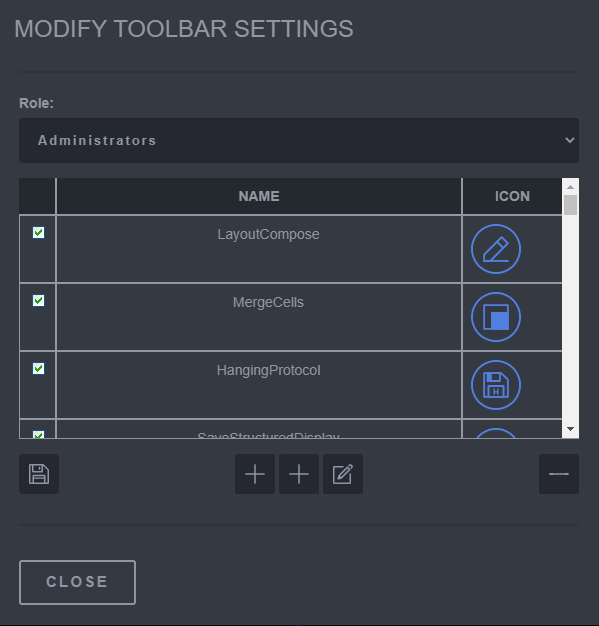
Steps to use the Config Global Toolbar button
To use this tool, select the Config Global Toolbar button. A window will appear that can be used to modify the default buttons provided by the HTML5 Medical Viewer. To modify the buttons seen, select a role from the drop down menu. This will ensure that any features modified will be presented for the selected role. To add a new toolbar item, select the Add root toolbar item or Add toolbar item. The Add root toolbar item will create a new button at the end of the list of buttons. The Add toolbar item button will allow the creation of a button in the directory of an already existing button. The Edit toolbar item will provide the ability to overwrite or change an already existing button. The Delete toolbar item provides the ability to delete an existing button. The visibility of a button can be disabled via the checkboxes. To save any changes made to the Global Toolbar, the Save toolbar settings button can be used to confirm any changes.
When creating a new toolbar item, the ID that is provided needs to be a unique ID that does not already exist. Supplying an already existing ID will result in the button being disabled after saving changes.
Steps to create a new toolbar item
- Select the Config Global Toolbar button.
- Select Add root toolbar item.
- Specify the details of the button and apply a unique Id.
- Select OK to create the item.
- Using the window, scroll down and click on the checkbox to enable in view.
- Select Save to add the new button on the toolbar.
17.8 Clear Dicom Cache
The Clear Cache button can be used to manually free images that are cached. Caching saves processing time when viewing DICOM images but can be cleaned up to maintain efficiency.
To use this tool, select the Clear Cache Button to remove the held data.
Steps to clear a Dicom Cache
Select the Clear Cache button to free images.
17.9 Config Remote PACS
The Config Remote PACS button can be used to add a DICOM PACS server used to retrieve images.
To use this tool, select the Config Remote PACS button. A window will appear that can be used to add, edit, delete, and save a PACS configuration. To add a PACS Server, provide a valid Client AE Title and select the Add PACS server button. The Edit Remote PACS Server window will now appear which will require the server AE Title, IP Address, and Port credentials. Providing correct credentials for these fields will provide a connection was successfully verified message.
If an invalid parameter is added in the Remote PACS Server settings window, an "attempt to connect was forcefully rejected" exception will occur. If an invalid Client AE title is provided, a "Calling AE Title not recognized" exception will occur.
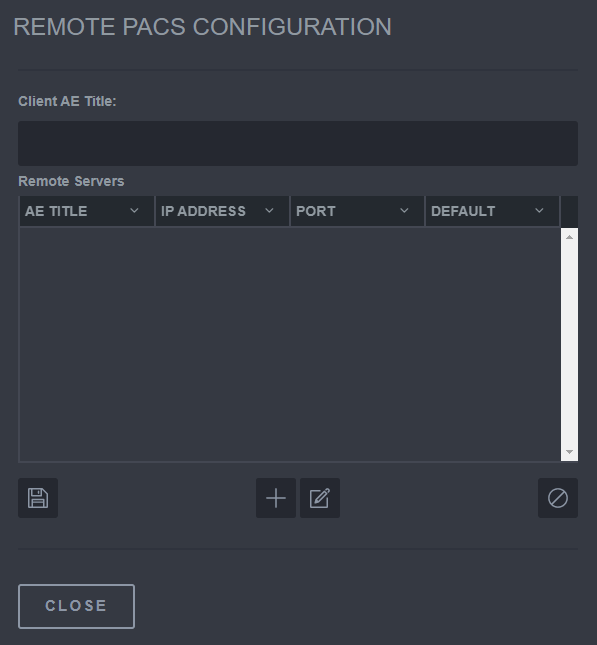
Steps to add a remote PACS server
- Select the Config Remote PACS button.
- Add an existing Client AE Title and select the Add PACS server button.
- Add a valid server AE Title, IP Address, and port location.
- Select the Verify button to test the connection.
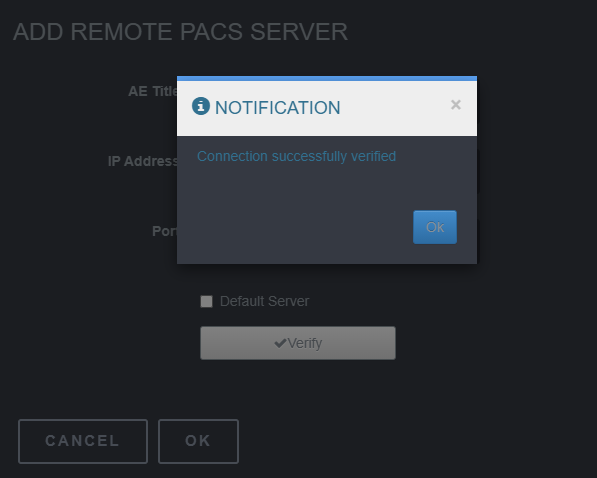
17.9.1 Retrieving and Viewing from a Remote Pacs
-
Select the Query PACS button.

-
Select the Remote PACS connection. If a connection does not appear, a valid connection needs to be configured through the Config Remote PACS button.

-
Select search. The studies will then populate from the Remote PACS server.

-
Select a study. The study will be added as series to the HTML5 Medical Web-Viewer.

-
The added series can now be found under the found studies.
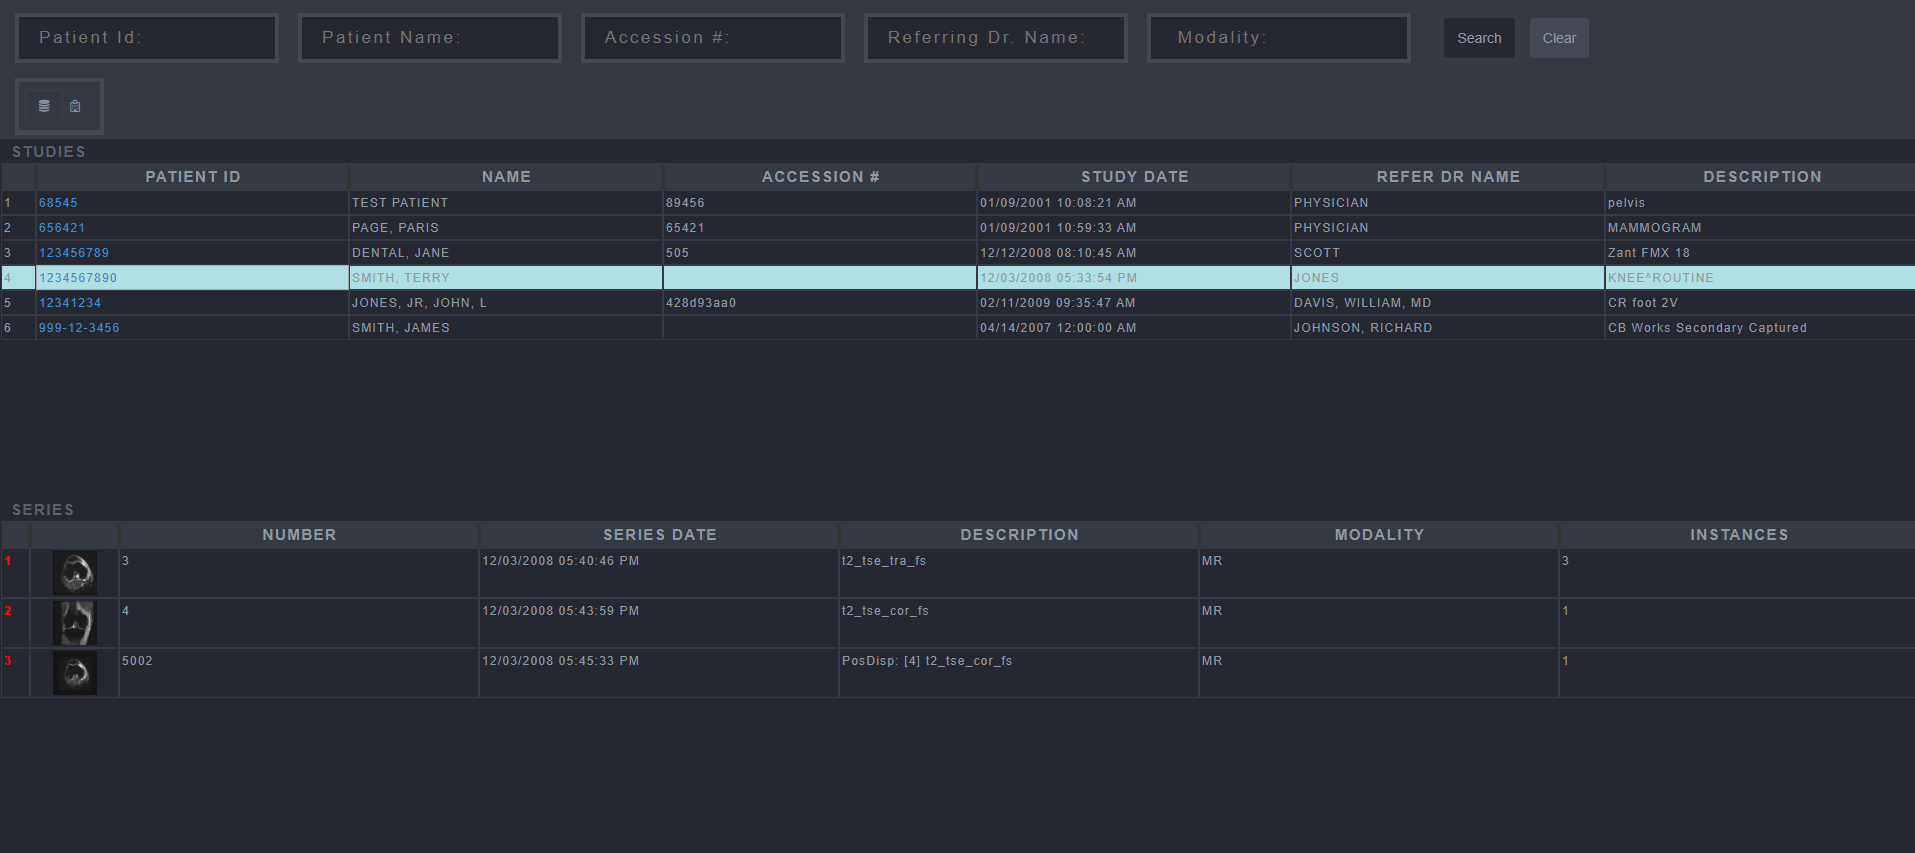
17.10 Template Editor
The Template Editor can be used to customize a display template used for viewing images.
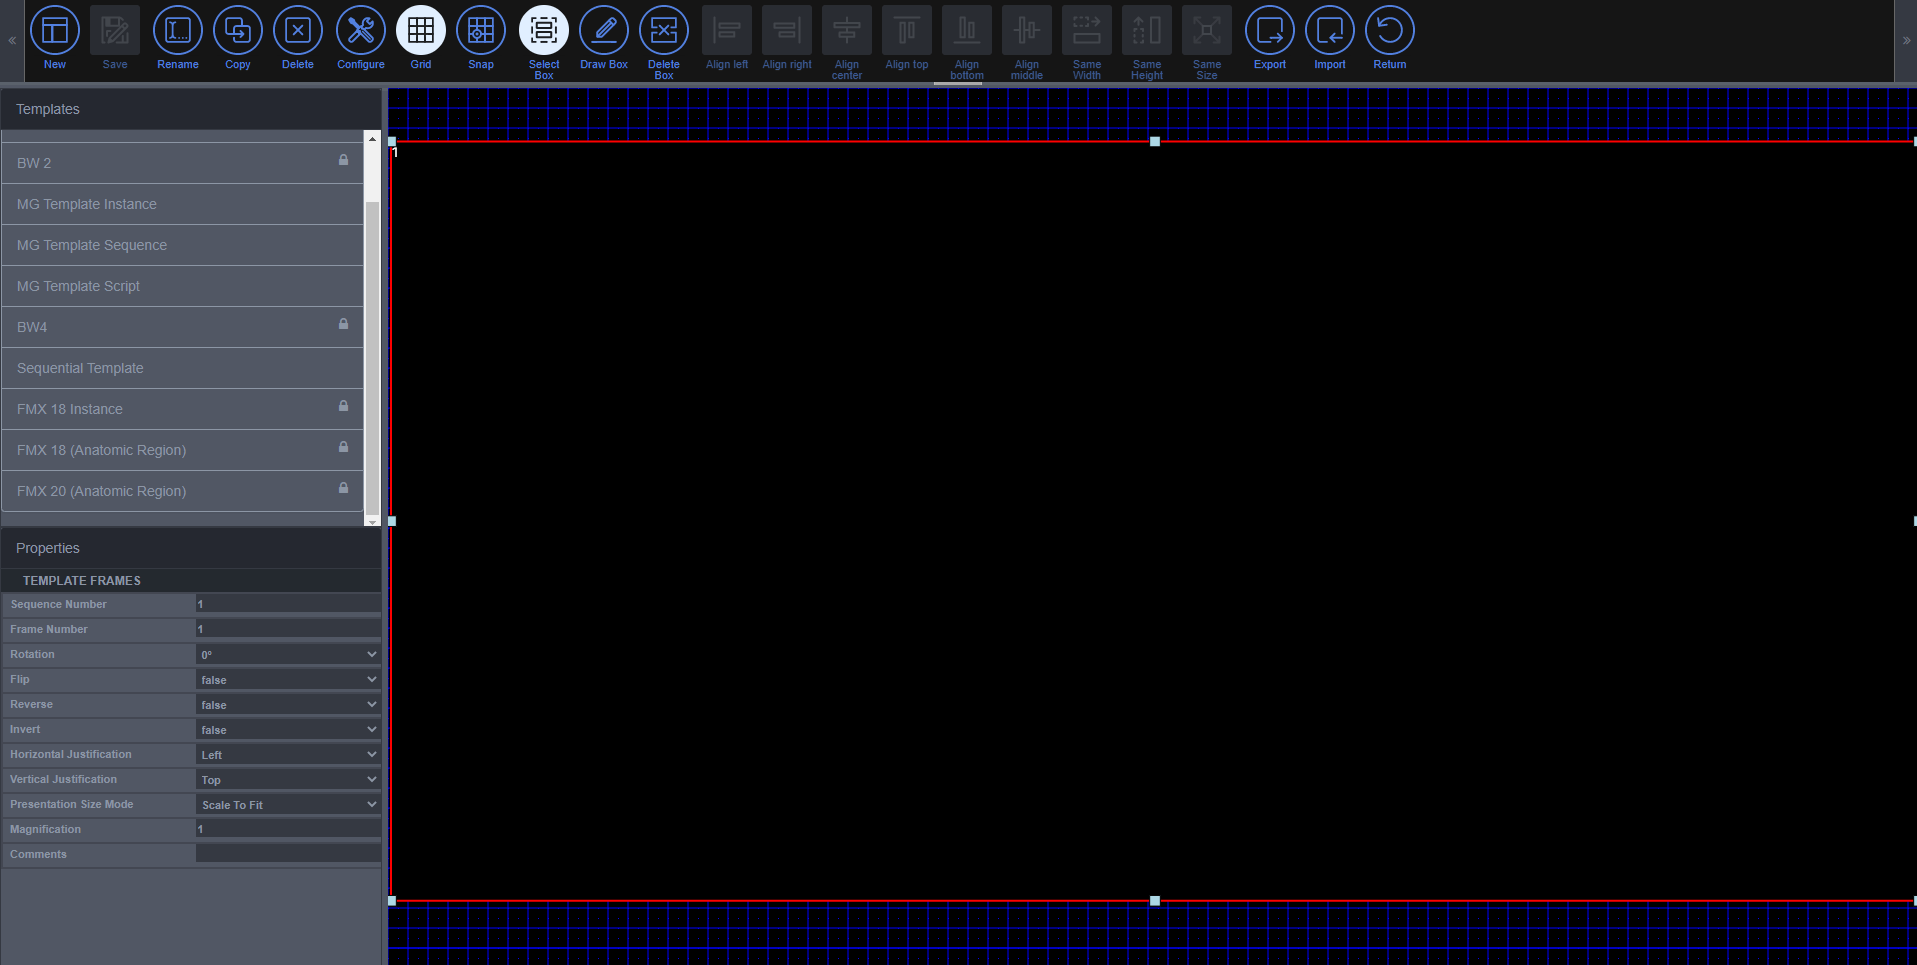
Steps to use the Template Editor
To use this tool, select the Template Editor button. The Template Editor window provides preconfigured templates that can be modified, as well as provides the ability to create a new template. To create a new template, select the New button and use the Draw Box button to draw the dimensions for the window. Double clicking the created window will open the Edit Script window. The Properties window to the left of the screen can be used to change the behavior of the window.
The Save button is used to save the changes made to a template. The Rename button is used to rename a template. The Copy button is used to copy a template window to another location on the grid. The Delete button is used to delete a created template. The Grid button provides a grid view that is used to ensure that a window fits expected dimensions. The Configure button can be used to change the size of the grid. The Delete Box button can be used to delete a created window in the template. The Export button can be used to save a template as a JSON file. The Import button will allow you to upload a previous existing template. The Return button can be used to return back to the HTML5 Viewer.
If two or more windows are created in the template, the CTRL key can be used to select more than one window. Selecting these windows will enable the Alignment tools. The Align left button will align the windows on the left side. The Align right button will align the windows on the right side. The Align Center is used to have the windows share the same Y-axis. The Align top button will align the windows on the top side. The Align bottom button will align the windows on the bottom side. The Align middle button will align the windows horizontally. The Same Width button will resize the widths of the windows to be identical. The Same Height button will resize the Heights of the windows to be identical. The Same Size button will resize the width and height of the windows to be identical.
17.10.1 Using a custom template
-
Select Change Study Layout under the Change Series Layout button.
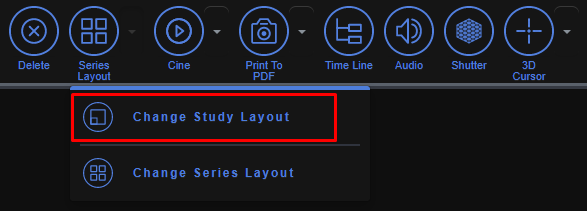
-
Select the custom template from the drop down menu
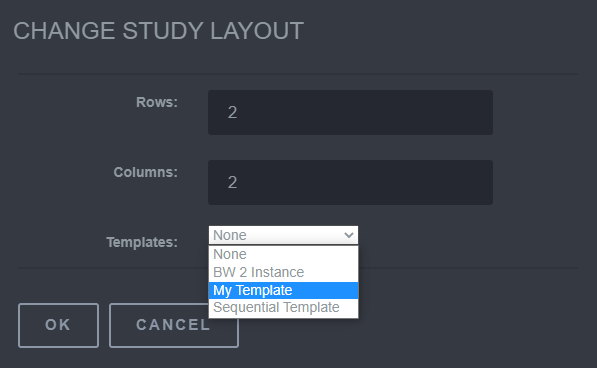
-
Select Ok to confirm the changes. The created template will now be applied
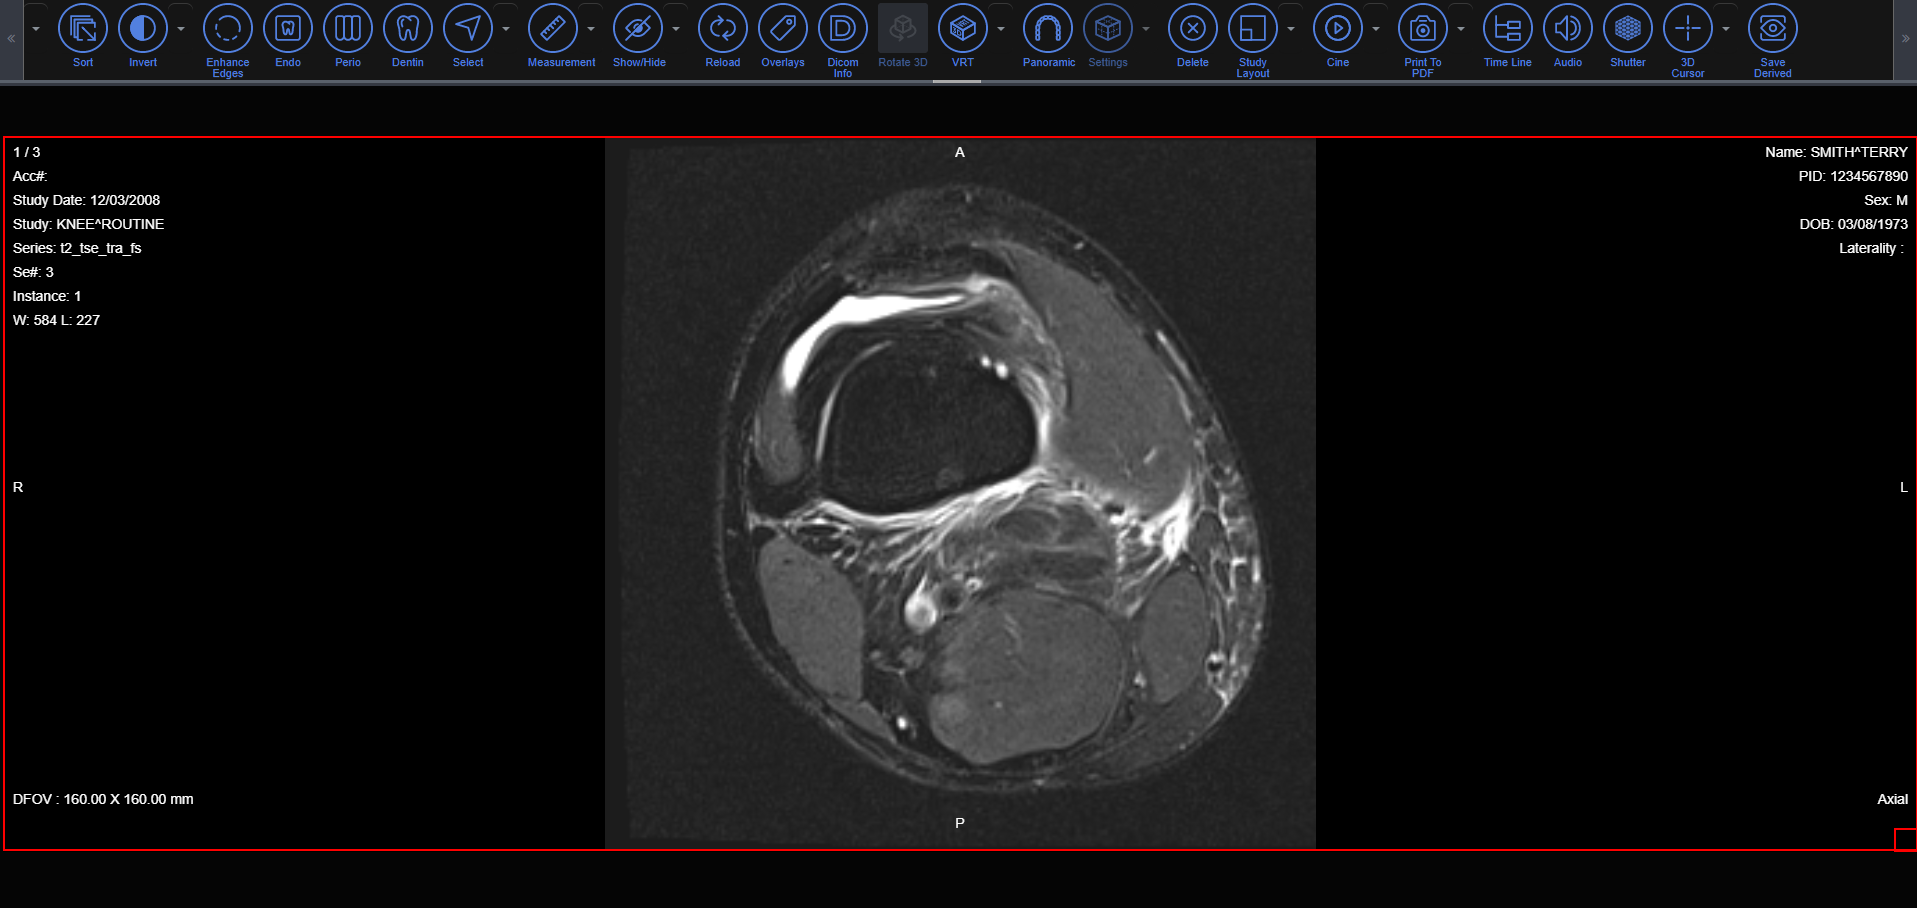
17.11 Theme
The Theme button provides the ability to change the background and font color of the Medical Web Viewer. This is by default configured to Dark Theme but can be toggled off.
To use this tool, select the Theme button and uncheck the Enable Dark Theme box to toggle the preferred color.
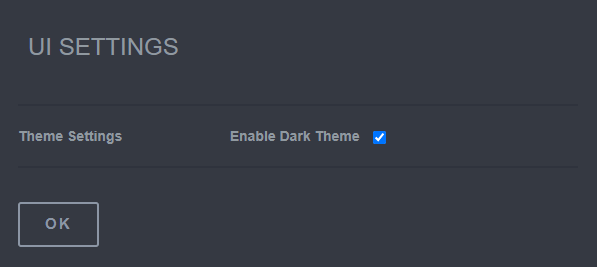
Steps to change a Theme
- Select the Theme button.
- Select the Enable Dark Theme box and click Ok.
17.12 Log Out
The Log Out button will sign out the current user.
To use this button, select the Log Out button.
17.13 About
The About button provides the current version of the Medical Web Viewer.
To use this tool, select the About button.
18 Tablet Functions
The HTML5 Web Viewer is able to be accessed from a number of devices as long as there is internet. For diagnostic purposes we suggest using a screen that is 7” in length or greater. For devices that use touch to navigate, all tools should function just as if you are using a mouse and keyboard. There are a couple of functions that will require two fingers. These are stated below.
18.1 Tablet Specific Functions
18.1.1 Zooming
To Zoom in and out take two fingers and move them apart/together to zoom in or out.
18.1.2 Complete a Function
Tools in the annotation/measurement tool bar used in HTML5 Web Viewer can be used and completed with a double left-click. This will hold true for the tablet use as well. Just double tap the screen where to end the function to complete the annotation or measurement.

