Add References and Set a License - Windows C DLL
This tutorial shows how to use the LEADTOOLS SDK in a Windows C DLL application and create a project, add headers, LIBs and DLLs, and set the license.
| Overview | |
|---|---|
| Summary | This tutorial covers how to set a license in a Windows C DLL Application. |
| Completion Time | 30 minutes |
| Visual Studio Project | Download tutorial project (17 KB) |
| Platform | Windows C DLL Application |
| IDE | Visual Studio 2017, 2019, 2022 |
| Runtime License | Download LEADTOOLS |
| Try it in another language |
|
Required Knowledge
Before any functionality from the SDK can be leveraged, a valid runtime license will have to be set.
For instructions on how to obtain a runtime license refer to Obtaining a License.
Create the Project
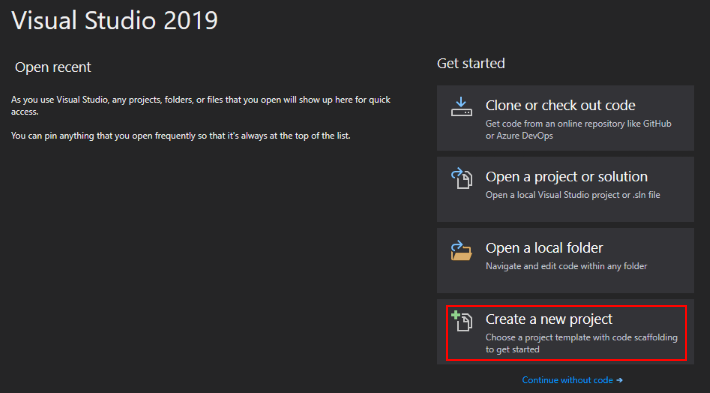
Launch Visual Studio and select Create a new project.
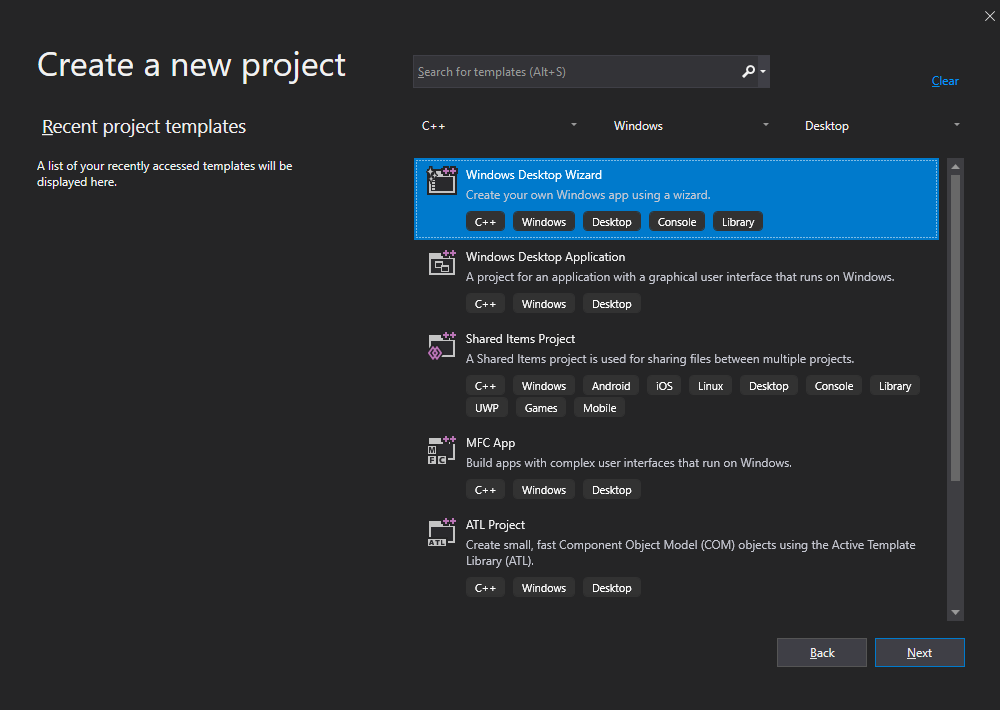
Select Windows Desktop Wizard and click Next.
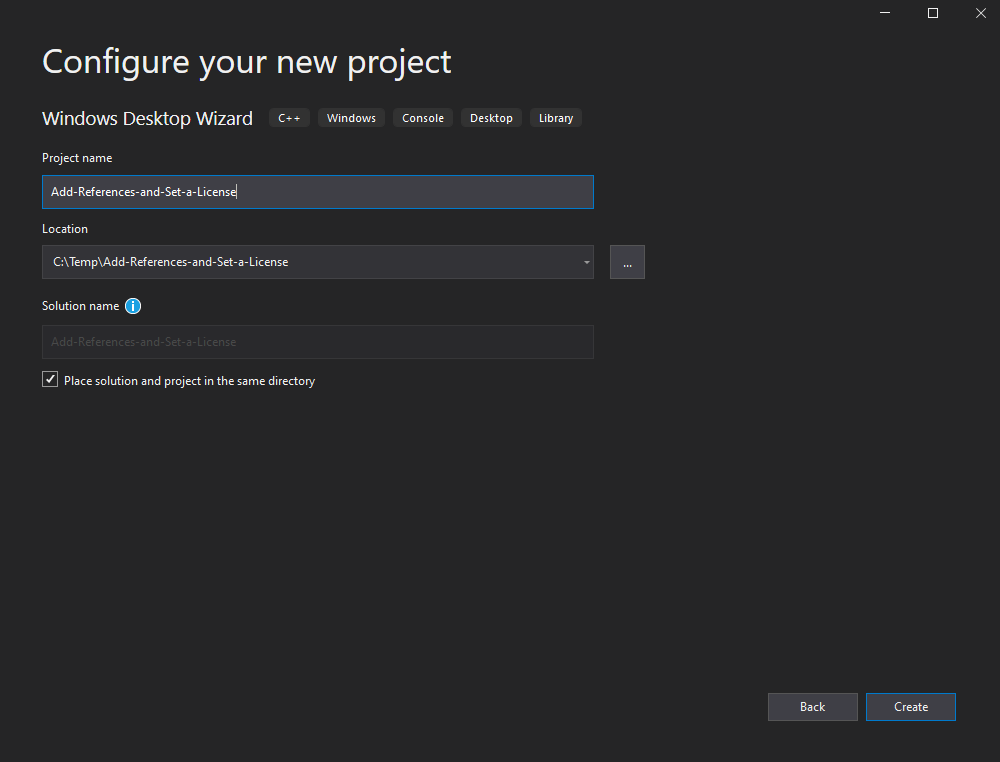
Add the project name and specify the location where the project to be saved to and click Create.
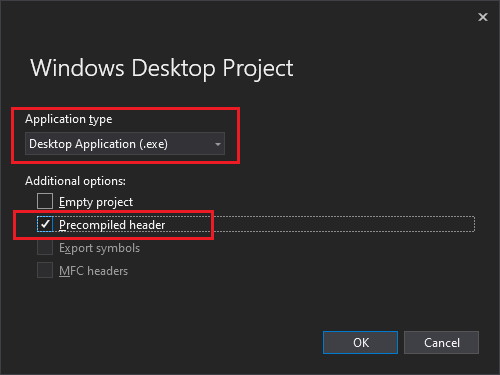
Set Application type to Desktop Application (.exe) and enable Precompiled header then click OK
Open the file framework.h and make sure it does not contain the following line:
// Delete the following line if it exists in any header file in the project#define WIN32_LEAN_AND_MEAN // Exclude rarely-used stuff from Windows headers
Add LEADTOOLS Headers and LIB Files
To use LEADTOOLS, include the SDK headers and link using the LIB files of the DLLs (Dynamic linked libraries) for the needed functions. The main kernel 64-bit DLL (LTKRNX) will be used, so make sure to set the Solution Platform in Visual Studio to x64.
Open the pre-compiled headers file of the project. For Visual Studio:
- 2019 and later, the file is
pch.h. - 2017 or earlier, the file is
stdafx.h.
Add the following lines after the #include lines:
// add headers to pre-compile#define LTV23_CONFIG#include "C:\LEADTOOLS23\Include\L_Bitmap.h" // use the actual path where LEADTOOLS is installed#pragma comment (lib, "C:\\LEADTOOLS23\\Lib\\CDLL\\x64\\Ltkrn_x.lib")
Add the Set License code
Now that the LEADTOOLS headers, LIBs and DLLs have been added to the project, code can be added to set the runtime license. The License unlocks the features needed for the project. It must be set before any toolkit function is called. The exact function called depends on the platform used. For details (including tutorials for different platforms), refer to Setting a Runtime License.
Open the main C++ code file of the project set_license_tutorial.cpp and add the following code to the InitInstance() function:
const L_TCHAR* pszLicenseFile = L_TEXT("C:\\LEADTOOLS23\\Support\\Common\\License\\LEADTOOLS.lic");const L_TCHAR* pszDeveloperKey = L_TEXT("Put the CONTENTS of LEADTOOLS.LIC.KEY file here");L_SetLicenseFile((L_TCHAR*)pszLicenseFile, (L_TCHAR*)pszDeveloperKey);L_BOOL LicenseFailed = L_IsSupportLocked(L_SUPPORT_BASIC);if (LicenseFailed){MessageBox(NULL, TEXT("License file invalid or expired..\nAborting"), TEXT("LEADTOOLS Demo"), MB_ICONERROR);return FALSE;}else{MessageBox(NULL, TEXT("License file set successfully"), TEXT("LEADTOOLS Demo"), MB_ICONINFORMATION);}
Run the Project
For the program to work, the DLL must be loaded successfully at run time. One way to ensure that during testing is to place the EXE in the same folder as the LEADTOOLS DLLs.
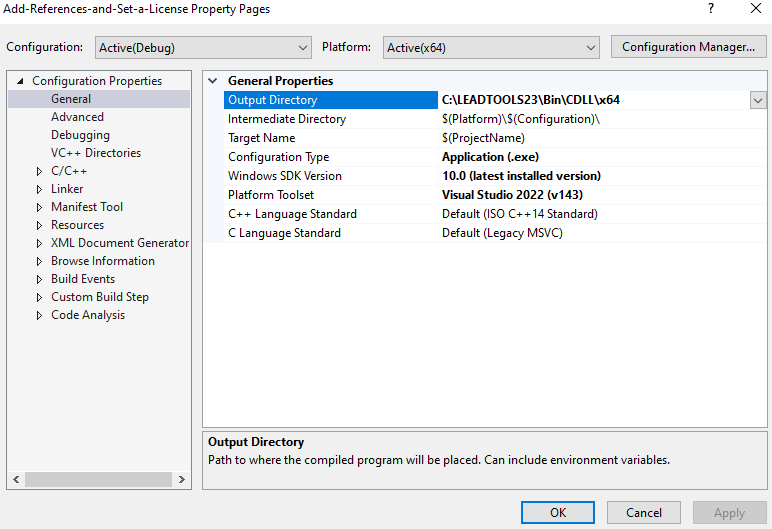
In Visual Studio, select Project -> project properties, and change the Output Directory to the <INSTALL_DIR>\LEADTOOLS23\Bin\CDLL\x64.
Run the project by pressing F5, or by selecting Debug -> Start Debugging.
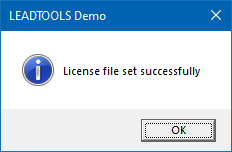
If the steps were followed correctly, a message box with "License file set successfully" appears.
Wrap-up
This tutorial showed how to create a new Windows C DLL Project, use the LEADTOOLS headers, LIBs and DLLs, and set the license.
This is the basis for all Windows C DLL applications using the LEADTOOLS SDK. All functionality in the SDK is unlocked via setting a license. L_SetLicenseFile must be called before calling any other LEADTOOLS SDK functions.
After the SDK is purchased, the evaluation license can be replaced with a valid runtime license to disable the Nag Message.
