In this quick tutorial, using the LEADTOOLS for WPF BitmapSourceViewer with Microsoft Expression Blend, you will design a layout and create an application that mounts a digital picture inside a digital frame. No coding is required to do this, and the entire XAML application can be created in a couple of minutes.
Add a "Picture Frame" Using the LEADTOOLS BitmapSource Image Viewer
You can use the BitmapSourceViewer control to display almost any kind of image, anywhere in your window. In this case, we will use it to add a "picture frame" image.
- Create a project in Microsoft Expression Blend and set it up to use LEADTOOLS WPF controls.
-
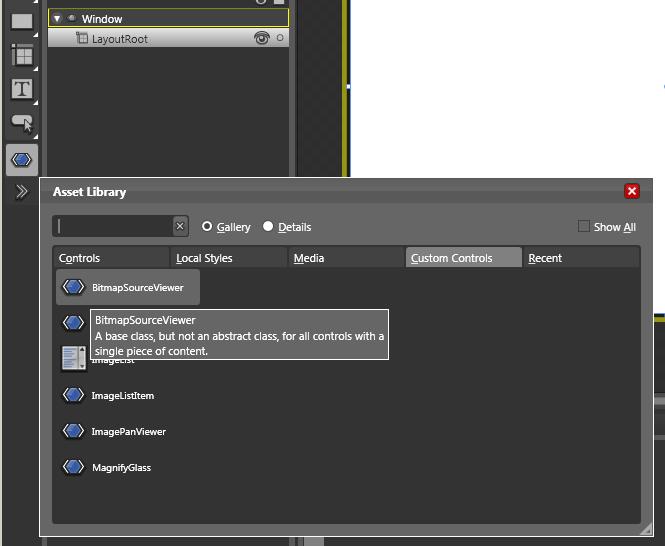
On the left-hand side of the screen, click the Asset Library arrow

- From the pop-up window, click the Custom Controls tab, then BitmapSourceViewer.
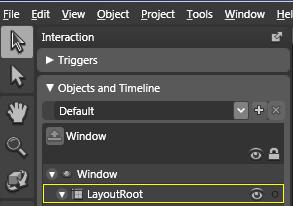
- On the Interaction tab, under Objects and Timelines, double-click LayoutRoot to select it:
- Place the cursor on any corner of the PictureThis! Window and draw a rectangle the same size as the window. The snap-to lines will help you find the exact window borders.
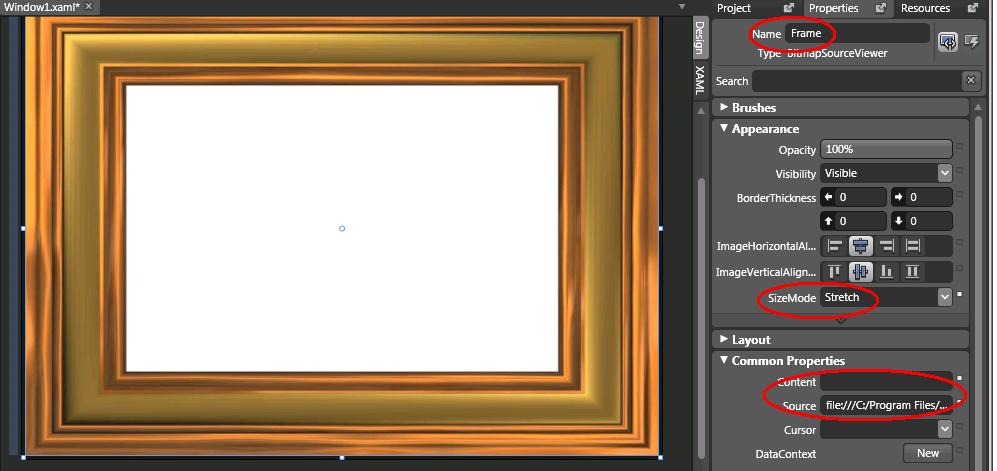
- On the Properties tab at the right of the screen:
- Next to Name type Frame
- Under Appearance, Select SizeMode-->Stretch
- Under Common Properties, clear (delete the text from) Content.
- Under Common Properties, copy/paste this image address into Source: C:\Program Files\LEAD Technologies\LEADTOOLS 15\Images\TestFrame1.JPG Note: if you did not accept program defaults on installation, the path to this image may be different on your computer
- The result should look like this:
This will make the BitmapSourceViewer the active control:
Put a Picture in the Frame
You can even display images on top of one another! In this project, we will use that feature to put a picture into the frame. The steps are the same as for the first image, except for where you draw, and which image you select for the image source. Also, because the BitmapSourceViewer is already the active control, you do not need to select it again:
- Place the cursor on any inside corner of the Frame image viewer that you just created, and draw a rectangle the same size as the inside of the frame.
- On the Properties tab at the right of the screen:
- Name this BitmapSourceViewer Picture
- Under Appearance, Select SizeMode-->Stretch
- Under Common Properties, clear (delete the text from) Content.
- Under Common Properties, copy/paste this image address into Source: C:\Program Files\LEAD Technologies\LEADTOOLS 15\Images\ScarletMacaws.jpg Note: if you did not accept program defaults on installation, the path to this image may be different on your computer.
- Press F5 to build your application. This will take a few seconds.
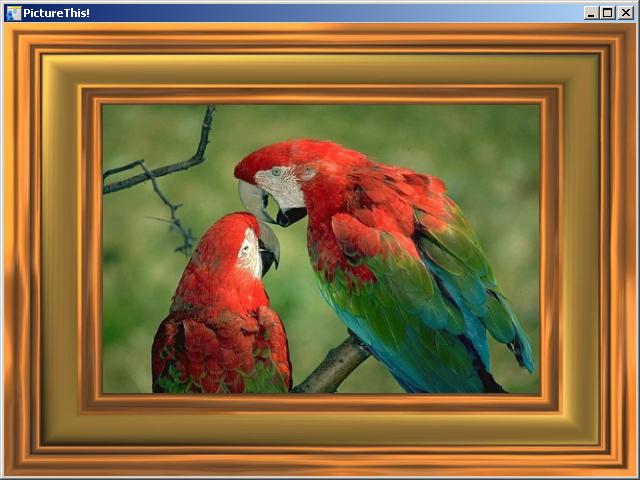
When it is done, you'll have a "framed" digital picture that you can resize like any window, with the "frame" and the "picture" resized together, but treated as separate objects:
 Example
[Window1.xaml]
<Window
	xmlns="http://schemas.microsoft.com/winfx/2006/xaml/presentation"
	xmlns:x="http://schemas.microsoft.com/winfx/2006/xaml"
	x:Class="MyProject.Window1"
	x:Name="Window"
	Title="PictureThis!"
	Width="640" Height="480" xmlns:Leadtools_Windows_Controls="clr-namespace:Leadtools.Windows.Controls;assembly=Leadtools.Windows.Controls">

	<Grid x:Name="LayoutRoot">
		<Leadtools_Windows_Controls:BitmapSourceViewer x:Name="Frame" Width="Auto" Height="Auto" Content="" SizeMode="Stretch">
			<Leadtools_Windows_Controls:BitmapSourceViewer.Source>
				<BitmapImage UriSource="file:///C:/Program Files/LEAD Technologies/LEADTOOLS 15/Images/TestFrame1.jpg"/>
			</Leadtools_Windows_Controls:BitmapSourceViewer.Source>
		</Leadtools_Windows_Controls:BitmapSourceViewer>
		<Leadtools_Windows_Controls:BitmapSourceViewer Margin="99,82,97,83" x:Name="Picture" Width="Auto" Height="Auto" Content="" SizeMode="Stretch">
			<Leadtools_Windows_Controls:BitmapSourceViewer.Source>
				<BitmapImage UriSource="file:///C:/Program Files/LEAD Technologies/LEADTOOLS 15/Images/ScarletMaCaws.jpg"/>
			</Leadtools_Windows_Controls:BitmapSourceViewer.Source>
		</Leadtools_Windows_Controls:BitmapSourceViewer>
	</Grid>
</Window>
See Also
Programming Reference
Adding LEADTOOLS Controls to Microsoft Expression BlendDisplay Images Using Expression Blend
Creating Image Lists Using Expression Blend
Link an Image List to an Image Viewer Using Expression Blend
Add a Magnifying Glass Using Expression Blend
Adding Bitmap Effects Using Expression Blend
Working with Images Using Visual Studio
Loading an Image File Using WIC
Saving an Image File Using WIC