In this quick tutorial, you will make the LEADTOOLS for WPF controls and effects available for use within Microsoft Expression Blend. No coding is required to do this.
Create the Project
- Start Microsoft Expression Blend, and from the main menu, select File->New->Project...
- In the Create New Project dialog box, accept the default selections Standard Application (.exe) and language Visual C#. Name the project. For Example: MyProject.
- If desired, type a new location for your project or select a directory using the Browse button, and then choose OK.
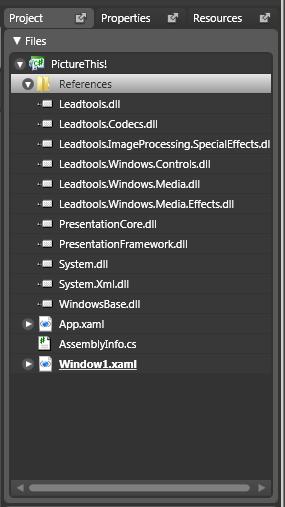
Plug-in LEADTOOLS for WPF Resources
LEADTOOLS for WPF provides you with powerful controls that let you add image displays, image lists, and apply image effects in Microsoft Expression Blend. In this step, you will make all these rich features available within your project.
 |
|
Set up Your Application Window
The default window name is Window1.xaml. To change this:
- Select the Window.
- On the Properties tab, find Common
Properties-->Title. Type a window name. For Example: PictureThis!

 Example
[Window1.xaml]
<Window xmlns="http://schemas.microsoft.com/winfx/2006/xaml/presentation"xmlns:x="http://schemas.microsoft.com/winfx/2006/xaml"x:Class="MyProject.Window1"x:Name="Window"Title="PictureThis!"Width="640"Height="480"><Grid x:Name="LayoutRoot"/></Window>
 See Also
Programming Reference
Display Images Using Expression BlendCreating Image Lists Using Expression Blend
Link an Image List to an Image Viewer Using Expression Blend
Add a Magnifying Glass Using Expression Blend
Adding Bitmap Effects Using Expression Blend
Working with Images Using Visual Studio
Loading an Image File Using WIC
Saving an Image File Using WIC
Loading and Saving Images with the LEADTOOLS RasterImageViewer