
Products | Support | Send comments on this topic. | Email a link to this topic. | Back to Introduction | Help Version 18.0.1.22
New Annotation Features of Version 14.5
Show in webframe
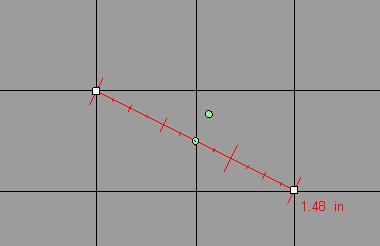
The following figure illustrates a rotate by dragging the "gripper" handle:
 The following figure illustrates moving the "center" handle:
 The rotate handles can be reset to a default location by right-clicking the annotation object, and selecting the Reset Rotate Control Points option, as shown in the following figure:
 The rotate control points can be globally hidden or displayed by right-clicking on the image (not an annotation object), and selecting the Use Rotate Control Points option, as shown in the following figure:
 The new annotation rotate handles are implemented by the following functions:
 Programmatically, set the UseXPStyleToolBar property to true to use the new XP style of toolbar. Set the UseXPStyleToolBar property to false to use the original style of toolbar.
New AnnNewGroupEditDesigner Class
The AnnNewGroupEditDesigner class extends AnnRectangleEditDesigner class to provide functionality for editing an AnnGroupObject annotation object on an annotation container. This class has improved resizing and rotate functionality over the AnnGroupEditDesigner class.
The MaintainAspectRatio function was added to control whether the aspect ratio is maintained when the group is resized. When selecting an AnnRectangleObject , or any annotation object that derives from AnnRectangleObject , or an AnnGroupObject , eight control points appear. If MaintainAspectRatio is true (default), dragging one of the four corner control points will change the size of the annotation object while maintaining its aspect ratio. If false, the aspect ratio is not preserved.
The AnnNewGroupEditDesigner class also changes the multiple-selection behavior. In previous versions of LEADTOOLS, you could select multiple objects and manipulate the objects by dragging any handle of any object. When moving a handle, the results were often not intuitive. With the new multi-select option, all selected objects are outlined with a multi-select border. The multi-select border has eight resize handles, and two rotate handles. Now, moving, resizing, and rotating multiply select objects is clear and easy to do.
The following figure displays a sample of the original style and the new style:
Programmatically, set the UseXPStyleToolBar property to true to use the new XP style of toolbar. Set the UseXPStyleToolBar property to false to use the original style of toolbar.
New AnnNewGroupEditDesigner Class
The AnnNewGroupEditDesigner class extends AnnRectangleEditDesigner class to provide functionality for editing an AnnGroupObject annotation object on an annotation container. This class has improved resizing and rotate functionality over the AnnGroupEditDesigner class.
The MaintainAspectRatio function was added to control whether the aspect ratio is maintained when the group is resized. When selecting an AnnRectangleObject , or any annotation object that derives from AnnRectangleObject , or an AnnGroupObject , eight control points appear. If MaintainAspectRatio is true (default), dragging one of the four corner control points will change the size of the annotation object while maintaining its aspect ratio. If false, the aspect ratio is not preserved.
The AnnNewGroupEditDesigner class also changes the multiple-selection behavior. In previous versions of LEADTOOLS, you could select multiple objects and manipulate the objects by dragging any handle of any object. When moving a handle, the results were often not intuitive. With the new multi-select option, all selected objects are outlined with a multi-select border. The multi-select border has eight resize handles, and two rotate handles. Now, moving, resizing, and rotating multiply select objects is clear and easy to do.
The following figure displays a sample of the original style and the new style:
 New Calibrate Ruler Feature
With this feature, a user can automatically calibrate a ruler to the desired size when using the automation. This is useful when a user wants to interactively measure something in an image. Note that there are four annotation object classes used for measuring:
Any of these objects can be calibrated. To calibrate a ruler:
New Calibrate Ruler Feature
With this feature, a user can automatically calibrate a ruler to the desired size when using the automation. This is useful when a user wants to interactively measure something in an image. Note that there are four annotation object classes used for measuring:
Any of these objects can be calibrated. To calibrate a ruler:
 The following figure appears:
 In the Calibrate dialog, set the Ruler Length to 2 and the Ruler Measurement to feet. Select the Apply to Newly Created Rulers check box. Click the OK button to close the Calibrate dialog. Click the OK button to save your selections and close the Ruler Properties dialog.
 For more information on calibrating rulers, see the topic Calibrating Annotation Ruler Objects.
 New Rubber Stamp Display Style
With LEADTOOLS Version 14.5 new default images are being introduced for the 26 predefined rubber stamp annotations. The following figure displays a sample of the original style and the new style:
New Rubber Stamp Display Style
With LEADTOOLS Version 14.5 new default images are being introduced for the 26 predefined rubber stamp annotations. The following figure displays a sample of the original style and the new style:
 Set the SetUseNewPicture property to true to use the new default pictures. Use the GetUseNewPicture property to get a value that indicates whether the new default pictures are being used.
 Products | Support | Contact Us | Copyright Notices