
Products | Support | Send comments on this topic. | Email a link to this topic. | Back to Introduction | Help Version 18.0.1.22
How to Host LEADTOOLS Services on IIS 7
Show in webframe
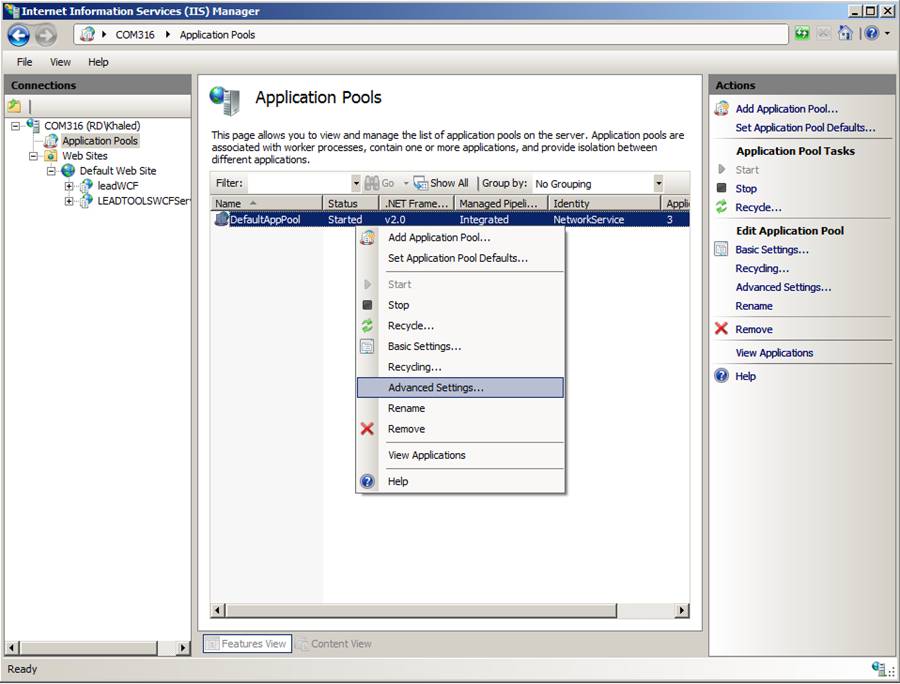
Host LEADTOOLS services on IIS 7.* (Vista and Windows 7 OS)
The LEADTOOLS installation program will automatically configure your version of IIS to host the LEADTOOLS WCF Services. If you wish to host the LEADTOOLS WCF Services on another computer then you should follow these steps. Also, for more information about hosting WCF services, refer to: MSDN Hosting Services
When using LEADTOOLS WCF services, it is recommended to put the LEADTOOLS assemblies in the Global Assembly Cache for the following reasons:
For more information, refer to the Global Assembly Cache topic in MSDN online.
<LEADTOOLS_INSTALLDIR>\WCFHostCreate a Bin directory: <LEADTOOLS_INSTALLDIR>\WCFHost\BinCopy the Leadtools.Services.* from <LEADTOOLS_INSTALLDIR>\Bin to <LEADTOOLS_INSTALLDIR>\WCFHost\Bin Files to copy include:
web.config at <LEADTOOLS_INSTALLDIR>\WCFHost[See details: MSDN - Configuring Services Using Configuration Files ]If the user intends to upload files larger than 4 MB on Windows Vista or 7, there is a security restriction for IIS 7.*. To get around this restriction add the following in the Web.config:
If the user intends to upload files larger than 4 MB on Windows Vista or 7, there is a security restriction for IIS 7.*. To get around this restriction add the following in the Web.config:<system.webServer> <security> <requestFiltering> <requestLimits maxAllowedContentLength="2147483648"/> </requestFiltering> </security> </system.webServer>
Then in
replace the following:<section name="requestFiltering" overrideModeDefault="Deny" />
with<section name="requestFiltering" overrideModeDefault="Allow" />
Then in
replace the following:
If the user intends to upload files larger than 4 MB on Windows Vista or 7, there is a security restriction for IIS 7.*. To get around this restriction add the following in the Web.config:
If the user intends to upload files larger than 4 MB on Windows Vista or 7, there is a security restriction for IIS 7.*. To get around this restriction add the following in the Web.config:<system.webServer> <security> <requestFiltering> <requestLimits maxAllowedContentLength="2147483648"/> </requestFiltering> </security> </system.webServer>
Then in
Then in
replace the following:<section name="requestFiltering" overrideModeDefault="Deny" />
with<section name="requestFiltering" overrideModeDefault="Allow" />
replace the following:<section name="requestFiltering" overrideModeDefault="Deny" />
with<section name="requestFiltering" overrideModeDefault="Allow" />
with
If the user intends to upload files larger than 4 MB on Windows Vista or 7, there is a security restriction for IIS 7.*. To get around this restriction add the following in the Web.config:
If the user intends to upload files larger than 4 MB on Windows Vista or 7, there is a security restriction for IIS 7.*. To get around this restriction add the following in the Web.config:<system.webServer> <security> <requestFiltering> <requestLimits maxAllowedContentLength="2147483648"/> </requestFiltering> </security> </system.webServer>
Then in
Then in
replace the following:
If the user intends to upload files larger than 4 MB on Windows Vista or 7, there is a security restriction for IIS 7.*. To get around this restriction add the following in the Web.config:
with<section name="requestFiltering" overrideModeDefault="Allow" />
If the user intends to upload files larger than 4 MB on Windows Vista or 7, there is a security restriction for IIS 7.*. To get around this restriction add the following in the Web.config:<system.webServer> <security> <requestFiltering> <requestLimits maxAllowedContentLength="2147483648"/> </requestFiltering> </security> </system.webServer>
Then in
Then in
replace the following:<section name="requestFiltering" overrideModeDefault="Deny" />
with<section name="requestFiltering" overrideModeDefault="Allow" />
replace the following:<section name="requestFiltering" overrideModeDefault="Deny" />
with<section name="requestFiltering" overrideModeDefault="Allow" />
replace the following:<section name="requestFiltering" overrideModeDefault="Deny" />
with<section name="requestFiltering" overrideModeDefault="Allow" />
<LEADTOOLS_INSTALLDIR>\WCFHost[ See details: MSDN - Create an .svc File for the WCF Service].IOcrService, create OcrService.svcfile and add the following line to it (Add to this line the percent sign after < and before >):
< @ServiceHost Language=C# Debug="true" Service="Leadtools.Services.Forms.ServiceImplementations.OcrService" >
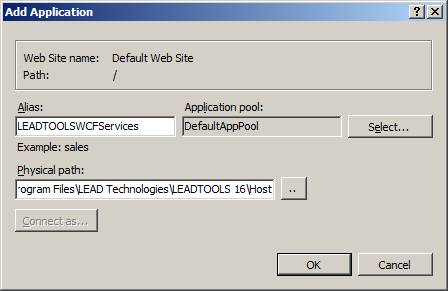
| Alias: | LEADTOOLSWCFServices |
| Directory: | <LEADTOOLS_INSTALLDIR>\WCFHost |
Special notes for OCR service
Hosting our IOCRService requires the following:
IIS Hosting Services Resources
MSDN - Configuring Services Using Configuration Files
MSDN - Create an .svc File for the WCF Service
 Products | Support | Contact Us | Copyright Notices