Whether you are a current user of LEADTOOLS or if you have never developed with our SDK before, you can easily configure LEADVIEW API, the newest high-level HTML5/JavaScript Document Viewer from LEADTOOLS. LEADVIEW API is built utilizing React and is designed to be fully customizable through configuration files without any programming needed. Using the LEADTOOLS LEADVIEW library, you can create an entire, fully-functional DocumentViewer application with as few as three lines of code. The component is highly customizable and supports all the features of the existing low-level Document Viewer.
Setting up the Project
If you have the SDK installed, navigate to <INSTALLDIR>\Examples\JS\DocumentViewerDemos\LEADVIEW_DocumentViewerDemo\wwwroot. If you have not yet installed the LEADTOOLS SDK, you will need to install before you continue.
First, create a folder in your IIS, C:\inetpub\wwwroot\, and name it LEADVIEW. Now that you have navigated to <INSTALL DIR>\Examples\JS\DocumentViewerDemos\LEADVIEW_DocumentViewerDemo\wwwroot, copy index.html to your IIS LEADVIEW folder. This html file contains all dependencies and script tags that are used to define the client-side JavaScript. Open index.html in your favorite text editor and notice all the JavaScript files and then one CSS file.
The pre-defined location for these files are in a Scripts/LEADTOOLS directory on your IIS so create a folder inside the LEADVIEW folder, name that folder Scripts. Now within the Scripts folder, add one more folder and name that LEADTOOLS. This is where you will add all the LEADTOOLS dependencies. Next, create a folder within LEADVIEW and name that Styles. This is where you can add the Leadtools.LEADVIEW.css. Lastly, copy over app.js and Polyfills.js from the examples folder and add that to the Scripts folder on your IIS.
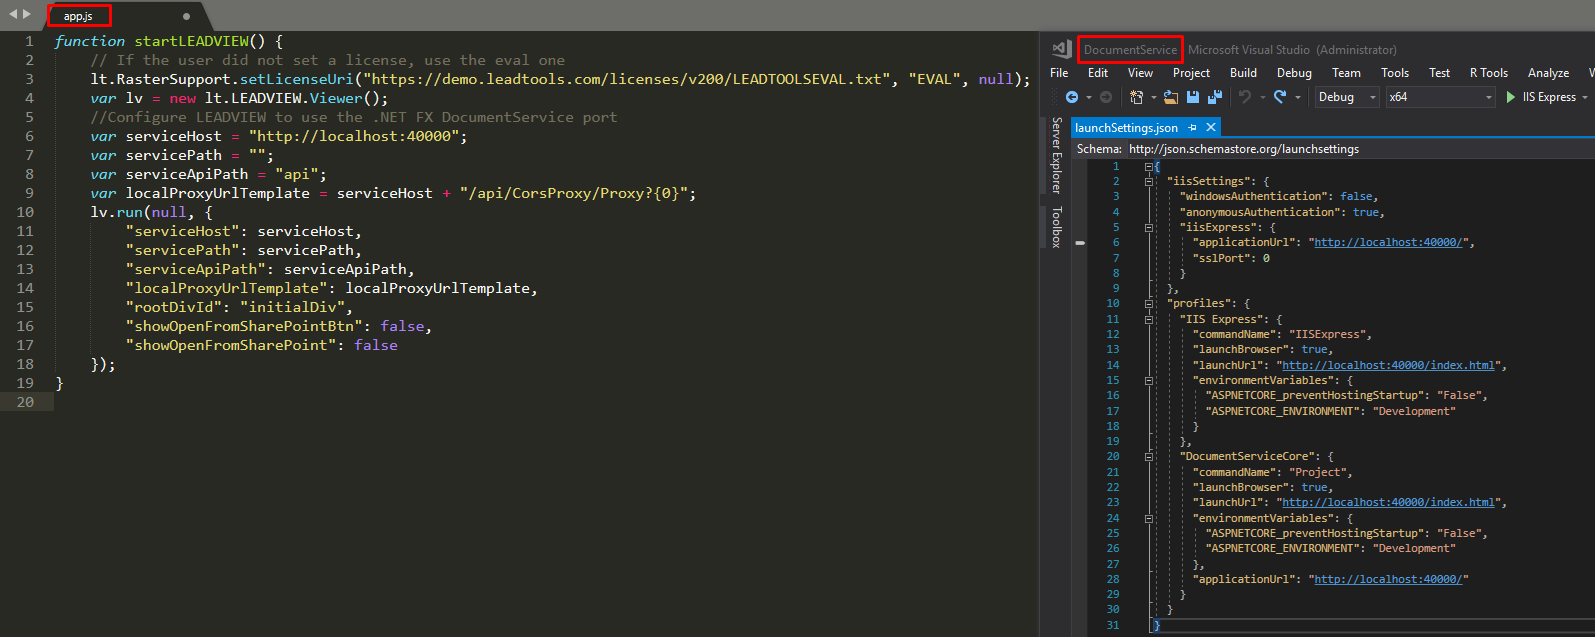
App.js contains the function that is called to start LEADVIEW. There is not much code to this function but that is what makes easy to use.
Note!
Reminder that all the needed files can be found here, <INSTALLDIR>\Examples\JS\DocumentViewerDemos\LEADVIEW_DocumentViewerDemo\wwwroot
Running the Document Service
Now all you have to do is run the Document Service that comes with the installation. The service's start-up settings can be found in the solution file <INSTALL DIR>\Examples\JS\Services\DocumentServiceDotNet\fx
Note! The serviceHost URL within the app.js file should match the same URL that is in the Properties → launchSettings.json
Matching URLs
Once everything matches, you can run the service from Visual Studio. If it all was set up correctly, you should see this page.

Running LEADVIEW API
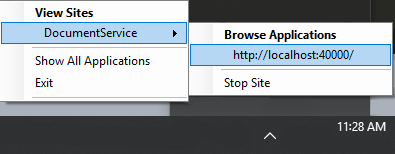
After the service has been started, you can check on it in the hidden icons area of your taskbar. Click the carrot icon to show the hidden icons, then right click IIS Express. Click on DocumentService to show the application's URL and then click the URL to ping the service page.
DocumentService
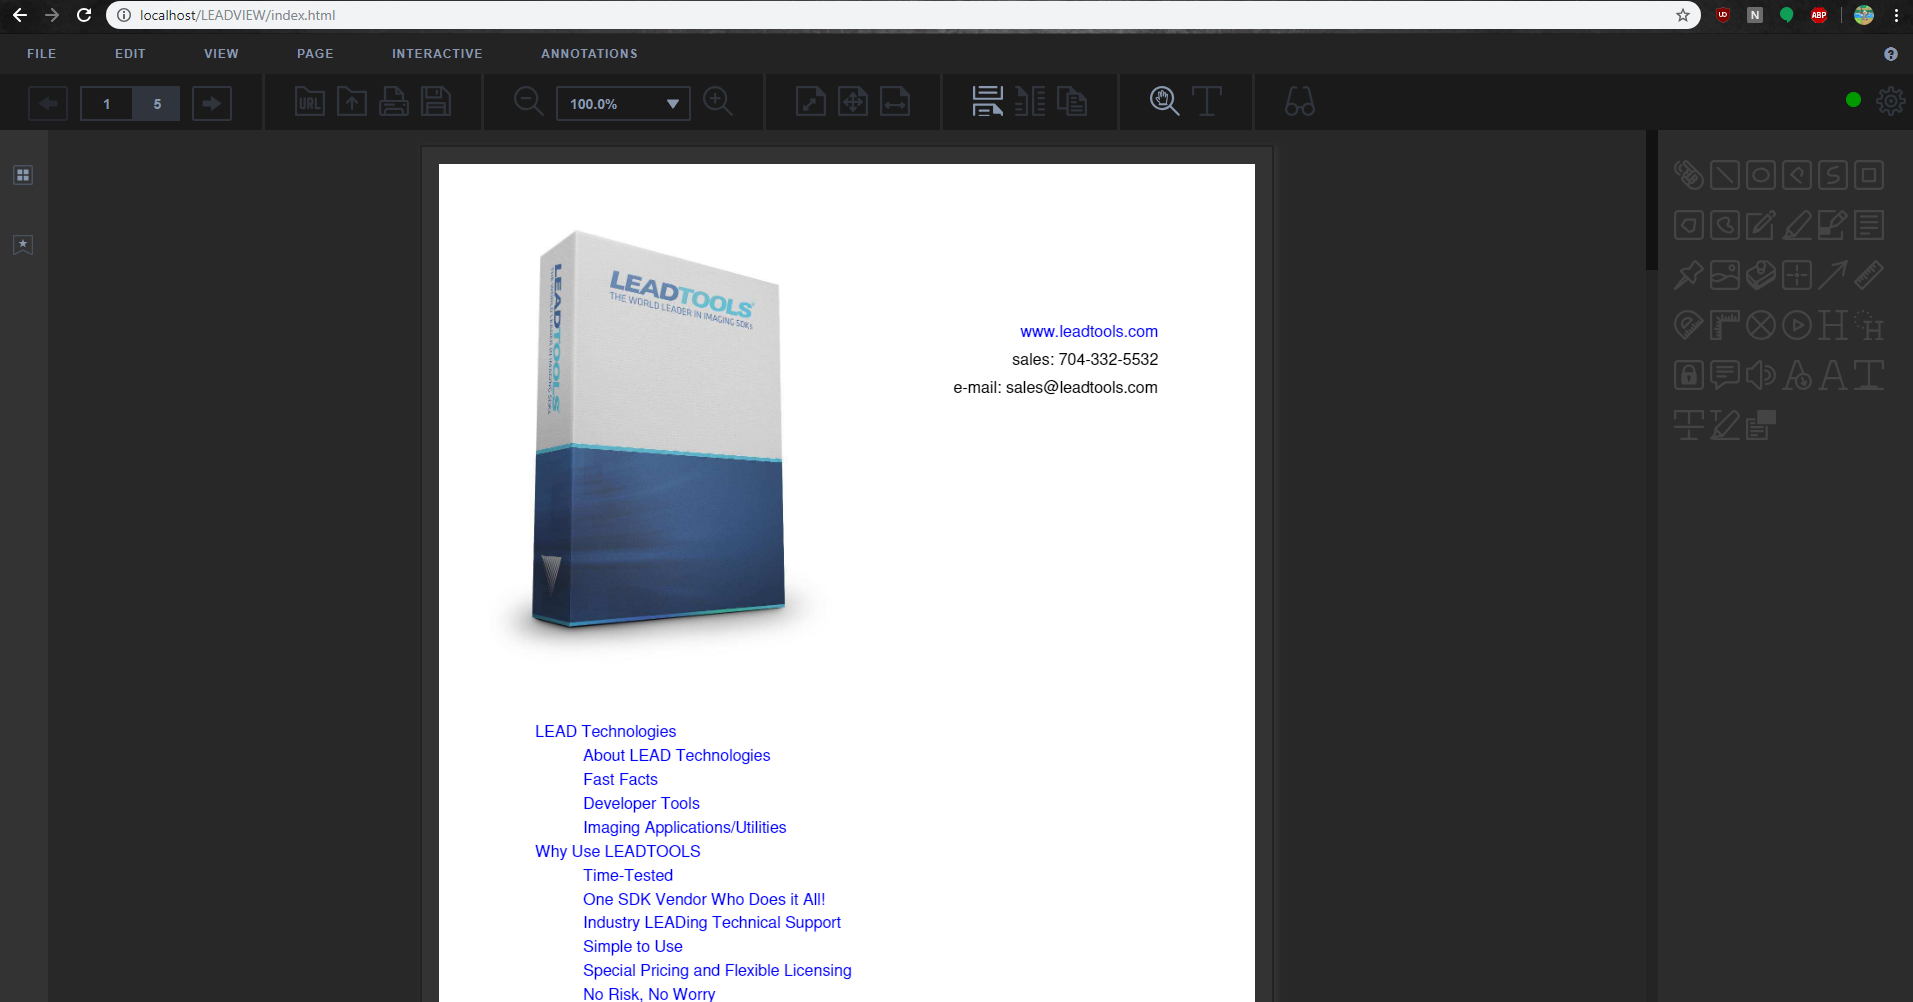
Now it is time to run the LEADVIEW application from IIS. To do so, open up a web browser and type "localhost/LEADVIEW/index.html". There you have it, a fully function document viewer created with minimal code.
To test this with the latest version of LEADTOOLS, download the free 60 day evaluation straight from our site. If you have any comments or questions regarding this, feel free to comment on this post or contact our Support department at [email protected].
