Customize Palette
The Palette List provides you with some standard palettes:
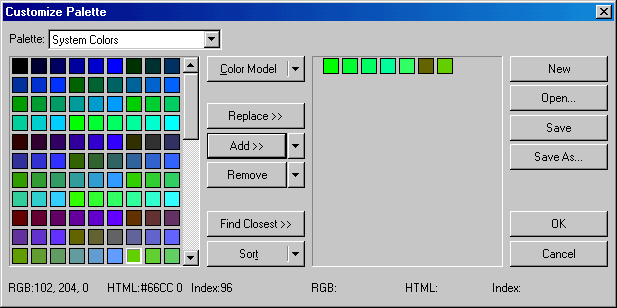
- System Colors This palette contains colors used by MS Windows when the screen mode is 256-colors.
- Netscape Palette This is the palette used by Netscape browsers.
- MSIE Palette This is the palette used by Microsoft Internet Explorer browsers.
- Gray Scale Palette This palette contains 256 shades of gray (such as the shades found in a "black & white" photograph).
- Standard VGA Palette This is the palette used by VGA monitors.
- Uniform Palette This palette contains a set of colors uniformly distributed across the set of all 16 million 24-bit colors.
If you pass a palette to the dialog the "Image Colors" item is added to the palette list to view the current colors in the passed palette.
The Left Pane of the Customize Palette dialog displays the colors that you can add to your palette. This pane is not editable and it has two modes of display; it either displays lists of individual colors (palettes), or continuous colors based on a particular color model. When displaying palettes, you can select multiple individual colors using the <Ctrl> key, and a range of consecutive colors using the <Shift> key.
The Right Pane of the Customize Palette displays the list of colors that you have chosen. (It is empty until you begin to choose colors). After selecting a single color or a group of colors in the left pane, you can add them to your list of chosen colors in the right pane by clicking the Add button or by dragging them into the right pane. You can re-arrange the colors in the right pane by clicking and dragging them to their new position, or by using one of the pre-defined sort methods listed in the Sort drop-down list box.
The RGB components and corresponding HTML form of the currently selected color are displayed at the bottom of the dialog.
The Color Model button will list the color models available for the left pane and can switch the display mode in the left pane.
Clicking this button will activate a menu with the following options:
- Palette. This option is the default. Choosing this option will activate the Palette drop-down list box and display the available colors in the Left Pane.
- HSB-Hue Based Choosing this option will open the HSB-Hue Based Model in the Left Pane.
- HSB-Wheel Based Choosing this option will open the HSB-Wheel Based Model in the Left Pane.
- HSB-Brightness Based Choosing this option will open the HSB-Brightness Based Model in the Left Pane.
- RGB-3D Additive Choosing this option will open the RGB-3D Additive Model in the Left Pane.
- CMY-3D Subtractive Choosing this option will open the CMY-3D Subtractive Model in the Left Pane.
- CMYK-3D Subtractive Choosing this option will open the CMYK-3D Subtractive Model in the Left Pane.
- Lab-Device Independent Choosing this option will open the Lab-Device Independent Model in the Left Pane.
The Replace button replaces a number of selected items in the Right pane with the same number and order of selected items from the Left pane.
The Add button adds an item or a group of items selected in the Left
pane into the Right pane. Items can also be added from the Left pane to
the Right pane by dragging them. Notice that the mouse cursor changes
into a hand  when dragging item(s). If the cursor is not
in a valid insert area, the cursor will turn into
when dragging item(s). If the cursor is not
in a valid insert area, the cursor will turn into  .
.
The Add Options button (the down arrow button to the right of the Add button) activates a menu that contains options indicating where those items should be added. The default is "At the end". The options included in this menu are as follows:
- At the End Add all insertions at the end of the list in the Right Pane.
- After Selected Add all insertions after the selected item. Notice that if no items are selected in the Right Pane the Add operation will fail and an error message will appear. This will also occur if more than one item is selected in the Right Pane.
- Before Selected Add all insertions before the selected item. Notice that if no items are selected in the Right Pane the Add operation will fail and an error message will appear. This will also occur if more than one item is selected in the Right Pane.
- If "After Selected" or "Before Selected" is chosen, the add operation will only be performed if there is exactly one item selected in the right pane.
The Remove button removes the selected item(s) from the Right Pane.
Items can also be removed by dragging them out of the Right Pane. Notice
that the mouse cursor changes into  to indicate the item
is about to be deleted.
to indicate the item
is about to be deleted.
The Remove Options button (the down arrow button to the right of the Remove button) activates a menu that allows you to set whether to be notified by a warning message when an item is about to be removed. The options included in this menu are as follows:
When this option is checked a confirmation message will appear whenever you remove an item.
The Find Closest button highlights the item in the Right Pane that is the closest match to the item selected in the Left Pane.
The Sort button allows you to choose a method for sorting items in the right pane depending on their color components. Clicking the button will activate a menu with the following options:
- HSB Clicking this option will sort all items in the Right Pane according to their HSB color components.
- HUE Clicking this option will sort all items in the Right Pane according to the Hue value of their HSB color components.
- Saturation Clicking this option will sort all items in the Right Pane according to the Saturation value of their HSB color components.
- Brightness Clicking this option will sort all items in the Right Pane according to the Brightness value of their HSB color components.
- RGB Clicking this option will sort all items in the Right Pane according to their RGB color components.
- Reverse Clicking this option will invert the order of all items in the Right Pane.
Use the Close button to end the dialog. If there are changes unsaved on the Right Pane, a prompt message will appear.